Canning Meat at Home: A Step-by-Step Guide to Long-Term Protein Storage
Learn how to safely pressure-can beef, chicken, and pork at home to build a reliable protein stockpile that lasts years without refrigeration.
Why Pressure Canning Meat Is a Core Survival Skill
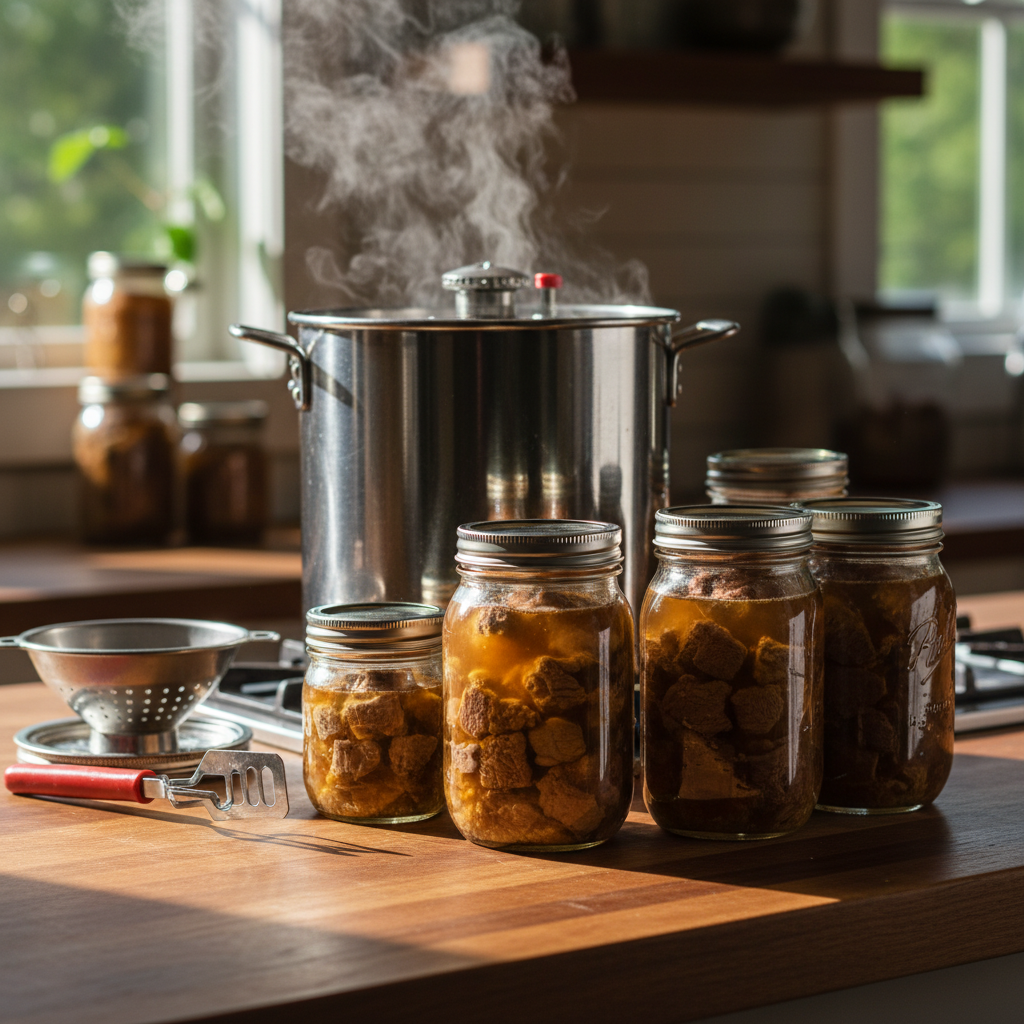
When the grid goes down and refrigeration becomes a distant memory, your protein supply is the first thing to disappear. Freeze-dried options are convenient, but they're expensive, have limited variety, and depend on a supply chain that may not always be there. Pressure canning meat at home gives you something those options can't: complete control over your food supply, with a shelf life of 2–5 years or more, no electricity required for storage, and the satisfaction of knowing exactly what's in every jar.
The USDA has tested and validated home pressure canning as a safe, effective preservation method for low-acid foods like meat, poultry, and fish. Unlike water bath canning — which is suitable only for high-acid foods — pressure canning reaches temperatures of 240°F (116°C), sufficient to destroy Clostridium botulinum spores, the bacteria responsible for botulism. When done correctly, home-canned meat is shelf-stable, nutritious, and ready to eat straight from the jar.
This guide walks you through the entire process, from equipment selection to finished product, so you can build a serious protein reserve before you ever need it.
Essential Equipment Before You Start
Pressure canning is not the place to improvise on equipment. Using the wrong tools doesn't just ruin a batch — it can create a genuine safety hazard. Here's what you need:
The Pressure Canner
A dedicated pressure canner is non-negotiable. Do not attempt to use a standard pressure cooker for shelf-stable canning unless it has been tested and approved for that purpose. There are two reliable options that dominate the preparedness community.
The Presto 23-Quart Pressure Canner and Cooker is the most accessible entry point. It uses a weighted gauge and a dial gauge, holds up to 20 pint jars, and has been a trusted workhorse in American kitchens for decades. It's an excellent choice for those just starting out.
For serious preppers who want the most durable, longest-lasting option available, the All American 921 21.5-Quart Pressure Cooker Canner is in a class of its own. Its metal-to-metal sealing system eliminates the need for a gasket — one less part that can fail during a long-term emergency. Many preparedness households have used their All American canners for 20+ years without a problem.
Jars, Lids, and Tools
Use only purpose-made mason jars. For meat, wide-mouth jars are strongly preferred because they're easier to pack and clean. The Kerr Wide Mouth Mason Jars 32-Ounce 12-Pack is a popular choice for quart-sized batches, giving you more protein per jar and fewer lids used per pound of meat.
Lids must be new for every canning session — they are single-use sealing components. Stock up on Ball Regular Mouth Mason Jar Lids and Bands 12-Pack in quantity. Bands can be reused as long as they're rust-free and undamaged.
A proper canning toolkit will save you burns and broken jars. The Norpro Canning Kit 6-Piece Set includes a jar lifter, lid wand, bubble remover, wide-mouth funnel, and other essentials that make the process significantly safer and more efficient.
Which Meats Can You Pressure Can?
Almost any meat can be safely pressure canned when processed correctly. The following work exceptionally well:
- Beef — chuck roast, ground beef, stew meat
- Pork — shoulder, loin, sausage
- Chicken and turkey — boneless thighs and breasts work best
- Venison and wild game — excellent for hunters building a long-term reserve
- Fish — salmon, tuna, and trout can all be pressure canned
Avoid heavily breaded or battered meats, and do not add dairy to any jar before canning. Fats are acceptable but should be trimmed to a reasonable level, as excessive fat can interfere with a proper seal.
Step-by-Step: How to Pressure Can Meat
Step 1 — Prepare Your Meat
Trim excess fat and cut meat into uniform chunks, roughly 1-inch pieces for stew-style packing. You have two options for packing: raw pack or hot pack.
- Raw pack: Pack raw meat loosely into jars without adding liquid. The meat will produce its own broth during processing. This is the simpler method.
- Hot pack: Pre-cook the meat until medium-rare, then pack into jars and cover with broth. This yields a fuller-flavored product and removes more air from the jar.
Step 2 — Prepare Your Jars
Wash jars, lids, and bands in hot soapy water and rinse thoroughly. Keep jars hot until you're ready to fill them — this prevents thermal shock when hot food is added. You can keep them in simmering water or a 200°F oven.
Step 3 — Pack the Jars
Using your jar funnel, pack meat into jars leaving 1 inch of headspace — this is critical and non-negotiable. Add 1 teaspoon of canning salt per quart (optional, for flavor only — it doesn't affect safety). Remove air bubbles by running a thin spatula or bubble remover around the inside of the jar. Wipe jar rims with a clean, damp cloth. Any residue on the rim will prevent a proper seal.
Step 4 — Load the Canner
Add 2–3 inches of hot water to the canner. Place the rack inside, then load your filled jars. Secure the canner lid according to your model's instructions. Leave the weight off or vent open at this stage.
Step 5 — Vent the Canner
Turn heat to medium-high and allow steam to vent steadily for 10 full minutes. This purges air from inside the canner and ensures accurate pressure during processing. Skipping this step compromises safety.
Step 6 — Pressurize and Process
After venting, place the weight or close the petcock and allow pressure to build to the level required for your altitude. At sea level to 1,000 feet, process at 10 pounds of pressure. Above 1,000 feet, consult the USDA altitude adjustment tables. Processing times:
- Pint jars of meat: 75 minutes
- Quart jars of meat: 90 minutes
- Pint jars of poultry (with bone): 65 minutes
- Quart jars of poultry (with bone): 75 minutes
Maintain steady pressure throughout — fluctuating pressure is the most common cause of seal failure and under-processing. Adjust heat as necessary to keep the gauge stable.
Step 7 — Depressurize and Remove Jars
When processing time is complete, turn off heat and allow the canner to depressurize naturally. Do not rush this step. Forcing depressurization — by running under cold water or removing the weight prematurely — will cause liquid to siphon out of jars and may break seals. Allow 30–45 minutes for full depressurization, then wait another 10 minutes before opening the lid.
Remove jars with your jar lifter and set on a towel, leaving 1 inch of space between jars. Do not tilt or touch the lids. Allow to cool undisturbed for 12–24 hours.
Step 8 — Check Seals and Store
After cooling, press the center of each lid. If it flexes up and down, the jar did not seal — refrigerate and use within a few days. Properly sealed lids will be concave and firm. Remove bands, label with date and contents, and store in a cool, dark location. Properly canned meat stored at 50–70°F will remain safe for 2–5 years, with quality best in the first two years.
Your Reference Resource
No preparedness library is complete without the Ball Blue Book Guide to Preserving. It contains tested, USDA-approved recipes and processing times for virtually every food you might want to can, including an extensive section on meats. Treat it as your canning bible.
Common Mistakes to Avoid
- Using a water bath canner for meat — this will not reach safe temperatures and produces an unsafe product
- Skipping the 10-minute venting period — air pockets inside the canner cause underprocessing
- Overpacking jars — inadequate headspace leads to seal failure and food spoilage
- Rushing depressurization — thermal shock breaks seals and can warp lids
- Reusing lids — always use new lids for every batch
Build Your Reserves Now, Not Later
Every jar of pressure-canned meat on your shelf is a meal that doesn't depend on the grid, the supply chain, or anyone else. Start with a few pounds of chicken thighs, process one batch, and experience the process before you need to scale up under pressure. The learning curve is minimal, the equipment pays for itself quickly, and the peace of mind is permanent.
The time to develop this skill is before an emergency — not during one.
Select fresh, high-quality meat and trim away excess fat, gristle, and bone fragments. Cut the meat into uniform chunks approximately 1-inch in size for even processing. Raw pack method works best for most meats, though you can also precook if preferred. Keep your work area clean and refrigerate meat until you're ready to pack the jars. Wash mason jars in hot soapy water and keep them hot in simmering water until ready to use. Place new lids in a small pan of hot (not boiling) water to soften the sealing compound. Set up your pressure canner according to manufacturer instructions, adding the recommended amount of water to the bottom. Have all your tools within easy reach before you begin packing. Fill hot jars with raw meat pieces, leaving 1-inch headspace at the top. Pack firmly but do not crush the meat, as it needs room to expand during processing. Add 1/2 teaspoon of salt per pint or 1 teaspoon per quart if desired, though salt is optional and only for flavor. Do not add any liquid—the meat will create its own broth during processing. Slide a non-metallic spatula or bubble remover around the inside of each jar to release trapped air pockets. Wipe the rim of each jar with a clean, damp cloth to remove any meat particles or grease. Place a prepared lid on each jar and screw on the band until fingertip-tight—do not over-tighten. Place filled jars on the rack inside your pressure canner, ensuring they don't touch each other or the sides. Lock the canner lid and bring to a boil over high heat until steam flows freely for 10 minutes. Close the vent, allow pressure to build to 11 pounds (dial gauge) or 10 pounds (weighted gauge), then process pints for 75 minutes or quarts for 90 minutes. When processing time is complete, turn off heat and let the canner depressurize naturally—never force-cool or remove the weight early. Wait until the pressure gauge reads zero and no steam escapes when you slightly tilt the weight. Carefully remove the lid, tilting it away from you to avoid steam burns, and let jars sit in the canner for 10 more minutes. Use a jar lifter to remove jars and place them on a towel-covered counter, leaving space between jars for air circulation. Allow jars to cool undisturbed for 12-24 hours—you should hear the satisfying "ping" of lids sealing. After cooling, press the center of each lid to verify the seal; properly sealed lids will not flex up and down. Remove bands, wipe jars clean, label with contents and date, then store in a cool, dark place for up to 1 year.What You'll Need
Step-by-Step Instructions
Step 1: Prepare and Cut Your Meat
Step 2: Sterilize Jars and Prepare Equipment
Step 3: Pack Meat into Jars
Step 4: Remove Air Bubbles and Seal Jars
Step 5: Load and Process in Pressure Canner
Step 6: Cool and Depressurize Safely
Step 7: Remove Jars and Check Seals