Mastering Lacto-Fermentation: How to Preserve Vegetables Without Refrigeration, Canning Jars, or Electricity
Fermentation is the oldest food preservation method on earth, and it needs no power, no pressure canner, and no fuel. Learn how to turn cabbage, carrots, and cucumbers into shelf-stable, probiotic-rich survival food using nothing but salt and water.
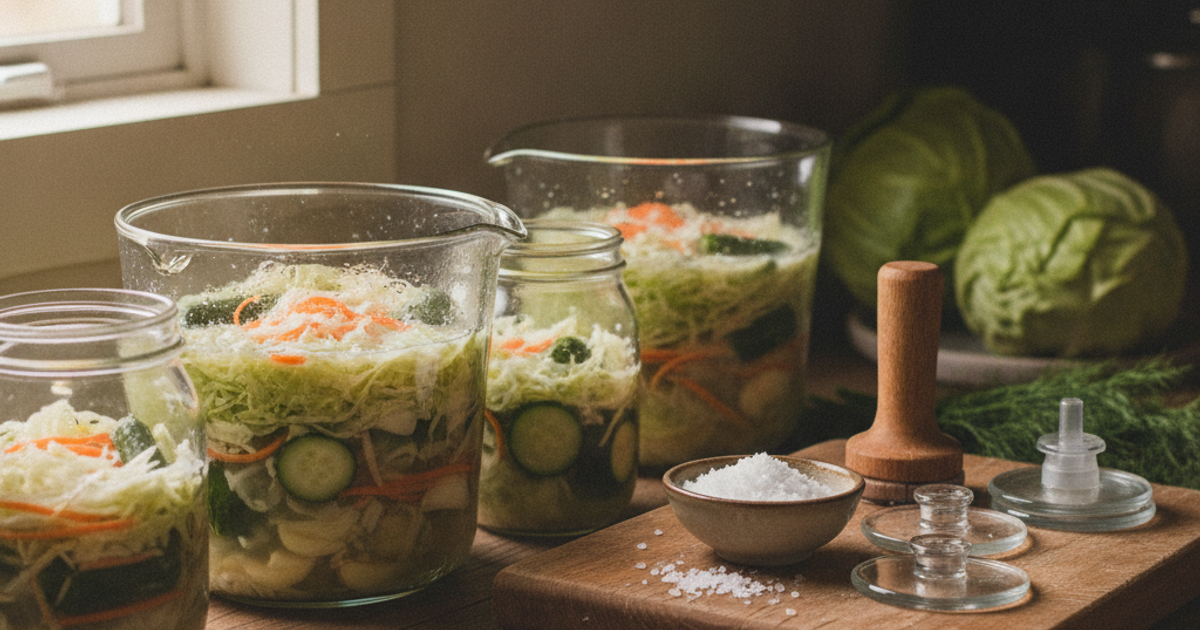
When the power goes out for more than a few days, the modern food preservation toolkit collapses fast. Freezers thaw. Pressure canners need sustained heat and fuel. Dehydrators need electricity or reliable sun. But there is one preservation method that predates refrigeration by roughly 4,000 years, requires no fuel, no electricity, and no specialized canning equipment — and it actually increases the nutritional value of your food while it works.
Lacto-fermentation is the process of submerging vegetables in a salt brine that suppresses spoilage organisms while allowing naturally occurring Lactobacillus bacteria to convert sugars into lactic acid. As acidity climbs and pH drops below 4.6 — usually to 3.4 or lower in finished sauerkraut — the environment becomes hostile to Clostridium botulinum, E. coli, Salmonella, and Listeria. The USDA and multiple university extension services classify properly fermented, acidified vegetables as shelf-stable acidic foods. Research published in the Journal of Applied Microbiology has repeatedly demonstrated that pathogenic bacteria inoculated into active kraut ferments die off within days.
The practical payoff for preppers is enormous. Korean households have stored kimchi in buried earthenware crocks through brutal winters for centuries. European farm families survived on barrels of sauerkraut. And fermented cabbage carries roughly 700 mg of vitamin C per kilogram — the reason Captain Cook's crews avoided scurvy on multi-year voyages. This is a skill that works equally well in a Brooklyn apartment closet and a Montana root cellar.
What You'll Need
Tools
- Stoneware fermentation crock (or food-grade bucket/wide-mouth jars)
- Mason jar fermentation kit with airlocks and weights
- Mandoline slicer or sharp chef's knife
- Kitchen scale (grams) and a large mixing bowl
- Wooden tamper or clean fist for packing
Supplies
- Unrefined mineral salt or canning and pickling salt
- Chlorine-free water (filtered, boiled-and-cooled, or well water)
- Fresh cabbage, cucumbers, carrots, radishes, green beans, peppers
- Tannin sources: grape, oak, horseradish, or bay leaves
- Whole spices — dill seed, garlic, peppercorns, caraway
Why Salt Concentration Is the Whole Ballgame
Salt is not a flavoring in this process — it is your safety system. At a 2% brine by weight, salt-tolerant Lactobacillus species thrive while most putrefying bacteria and molds are inhibited. Go below 1.5% and you risk soft, slimy, off-smelling failures. Go above 5% and fermentation stalls out.
Use these benchmarks:
- 2% (dry salting): Sauerkraut, kimchi, shredded root vegetables. Weigh your shredded cabbage in grams, multiply by 0.02, and that's your salt in grams.
- 3.5% brine: Whole cucumbers, green beans, whole peppers. That's roughly 35 grams of salt per liter of water, or about 2 tablespoons per quart.
- 5% brine: Long-term storage ferments intended to sit six months or more in a cool cellar, especially in warm climates.
Avoid iodized table salt — the iodine and anti-caking agents can inhibit bacterial activity and cloud your brine. Chlorinated municipal tap water is another common cause of failure; let it sit uncovered 24 hours or run it through a carbon filter first. If you're working out water logistics generally, our guide to choosing and rotating emergency water storage containers covers the storage side of the equation.
How to Ferment Vegetables in an Apartment Without a Root Cellar
Rural preppers have the advantage of cellars and springhouses, but urban fermenters are not out of luck. Fermentation happens fastest at 70–75°F and slowest at 50–55°F. An apartment interior closet, the floor of a north-facing pantry, or the back of a cabinet on an exterior wall will typically run 8–12 degrees cooler than the middle of your living room.
Small-batch fermenting in quart and half-gallon mason jars is ideal for tight spaces. Easy Fermenter wide-mouth lids use a one-way valve that vents CO2 without letting oxygen in, and they stack neatly in a closet. For a more durable, all-metal option that will outlast plastic in a long-term grid-down scenario, the Kraut Source stainless steel fermentation lid is essentially indestructible. Apartment dwellers should also read our guide to building a serious emergency stockpile in a small space.
For volume production — 5 to 20 pounds at a time — a water-sealed crock is the traditional answer. The Humble House Sauerkrock with ceramic weights uses a water moat around the lid rim that lets gas escape while blocking oxygen, mold spores, and fruit flies entirely. It requires zero power and only occasional water top-offs.
Step-by-Step Instructions
Step 1: Select and clean fresh, unwaxed produce
Use vegetables harvested within 48 hours if possible — older produce has depleted sugars and softer cell walls. Rinse in cool water but do not scrub aggressively; the wild Lactobacillus you need lives on the vegetable surface. Discard anything bruised, moldy, or soft, and trim cucumber blossom ends, which carry enzymes that cause mushy pickles.
Step 2: Slice, shred, or leave whole based on the ferment
Shred cabbage to about 1/8 inch for kraut so cells rupture and release liquid. A mandoline produces uniform thickness that ferments evenly — critical when you can't easily monitor a crock daily. Leave cucumbers, beans, and small peppers whole for a crisper finished texture.
Step 3: Weigh your vegetables and calculate salt precisely
Put your bowl on the scale, tare it, add vegetables, and record the gram weight. Multiply by 0.02 for dry-salted ferments. Eyeballing salt is the single most common beginner mistake and the leading cause of failed, slimy batches.
Step 4: Massage or brine until liquid covers everything
For kraut and kimchi, work salt into the shreds with your hands for 5–10 minutes until they release enough liquid to pool. For whole vegetables, dissolve your salt in chlorine-free water and pour over. Add a grape or oak leaf for tannins to keep pickles crisp.
Step 5: Pack tightly and submerge below the brine line
Press vegetables down with a tamper to eliminate air pockets, then place a glass or ceramic weight on top. Everything must stay under liquid — anything exposed to air will mold. Leave at least two inches of headspace for the vigorous bubbling of days three through seven.
Step 6: Ferment at a stable temperature and burp daily
Set the vessel on a tray to catch overflow. If using a plain lid instead of an airlock, loosen it once a day to release CO2 pressure. Expect visible bubbling within 24–72 hours and a distinctly sour, clean smell — not rotten or yeasty.
Step 7: Taste-test and move to cold storage
Begin tasting at day 5 for small jars, day 14 for full crocks. When the flavor is pleasantly sour and the texture holds, transfer to the coolest storage you have. At 50°F, sauerkraut holds quality for 6–12 months; at 65°F, expect 2–4 months before it softens. Our guide to building a low-cost underground root cellar is the natural next project for rural readers.
Step 8: Inspect stored ferments monthly
Check brine levels and top off with fresh 2% brine if evaporation has exposed the vegetables. Skim any white kahm yeast — harmless but flavor-degrading. Fuzzy black, pink, or blue-green mold means discard the batch.
Recommended Gear
Start small with jars, then scale to crocks as your confidence grows. The Masontops complete kit bundles airlocks, glass weights, and a tamper in one purchase — the fastest path from zero to first batch. Serious long-term storage calls for a heavy Ohio Stoneware crock, which will outlive you with basic care. Stock salt deeply: 25 pounds of canning and pickling salt costs less than a tank of gas and ferments hundreds of pounds of vegetables. Pair this skill with solar food dehydrating and pressure canning for a redundant, three-method emergency food storage system. More options are listed on our recommended survival gear page.
Frequently Asked Questions
How long do fermented vegetables last without refrigeration?
Properly fermented vegetables kept submerged in brine at 50–60°F typically remain safe and palatable for 6 to 12 months. At room temperature around 70°F, expect 2 to 4 months before texture degrades significantly, though acidity keeps them safe longer. Higher salt concentrations of 5% extend storage life at warmer temperatures at the cost of a saltier product.
How do I know if a ferment has gone bad?
Trust your nose first. Good ferments smell sharply sour, tangy, and clean. Discard any batch that smells rotten, putrid, or like nail polish remover, or that shows fuzzy black, pink, or blue-green mold. A flat white film on the surface is kahm yeast — unappetizing but harmless, and it can be skimmed off. Slimy, ropy brine usually means the salt ratio was too low.
Can I ferment vegetables in a plastic bucket instead of a crock?
Yes, provided the bucket is food-grade HDPE (recycling code 2) and has never held non-food chemicals. This is how commercial operations handle multi-ton batches. Use a plate and a water-filled food-safe bag as a weight, cover with a cloth, and keep it out of direct sunlight. Never ferment in metal containers other than stainless steel — lactic acid will leach from aluminum and galvanized surfaces.
Affiliate Disclosure: SHTFPlan.net participates in the Amazon Services LLC Associates Program. Some links are affiliate links — we may earn a small commission at no extra cost to you.