DIY Root Cellar: How to Build a Low-Cost Underground Food Storage System
A root cellar can keep vegetables, fruits, and preserved foods fresh for months without electricity. Here's how to build one on any property.
Why Every Prepared Household Needs a Root Cellar
When the grid goes down, supply chains break, or economic collapse makes grocery runs impossible, your long-term food storage becomes your lifeline. Freeze-dried meals and canned goods are excellent components of any preparedness plan, but nothing beats a properly built root cellar for storing fresh produce, preserved foods, and bulk staples over months — sometimes years — without electricity. Our grandparents understood this. It's time we relearn what they knew.
According to the USDA, root cellars can extend the shelf life of root vegetables like carrots, potatoes, and beets by four to six months beyond their normal storage window when maintained at the right temperature and humidity. That's not a minor improvement — that's the difference between eating well through a hard winter and rationing canned beans by February.
This guide walks you through the full process of designing and building a low-cost underground food storage system, from site selection to finishing details. You don't need a construction background or a fat budget. You need the right information, some elbow grease, and a willingness to invest in your family's security.
Understanding the Ideal Root Cellar Environment
Before you break ground, understand what you're trying to achieve. A functional root cellar maintains two critical conditions:
- Temperature: 32°F to 40°F (0°C to 4°C) for most produce
- Humidity: 85% to 95% relative humidity for root vegetables; lower for cured alliums like onions and garlic
These conditions slow the metabolic processes that cause food to rot, sprout, or desiccate. The earth itself is your greatest ally here — at a depth of just four feet, ground temperature in most of the continental U.S. stabilizes between 45°F and 55°F year-round. Dig deeper and you get closer to that ideal 32–40°F range, especially in northern climates.
Monitoring those conditions is non-negotiable. A quality Temp-Tec Digital Thermometer Hygrometer Indoor Humidity Monitor lets you track both temperature and relative humidity at a glance, so you can make ventilation adjustments before your harvest is compromised. Mount one near the ceiling and one near the floor — heat and moisture stratify, and the data from both points tells a more complete story.
Choosing the Right Site
Site selection can make or break your root cellar. Look for these characteristics:
- North-facing slope: Minimizes solar heat gain and keeps temperatures lower naturally
- Well-drained soil: Clay-heavy ground retains moisture and can lead to flooding and structural issues
- Distance from trees: Root systems from large trees can compromise walls and introduce pests
- Accessibility: You'll be carrying heavy loads in and out, often in winter — keep the path short and manageable
If you're building into an existing hillside or embankment, you've already won half the battle. The earth acts as natural insulation on three sides, reducing both the labor and the material costs significantly. A free-standing in-ground cellar on flat terrain requires more work but is equally viable on most residential lots.
Basic Construction: The Walk-In Underground Cellar
Excavation
For a functional family-sized cellar, plan for an interior footprint of at least 8x10 feet with a ceiling height of 7 feet to allow comfortable movement and vertical shelving. This means excavating roughly 10x12 feet to account for wall thickness. Rent a mini excavator if possible — the cost (typically $250–$400/day) is worth it compared to days of hand digging.
Walls and Floor
Poured concrete or concrete block walls are the most durable and pest-resistant option. For a budget-conscious build, concrete blocks laid in a standard running bond pattern work excellently. Use type S mortar for below-grade applications. Walls should be a minimum of 8 inches thick. The floor can remain compacted earth for maximum humidity regulation, or you can pour a thin concrete slab with drainage provisions — earth floors are traditional and effective for most produce storage.
Waterproofing is critical. Water intrusion is the single most common reason DIY root cellars fail. Apply a waterproofing membrane to the exterior of your walls before backfilling. WaterGuard Below-Floor Drainage System Waterproof Membrane Sheeting provides a robust barrier against groundwater and soil moisture penetration and is well worth the investment before you bury those walls permanently.
Seal all seams, pipe penetrations, and joints aggressively. Gorilla Tough & Wide Gorilla Tape All Weather Heavy Duty is a practical tool for sealing membrane overlaps, insulating gaps around ventilation pipe penetrations, and a dozen other small jobs that come up during construction.
The Roof
For a hillside cellar, timber framing covered with corrugated metal roofing, then covered with at least 12–18 inches of compacted earth, is a proven method. Use pressure-treated lumber rated for ground contact. For free-standing cellars, poured concrete roofs offer the best longevity, though precast concrete panels are a faster alternative.
Ventilation: The Element Most Builders Get Wrong
Without proper ventilation, your root cellar becomes a warm, oxygen-depleted environment that rots food quickly and can produce dangerous levels of carbon dioxide from decomposing produce. Two-pipe ventilation is the standard approach:
- Intake pipe: 4–6 inch diameter PVC, positioned low (near the floor) on the north wall, pulling cool outside air in
- Exhaust pipe: Same diameter, positioned high (near the ceiling) on the opposite wall, allowing warm, moisture-laden air to escape
Passive ventilation works in mild climates, but in areas with extreme temperature swings, a controlled fan system gives you precise management over airflow. A VIVOSUN 6 Inch Inline Fan with Speed Controller installed on your exhaust pipe lets you dial in airflow based on what your thermometer-hygrometer is reading. Run it at night in autumn when outside air is coldest to pull temperatures down quickly, then throttle it back during warmer periods.
Cap all exterior pipe openings with screened covers to keep rodents and insects out. Line interior pipe openings with Amagabeli Hardware Cloth 1/4 inch Galvanized Welded Wire Mesh Roll — the 1/4-inch mesh is fine enough to block mice while maintaining airflow. Also use this mesh over any floor drains or gaps where pests might enter.
Shelving, Organization, and What to Store
Build shelving from untreated wood (cedar is naturally rot-resistant) or use galvanized wire shelving. Allow air circulation on all sides — solid-bottomed shelves trap moisture and promote mold. Organize your cellar by storage requirements:
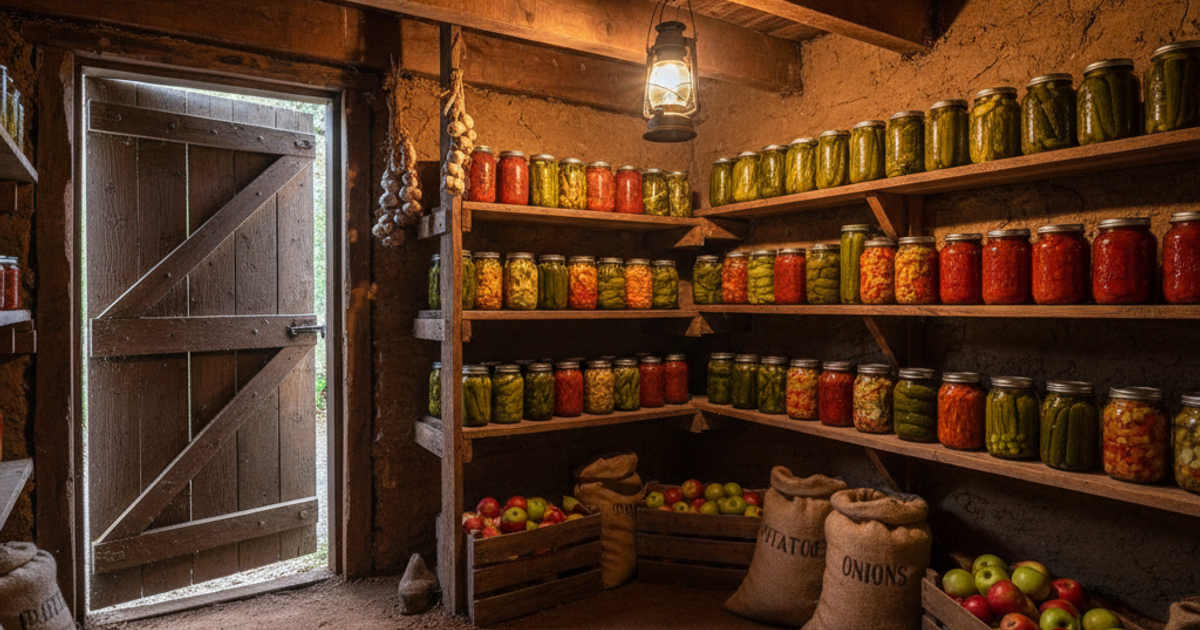
- Coldest, most humid zone (floor level): Root vegetables — carrots, beets, turnips, parsnips packed in damp sand or sawdust
- Mid-level shelves: Canned goods, preserved foods, bulk grains in sealed containers
- Higher, drier areas near ventilation: Cured onions, garlic, winter squash, dried herbs
Keep a handwritten inventory on the door and rotate stock consistently — first in, first out. A well-organized cellar can realistically hold enough calories and nutrition for a family of four to survive six months or longer without resupply.
Going Deeper: Education Matters
Building the structure is just the beginning. Understanding which varieties store best, how to cure produce before cellaring, and how to troubleshoot problems like excess moisture or premature sprouting requires ongoing knowledge. Lehman's Root Cellar Companion Book by Niki Jabbour is one of the most comprehensive guides available on the subject, covering everything from construction principles to variety selection and long-term management. Keep a physical copy in your preparedness library — it doesn't require Wi-Fi.
Final Thoughts
A root cellar is one of the highest-return preparedness investments you can make. The materials for a basic but functional cellar can cost as little as $500–$1,500 depending on size and existing site conditions — far less than a year's supply of freeze-dried food. More importantly, it provides a renewable food security system that works every season, every year, entirely independent of the power grid.
The people who come through hard times aren't always the ones with the most gear. They're the ones who rebuilt the skills and infrastructure that kept human communities alive for thousands of years. A root cellar is that infrastructure. Build one before you need it.
Choose a well-drained hillside or slope at least 10 feet from your home's foundation to prevent water damage. The ideal spot should be on the north side of a hill to maintain cooler temperatures year-round. Mark out a space approximately 8x10 feet, ensuring you're clear of utility lines by calling 811 before digging. Avoid areas with high water tables or near large tree roots that could compromise the structure. Dig into the hillside to create a chamber at least 6-7 feet deep to reach below the frost line and maintain stable temperatures. If building on flat ground, excavate a pit and plan to mound earth over the top after construction. Slope the floor slightly toward the entrance for drainage, and create a level base at the bottom. Remove all loose soil and rocks, then compact the earth floor firmly before adding your gravel drainage layer. Construct sturdy walls using concrete blocks, treated lumber, or stone, ensuring they can support the weight of soil overhead. Leave space for a door frame at the entrance and reinforce all corners with additional support. Create a robust ceiling using thick wooden beams or concrete, capable of bearing several tons of earth. Allow the ceiling to slope slightly toward the entrance to prevent water accumulation and direct any moisture outward. Insert two 4-inch PVC pipes through the ceiling to create air circulation: one intake pipe near the floor and one exhaust pipe near the ceiling on the opposite end. The intake pipe should extend just 6 inches above ground outside, while the exhaust pipe should reach 4-6 feet high to create natural convection. Install mesh screens on both pipes to keep out rodents and insects. This ventilation system will regulate humidity and prevent mold growth while maintaining optimal storage temperatures. Apply waterproof sealant to all interior walls or line them with heavy-duty plastic sheeting, ensuring all seams overlap by at least 12 inches. Add insulation to the walls and ceiling using straw bales, foam boards, or earth-packed tires to maintain consistent 32-40°F temperatures. Cover the exterior walls with a waterproof membrane before backfilling to prevent groundwater seepage. The insulation layer should be at least 4-6 inches thick for optimal temperature regulation. Carefully backfill around the walls with excavated soil, tamping down every 6-8 inches to prevent settling and air pockets. Mound at least 2-3 feet of earth over the roof, shaping it to shed water away from the entrance. Plant grass or ground cover on the mound to prevent erosion and provide additional insulation. Ensure the earth slopes away from all sides of the root cellar to direct water runoff away from your structure. Hang an insulated, weather-stripped door that opens outward and fits snugly in the frame to maintain temperature and humidity. Add a secure latch and consider a secondary interior door for extra insulation in extreme climates. Build wooden shelving along the walls using untreated lumber, with slatted shelves to allow air circulation around stored produce. Install your thermometer and hygrometer in a central location to monitor conditions, aiming for 32-40°F and 85-95% humidity for optimal food preservation.What You'll Need
Step-by-Step Instructions
Step 1: Select and Mark Your Location
Step 2: Excavate the Underground Chamber
Step 3: Build the Walls and Ceiling Structure
Step 4: Install Proper Ventilation System
Step 5: Waterproof and Insulate the Structure
Step 6: Backfill and Mound Earth Over the Structure
Step 7: Install the Door and Build Interior Shelving