Pressure Canning Vegetables: How to Build a Year's Worth of Shelf-Stable Produce at Home
Pressure canning is one of the most powerful food preservation skills a prepper can master. Here's how to do it safely and build a serious stockpile.
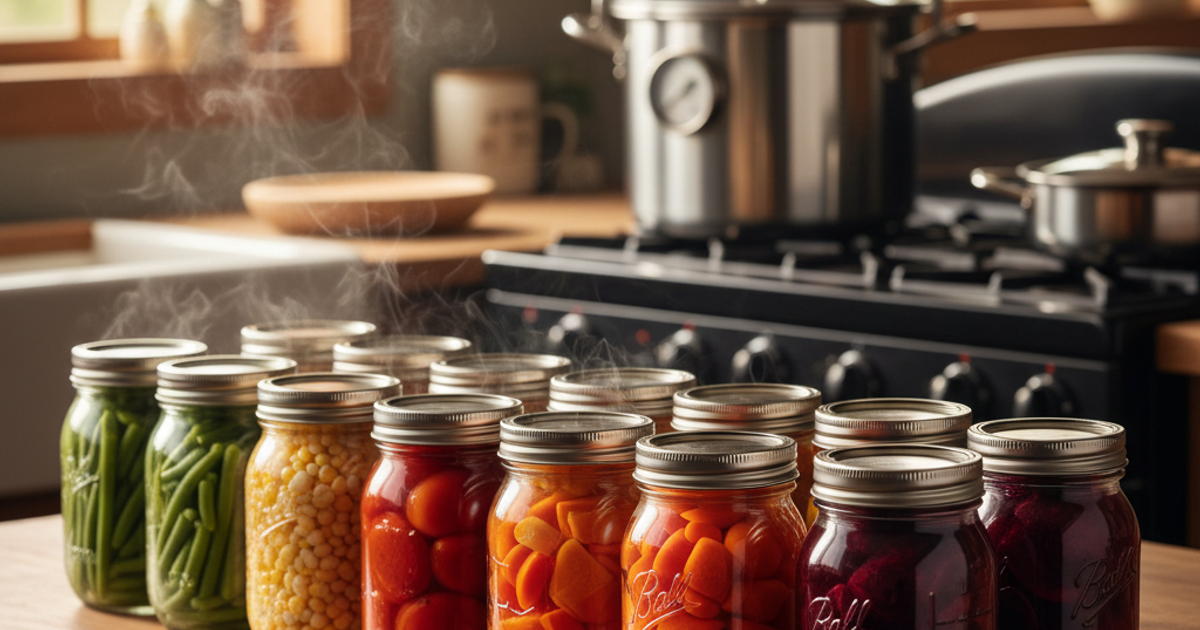
When the supply chain fractures — whether from a regional disaster, economic collapse, or a full-scale SHTF event — the preppers who eat well are the ones who built their food security before they needed it. Pressure canning vegetables is one of the most powerful and cost-effective skills you can add to your emergency preparedness arsenal. Unlike freeze-drying equipment that costs thousands of dollars, or dehydrators that leave food dependent on reconstitution with clean water, pressure-canned vegetables are ready to eat straight from the jar — no electricity, no water purification required.
According to the USDA, properly pressure-canned low-acid vegetables maintain their safety and nutritional value for a minimum of one to two years, with many preppers reporting palatable quality well beyond five years when stored correctly. For anyone serious about long-term food storage, this is a skill worth mastering whether you live on a rural homestead, in a suburban neighborhood, or in a city apartment with nothing but a standard kitchen stove.
This guide covers everything you need to know to safely pressure can vegetables at home and systematically build a year's worth of shelf-stable produce — from a single pressure canner and a case of jars.
Why Pressure Canning — Not Water Bath Canning — for Vegetables
This is the single most important safety distinction in home food preservation, and getting it wrong can kill you. Low-acid vegetables — including green beans, corn, carrots, potatoes, beets, and peas — cannot be safely processed in a water bath canner. Water bath canning only reaches 212°F (100°C), which is insufficient to destroy Clostridium botulinum spores in low-acid foods. These spores produce botulinum toxin, one of the most lethal substances on earth, and it produces no smell, no visible mold, and no obvious warning signs.
Pressure canning reaches internal temperatures of 240–250°F (116–121°C) under 10–15 pounds of pressure — the only method that reliably eliminates botulism risk in vegetables. The Ball Blue Book Guide to Preserving is the gold standard reference for tested, USDA-approved recipes and processing times, and every serious prepper who pressure cans should have a physical copy on their shelf — not just a browser bookmark that disappears when the grid goes down.
What You'll Need
Tools
- Presto 23-quart pressure canner
- All American 921 pressure canner (aluminum)
- Jar lifter
- Canning funnel
- Bubble remover / headspace tool
- Kitchen timer or stopwatch
Supplies
- Ball wide-mouth quart mason jars (case)
- Kerr regular-mouth pint mason jars
- Ball Sure-Tight canning lids and bands
- Pickling salt or canning salt (non-iodized)
- Clean water (filtered or municipal)
Choosing Your Pressure Canner: Urban Apartment vs. Rural Homestead
Your living situation matters when choosing a canner. The Presto 23-quart pressure canner is an excellent entry-level choice that works on standard gas and electric stovetops — making it the right call for most urban and suburban preppers. It holds 7 quart jars or 20 pint jars per batch, is relatively affordable, and uses a weighted gauge system that's straightforward to calibrate. Apartment dwellers should confirm their building permits pressure canners on electric smooth-top ranges, as some glass-top stoves may not support the weight or heat distribution requirements — check your stove's manual first.
For serious homesteaders or anyone committed to multi-decade preparedness, the All American 921 pressure canner is the gold standard. It features a metal-to-metal seal that requires no rubber gasket (gaskets degrade and become unavailable post-collapse), holds 19 pint jars per load, and is built to last generations. It's a significant investment, but when you're planning for a true SHTF scenario, equipment that functions without replacement parts is worth every dollar.
Jars, Lids, and Long-Term Supply Planning
The jar is a one-time investment. The lid is the consumable. Ball wide-mouth quart jars are ideal for high-volume vegetables like green beans, corn, and soup mixes — the wide mouth makes packing chunky produce much easier. Kerr regular-mouth pint jars are better suited for single-meal portions for smaller households, and they're slightly easier to store in urban spaces with limited pantry real estate.
For lids, serious preppers should think about supply-chain resilience. Ball Sure-Tight lids and bands are the most widely available and reliable single-use option — stock up on extras now, before you need them. But if you're planning for true grid-down, long-term sustainability, invest in Tattler reusable canning lids. These BPA-free plastic lids with rubber gaskets can be reused hundreds of times if maintained properly — a critical advantage when Amazon isn't an option and hardware stores are closed. For apartment preppers building a serious emergency stockpile in a small space, Tattler lids also reduce the volume of consumables you need to store long-term.
The Best Vegetables to Pressure Can for Emergency Food Storage
Not all vegetables are equally practical for a prepper pantry. Focus your canning efforts on high-calorie, high-nutrition produce that forms the backbone of real meals:
- Green beans — One of the easiest vegetables to can; very forgiving for beginners
- Corn — High caloric density; excellent for bartering or large group feeding
- Carrots — Long processing time but stores beautifully; adds vitamins A and C
- Potatoes — High caloric value; cubed or sliced, they cook quickly from the jar
- Beets — Nutrient-dense and sweet; stores for years without quality loss
- Peas — Excellent protein and fiber; pair well with rice and stored grains
- Vegetable soup mixes — Pre-combined jars of multiple vegetables are the ultimate ready-to-eat emergency food
Urban preppers without garden access should buy in bulk from farmers markets, food co-ops, or restaurant supply stores during peak harvest season — this is when prices drop dramatically and quality peaks. Rural preppers and homesteaders can can directly from their garden. Either way, the strategy is the same: process large quantities in concentrated sessions to maximize efficiency.
Gauge Maintenance: The Safety Check Most Preppers Skip
A pressure canner is only safe and accurate if its gauge is functioning correctly. Dial gauges on pressure canners should be tested annually — your local Cooperative Extension office often does this for free or for a nominal fee. If the gauge reads inaccurately, you may be under-processing jars (botulism risk) or over-pressurizing (equipment failure risk). Keep Presto pressure canner gauge replacement parts on hand as part of your preparedness kit — gaskets, sealing rings, and overpressure plugs are cheap now and impossible to find during a supply disruption. This is exactly the kind of small, often-overlooked item that separates a well-prepared prepper from someone whose critical equipment fails at the worst possible moment.
Step-by-Step Instructions
Step 1: Gather and Inspect All Equipment Before Starting
Visually inspect your pressure canner for cracks, warped sealing surfaces, and damaged gaskets. Check that the vent pipe and safety plug are clear of debris. Inspect all jars for chips or cracks along the rim — any flaw in the glass sealing surface will cause seal failure. Never reuse commercial food jars (like pickle jars) for pressure canning; they are not manufactured to withstand the thermal stress.
Step 2: Prepare Your Vegetables With Proper Washing and Cutting
Wash all produce thoroughly under clean running water, scrubbing root vegetables with a brush. Cut vegetables into uniform pieces to ensure even heat penetration during processing — inconsistent sizing is a leading cause of under-processing. Refer to USDA-approved guidelines in your Ball Blue Book for the correct cut size per vegetable type.
Step 3: Sterilize Jars and Heat Lids to Proper Temperature
Wash jars in hot soapy water or run them through a dishwasher cycle. Keep jars hot until filling — cold jars inserted into a hot canner can crack (thermal shock). Place lids in a small saucepan of simmering (not boiling) water to soften the sealing compound. Do not boil lids, as this degrades the sealing material.
Pack Jars Using Hot or Raw Pack Method Correctly
Most vegetables can be packed either raw (cold pack) or hot (pre-cooked briefly, then packed). Raw packing is faster; hot packing typically produces a better-quality product with fewer floating vegetables and tighter pack density. Use a canning funnel to fill jars, leaving the headspace specified in your recipe — typically 1 inch for most vegetables. Run a bubble remover tool around the inside edge of the jar to release trapped air pockets.
Step 5: Add Salt, Wipe Rims, and Seal Jars Precisely
Add ½ teaspoon of non-iodized canning salt per pint or 1 teaspoon per quart — this is optional for safety but improves flavor. Wipe jar rims with a clean, damp cloth; any food residue on the rim will prevent a proper seal. Apply lids fingertip-tight only — over-tightening prevents air from venting during processing, which disrupts the vacuum seal formation.
Step 6: Load the Canner and Build Pressure to Target PSI
Add 2–3 inches of hot water to the canner bottom. Load filled jars using a jar lifter — never tip or angle jars during loading. Lock the canner lid, then heat on medium-high until steam vents steadily from the vent pipe. Allow steam to vent for 10 full minutes before placing the weight or closing the petcock. This exhausts air from the canner — skipping this step results in inaccurate pressure and under-processed jars.
Step 7: Process at Correct Pressure and Time for Your Altitude
Altitude dramatically affects required processing pressure. At sea level, most vegetables process at 10 PSI with a weighted gauge canner; above 1,000 feet, pressure must be increased. Process for the exact time specified in your USDA-tested recipe — do not guess or reduce times. Keep heat consistent throughout processing; if pressure drops below target, restart the timing from zero.
Step 8: Cool, Test Seals, Label, and Store in a Dark Cool Location
Turn off heat and allow the canner to depressurize naturally — never run under cold water or force-cool it. Wait an additional 10 minutes after the gauge reads zero before removing the lid. Remove jars without tilting and place on a towel-covered counter with 1-inch spacing. After 12–24 hours, test each seal by pressing the center of the lid — it should be concave and firm. Any unsealed jars must be refrigerated and used within a few days. Label sealed jars with contents and date, then store in a cool, dark location away from temperature extremes. Check your long-term food storage methods comparison for guidance on optimal storage conditions alongside your other preservation strategies.
Building a Year's Worth of Canned Produce: A Practical Strategy
A year's supply sounds overwhelming until you break it down. For one adult, a reasonable target is roughly 300–365 pint jars of vegetables, or about 150–180 quart jars. If you process one canner load per week (7 quart jars per load), you'll have over 350 quarts in a year — enough for a family of two. The real strategy is batching: dedicate one or two full-day canning sessions per month to a single vegetable type rather than trying to can a variety every time. This minimizes setup and cleanup time dramatically.
For urban and suburban preppers without cellar storage, the biggest challenge isn't canning — it's storage. Canned jars need stable temperatures below 70°F and away from direct light to maximize shelf life. Under-bed storage containers, closet shelving systems, and interior cabinet space all work. Check our guide to apartment prepping for emergency stockpiling in small spaces for creative storage solutions tailored to compact living situations. Even a one-bedroom apartment can realistically store 100–150 jars with thoughtful organization.
If you're also building out other aspects of your emergency food storage — such as proteins — our companion guide on canning meat at home for long-term protein storage walks through the same pressure canning process applied to chicken, beef, and fish. Combining home-canned vegetables with home-canned meats creates a complete, grid-independent meal supply that requires nothing but a can opener to serve.
Recommended Gear
Every prepper who pressure cans should have a physical copy of the Ball Blue Book Guide to Preserving in their emergency reference library — it contains USDA-tested recipes and processing times for dozens of vegetables, and it'll be there when the internet isn't. For long-term sustainability, stock a supply of Tattler reusable canning lids alongside your standard Ball lids — when disposable lids become unavailable post-SHTF, Tattlers become an invaluable asset. Keep a set of Presto pressure canner gauge replacement parts in your gear cache so a worn gasket or failed gauge never sidelines your food production capability at a critical moment.
Frequently Asked Questions
How long does home pressure-canned food actually last?
The USDA recommends consuming home-canned vegetables within 1–2 years for best quality, but safety (assuming proper processing and an intact seal) extends considerably longer. The National Center for Home Food Preservation notes that properly canned food is safe indefinitely as long as the seal is intact and the jar shows no signs of spoilage — though color, texture, and nutritional content degrade over time. Many experienced preppers rotate 3–5 year-old canned goods regularly without issues. The critical variables are seal integrity, storage temperature, and whether USDA-tested recipes and processing times were followed precisely.
Can I pressure can vegetables in an apartment without special equipment?
Yes — pressure canning requires only a pressure canner and a heat source capable of maintaining a steady boil. Most standard gas ranges work perfectly. Electric coil stoves also work well. The primary concern in apartments is smooth-top glass or ceramic electric ranges, which some manufacturers advise against using with heavy canners due to weight limits and uneven heat distribution — always check your appliance manual. Induction cooktops generally don't generate sufficient sustained heat for pressure canning. Beyond the stovetop question, apartment pressure canning is entirely practical — the canner, jars, and supplies store compactly, and the process requires no outdoor space or special ventilation.
What vegetables absolutely cannot be pressure canned at home?
Certain vegetables produce poor or unsafe results with home pressure canning. Pureed or mashed vegetables (like mashed potatoes or butternut squash puree) are too dense for heat to penetrate to the center — always can these in chunks, never pureed. Dairy-containing mixtures cannot be safely pressure canned at home. Cabbage, broccoli, cauliflower, and Brussels sprouts develop off-flavors and mushy texture when pressure canned and are better preserved by pickling, fermentation, or freeze-drying. Stick to USDA-tested recipes — do not improvise ingredients or proportions, as these recipes have been laboratory-tested for both safety and heat penetration.
Affiliate Disclosure: SHTFPlan.net participates in the Amazon Services LLC Associates Program. Some links are affiliate links — we may earn a small commission at no extra cost to you.