First Aid Without a Doctor: Building a Trauma Kit for Long-Term Emergencies
When 911 isn't coming, your trauma kit and skills are all that stand between life and death. Here's what you actually need.
Why Medical Preparedness Is the Most Overlooked Survival Priority
Ask most preppers what's in their bug-out bag, and they'll rattle off food, water, fire starters, and weapons without hesitation. Ask them what trauma supplies they carry, and the answer is often a dusty $12 first aid kit from a big-box store — the kind stuffed with adhesive bandages and antiseptic wipes. In a true grid-down emergency, that kit won't keep someone alive.
According to the Committee on Trauma of the American College of Surgeons, uncontrolled hemorrhage is the leading cause of preventable death from traumatic injury. In a disaster scenario where emergency services are unavailable — or hours away — your ability to manage bleeding, airway emergencies, and wound care could be the difference between life and death for yourself or someone you love. The military learned this lesson the hard way in combat, and the civilian preparedness community needs to take note.
This guide breaks down what a real trauma kit looks like, what supplies you need to prioritize, and how to build a layered medical preparedness plan that can sustain you through extended emergencies when doctors and hospitals aren't an option.
Understanding the Threat: What Injuries Kill People First
Before you can build an effective trauma kit, you need to understand what you're preparing for. In disaster and SHTF scenarios, the most common life-threatening injuries break down into a predictable pattern that trauma surgeons call the "Deadly Triad" of preventable death:
- Massive hemorrhage — Severe bleeding from lacerations, puncture wounds, or crush injuries
- Airway obstruction — Blocked airways from unconsciousness, swelling, or foreign objects
- Tension pneumothorax — A collapsed lung caused by penetrating chest wounds
The military's Tactical Combat Casualty Care (TCCC) protocol was developed specifically to address these three threats in order of priority. Civilian preparedness kits should be built around the same framework. Everything else — blisters, minor cuts, headaches — comes second.
The Foundation: Hemorrhage Control
Stop the bleeding first. This is the golden rule of trauma care, and it should drive your purchasing decisions when assembling a kit.
Tourniquets
If you own only one piece of trauma gear, make it a quality tourniquet. The North American Rescue CAT Combat Application Tourniquet Gen 7 is the gold standard — it's the same tourniquet issued to U.S. military personnel and has been validated in combat use across multiple theaters of operation. Do not buy cheap imitations. Studies published in the Journal of Special Operations Medicine found that counterfeit tourniquets failed at alarming rates under field conditions. Your life is not worth saving $15.
Own at least two tourniquets per person in your household. Tourniquet application should be practiced until it can be done one-handed in under 30 seconds — because in a real emergency, you may be applying it to yourself.
Hemostatic Agents
Tourniquets only work on limbs. For junctional wounds — injuries to the groin, armpit, or neck — you need a hemostatic agent. Celox Hemostatic Granules Blood Clotting Agent works by rapidly clotting blood independent of the body's natural clotting cascade, making it effective even in patients on blood thinners. Pack the wound cavity tightly with the granules and apply firm, direct pressure for three minutes. It is not a substitute for professional medical care, but it buys critical time.
Pressure Dressings
Once bleeding is controlled with a hemostatic agent, you need to maintain pressure and protect the wound. The Recon Medical Israeli Bandage Emergency Pressure Dressing — commonly called an "Israeli bandage" — is a self-contained pressure dressing with a built-in pressure bar that allows single-handed application. It was developed by the Israeli Defense Forces and has been widely adopted by military and emergency medical services worldwide. Stock several of these in varying sizes.
Building a Complete Trauma Kit
Individual components matter, but a well-organized, pre-assembled kit is far more useful under stress. The Adventure Medical Kits Trauma Pak Pro is an excellent ready-made trauma kit that includes a tourniquet, hemostatic gauze, pressure dressing, and chest seal in a compact, organized package. It's a strong starting point, particularly for people new to trauma preparedness who want a proven kit they can build on over time.
For a more comprehensive everyday carry option, the MyMedic MyFAK Individual First Aid Kit bridges the gap between a standard first aid kit and a full trauma setup. It's modular, well-organized, and includes supplies for both trauma response and general wound management. If you want one kit that handles a wide range of scenarios — from a deep laceration to a sprained ankle on a bug-out — this is a smart choice.
Additional Supplies to Stock
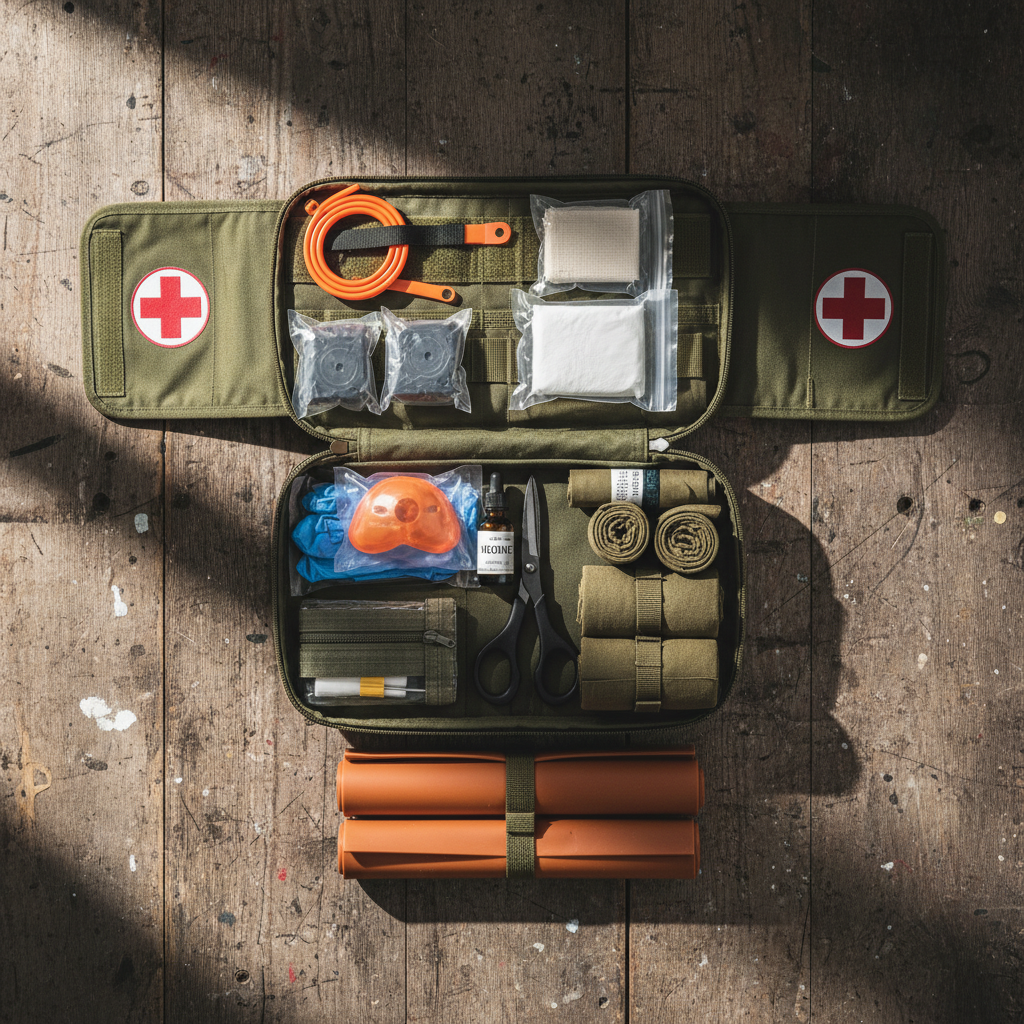
Beyond the core hemorrhage control tools, a well-rounded long-term trauma kit should include:
- Chest seals (vented) — For penetrating chest wounds to prevent tension pneumothorax
- Nasopharyngeal airway (NPA) — To maintain an airway in an unconscious patient
- SAM splints — Lightweight, moldable splints for fractures and dislocations
- Medical shears / trauma shears — Heavy-duty scissors for cutting away clothing
- Nitrile gloves — Multiple pairs; change between patients to prevent contamination
- Irrigation syringe and saline — For wound flushing; infection is a major killer in long-term scenarios
- Suture kit or skin stapler — For wound closure when evacuation isn't possible
- Broad-spectrum antibiotics — Consult a physician about stocking Fish Mox or similar options
- Pain management supplies — Ibuprofen, acetaminophen, and if possible, prescription options through your doctor
- Burn dressings — Non-adherent dressings specifically rated for burns
- Blood pressure cuff and pulse oximeter — For monitoring patient vitals over time
Knowledge Is the Most Important Supply
Gear without training is theater. A tourniquet improperly applied can cause permanent nerve damage. Packing a wound incorrectly can introduce infection. Chest seals placed wrong can kill. Every supply in your kit should come with a corresponding skill that you've practiced, ideally under the supervision of a trained instructor.
Take a Stop the Bleed course — they're free, widely available, and taught by medical professionals. Consider enrolling in a Wilderness First Responder (WFR) course if you're serious about long-term preparedness. The WFR curriculum is specifically designed for scenarios where professional medical help is hours or days away — exactly the situations preppers need to be ready for.
Back up your training with reliable reference material. A Comprehensive Guide for Wilderness and Travel Medicine by Eric Weiss is one of the most respected field references available, covering diagnosis and treatment protocols for injuries and illnesses in remote environments. Keep a physical copy in your kit — not just a digital file that requires a charged device.
Organizing and Maintaining Your Kit
A trauma kit is worthless if you can't find what you need in 30 seconds under pressure. Organize your kit by priority: hemorrhage control on top, airway supplies next, wound care below that. Color-code your pouches if necessary. Conduct quarterly audits to replace expired supplies and restock anything used in training.
Store your kit in a consistent, accessible location. Everyone in your household should know where it is and how to use the basics. A trauma kit your spouse can't find or operate is a failed kit.
Start Now, Build Over Time
Medical preparedness doesn't have to happen overnight, and it doesn't have to be expensive all at once. Start with the fundamentals: a quality tourniquet, hemostatic gauze, and a pressure dressing. Then build out from there as your budget allows. Take a first aid course before you spend another dollar on gear. Read. Practice. The investment you make in medical knowledge and supplies today may be the most important preparedness decision you ever make.
When the grid goes down, ambulances stop running, and the hospital is a rumor — your trauma kit and the knowledge to use it are all that stand between a survivable injury and a preventable death.
Place tourniquets and hemostatic gauze in the most accessible compartment of your kit, as massive hemorrhage is the leading cause of preventable death in trauma situations. Include at least two tourniquets, as limb injuries may require multiple applications or you may need to treat more than one casualty. Practice applying a tourniquet on yourself with one hand, as you may need to self-administer in an emergency. Time is critical—severe arterial bleeding can lead to death in under five minutes. Include multiple sizes of sterile gauze, Israeli bandages for pressure application, and hemostatic agents for wounds that tourniquets cannot address, such as junctional areas (groin, armpit, neck). Add irrigation supplies to flush debris from wounds, which is essential for preventing infection when professional medical care is unavailable. Pack both antibiotic ointment for minor wounds and oral antibiotics for serious infections, along with a reference guide for proper dosing. In long-term scenarios, infection kills more people than initial trauma. Add a nasopharyngeal airway to maintain breathing in unconscious patients and vented chest seals to treat penetrating chest wounds that can cause collapsed lungs. These items address the second and third priorities in trauma care (airway and breathing) after bleeding control. Include at least two chest seals, as entry and exit wounds may both require sealing. Practice identifying tension pneumothorax symptoms, as this condition requires immediate intervention that may exceed typical first aid training. Pack a malleable SAM splint that can stabilize fractures of arms, legs, fingers, or even be fashioned into a cervical collar for neck injuries. Add triangular bandages for creating slings, securing splints, and providing compression for various injuries. Include elastic bandages for sprains and strains, which are among the most common injuries in survival situations. Proper immobilization prevents further tissue damage and reduces pain during transport or while awaiting rescue. Stock multiple levels of pain relief, from over-the-counter options like ibuprofen and aspirin to stronger prescription medications if you can legally obtain them. Include both oral and topical pain relievers, as some situations may prevent swallowing pills. Add antihistamines for allergic reactions, anti-diarrheal medication, and any personal prescription medications with extended expiration dates. Label all medications clearly with dosing instructions, as stress impairs decision-making during emergencies. Store all supplies in a waterproof, crush-resistant container with clear organization—use color-coded pouches or labels so you can locate items quickly under stress. Place the most critical items (tourniquets, chest seals, gloves) in external pockets for immediate access. Vacuum-seal items susceptible to moisture damage and rotate medications before they expire. Create a laminated inventory checklist attached to the kit so you can quickly assess and restock supplies after use. Include a comprehensive wilderness medicine guide or emergency care manual, and laminate quick-reference cards for critical procedures like tourniquet application, wound packing, and shock treatment. Take a formal wilderness first aid or tactical emergency casualty care course to understand when and how to use advanced supplies. Practice scenarios regularly with your kit, as equipment familiarity can mean the difference between life and death when seconds count. Document any allergies, blood types, and medical histories for family members on waterproof cards stored in the kit.What You'll Need
Step-by-Step Instructions
Step 1: Prioritize Life-Threatening Bleeding Control
Step 2: Stock Wound Management and Infection Control Supplies
Step 3: Prepare for Airway and Breathing Emergencies
Step 4: Include Fracture and Immobilization Equipment
Step 5: Add Pain Management and Medication Supplies
Step 6: Organize and Protect Your Kit for Durability
Step 7: Train and Document Treatment Protocols