Seed Saving and Storage: Building a Survival Seed Vault at Home
Learn how to harvest, dry, and store seeds long-term so you can grow food indefinitely — no matter what happens to the supply chain.
Why Every Prepper Needs a Seed Vault
When the grocery store shelves go bare and supply chains collapse, your ability to grow food becomes the difference between survival and starvation. Yet most preppers spend thousands stockpiling freeze-dried meals and canned goods while completely ignoring the one renewable resource that could feed their family indefinitely: seeds. A well-built home seed vault doesn't just give you food for a season — it gives you the ability to produce food year after year, trade with neighbors, and rebuild something resembling normalcy in the aftermath of a serious SHTF scenario.
According to the Food and Agriculture Organization of the United Nations, approximately 75% of the world's crop diversity was lost during the 20th century as industrial agriculture consolidated around a narrow band of high-yield commercial varieties. Those commercial seeds are often hybrid or genetically modified strains that either won't reproduce true-to-type or are intentionally sterile. That's why open-pollinated, non-GMO, heirloom seeds are the only seeds worth saving and storing for long-term survival purposes.
Starting Smart: Buying vs. Saving Your Own
Building a seed vault is a two-track effort. The first track involves acquiring a solid base of proven varieties immediately. A pre-assembled collection like the Survival Garden Seeds Non-GMO Seed Vault gives you a broad spectrum of heirloom vegetables — typically 30 or more varieties — that are already selected for open-pollination and high germination rates. These collections are an excellent foundation, especially if you're just beginning to garden or haven't yet established which varieties perform best in your climate zone.
The second track, and the one that separates true self-sufficiency from dependency, is learning to save your own seeds from every harvest. Over time, seeds saved from plants that thrived in your specific soil and climate conditions will outperform anything you buy from a catalog. This is called landrace development, and it's how traditional farmers fed communities for thousands of years without a single trip to a seed company.
Which Seeds to Prioritize
Not all seeds are created equal from a survival standpoint. When building your vault, prioritize crops based on three criteria: caloric density, ease of seed saving, and storage longevity.
- Beans and legumes — High in protein and calories, extremely easy to save, and some varieties remain viable for 3–5 years or longer under proper conditions.
- Squash and pumpkins — Dense calorie sources with seeds that are simple to harvest, dry, and store.
- Tomatoes — Seeds saved via the fermentation method remain viable for 4–6 years and are some of the most valuable barter items in a collapse scenario.
- Corn (open-pollinated varieties only) — A caloric powerhouse, though it requires isolation to prevent cross-pollination between varieties.
- Leafy greens and herbs — Lettuces, kale, and culinary herbs go to seed quickly, giving you multiple saving opportunities per season.
- Root vegetables — Carrots, beets, and turnips are biennial, meaning they require two growing seasons to produce seeds, so plan accordingly.
The Right Way to Dry Seeds Before Storage
Moisture is the single greatest threat to seed viability. Seeds must be thoroughly dried before storage — any residual moisture will cause mold, premature germination, or complete loss of viability. The general rule of thumb is the "snap test": small seeds should snap cleanly when bent rather than bending like plastic. Larger seeds like beans should be rock-hard with no give.
Spread freshly harvested seeds on a paper plate, parchment paper, or a fine mesh screen in a single layer. Allow them to air dry in a cool, well-ventilated area away from direct sunlight for a minimum of two weeks. For seeds that will be stored long-term, extend the drying period to three to four weeks. Never use a heat source to accelerate drying — temperatures above 95°F (35°C) will kill the embryo inside the seed.
Seed Organization: The First Layer of Your Vault
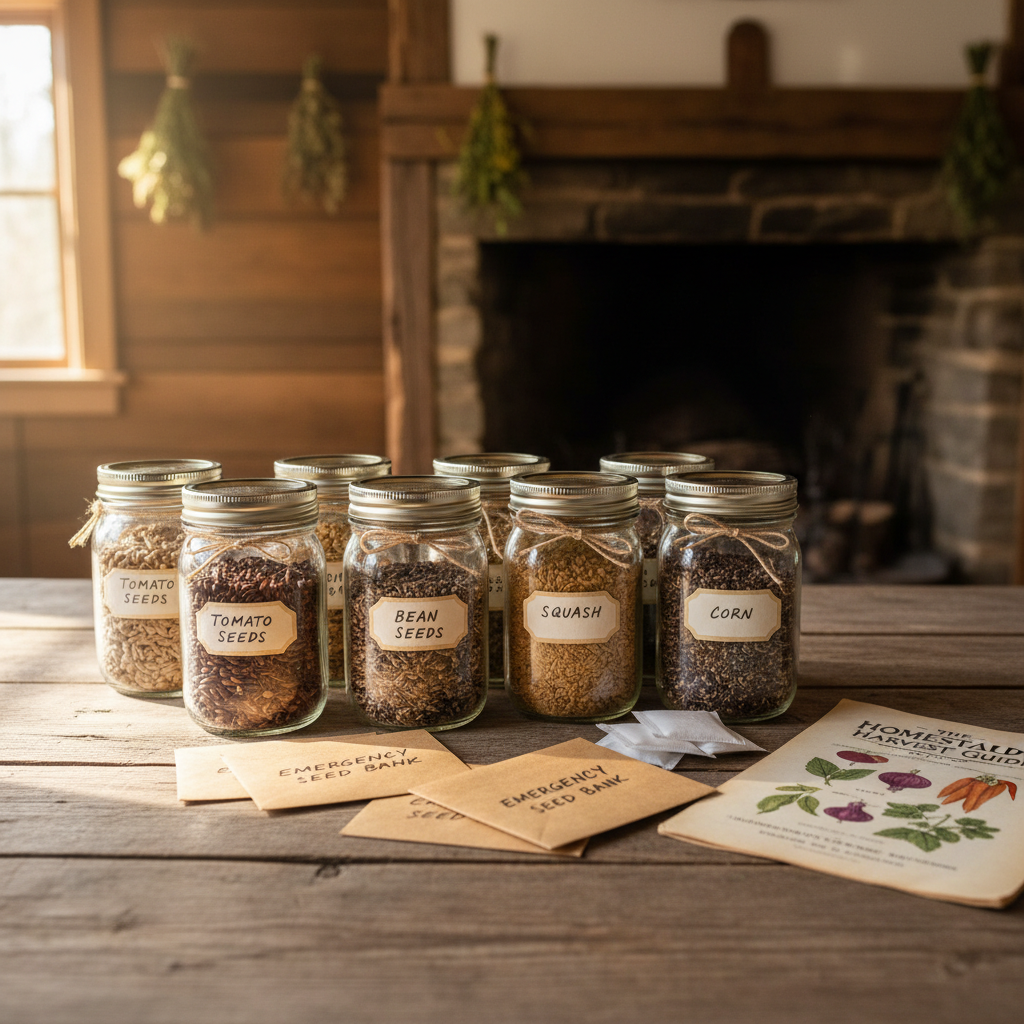
Before seeds go into long-term storage containers, they need to be organized and labeled at the individual variety level. Seed Needs Kraft Coin Envelopes Seed Saving Packets are ideal for this purpose — small, breathable paper envelopes that allow any remaining trace moisture to escape while keeping seeds organized and clearly labeled. Write on each envelope: the variety name, date of harvest, location grown, and any relevant notes about performance. This information becomes invaluable when you're selecting which seeds to plant — and which to prioritize saving — season after season.
Long-Term Storage: Creating an Airtight Environment
Once your seeds are properly dried and organized into labeled packets, they need to go into an environment that eliminates the two remaining threats to viability: oxygen and humidity. This is where your storage methodology determines whether you have a seed collection that lasts two years or one that remains viable for a decade or more.
Mylar Bags with Oxygen Absorbers
For bulk long-term storage, MylarValut 1-Gallon Mylar Bags with Oxygen Absorbers are the gold standard. Mylar creates an oxygen and moisture barrier that glass and plastic simply cannot match. Place your labeled paper seed envelopes inside the mylar bag along with a 300cc oxygen absorber, then heat-seal the bag using a flat iron or dedicated sealer. The oxygen absorber will eliminate residual oxygen inside the bag, dramatically slowing oxidative degradation and extending viability. Store sealed mylar bags inside a food-grade bucket for an additional layer of protection against rodents and physical damage.
Vacuum Sealing for Medium-Term Storage
For seeds you plan to rotate through over a 2–4 year cycle, vacuum sealing is a practical and accessible option. A FoodSaver FM2000 Vacuum Sealing System removes the air from specially designed bags and creates a tight seal that significantly extends seed life compared to standard zip-lock storage. This method works particularly well when seeds are organized in paper envelopes first — place several labeled envelopes together in a single vacuum bag by variety group (all cucurbits together, all legumes together, etc.) for easy access when planting season arrives.
Glass Jar Storage
For seeds you access more regularly or want to display and monitor easily, Weck 743 Mold Jar Glass Storage Jars offer an attractive and functional option. Glass is completely impermeable to moisture and odors, and the rubber gasket seal on Weck jars creates an effective airtight closure. Add a small silica gel desiccant packet inside each jar to absorb any trace moisture before sealing. Glass jars work best when stored in a dark location, as light exposure can degrade seed viability over time.
Environmental Control: Temperature and Humidity
The best containers in the world won't save your seeds if they're stored in a hot, humid environment. Research from the National Center for Genetic Resources Preservation demonstrates that for every 10°F decrease in storage temperature, seed longevity roughly doubles. Aim for storage temperatures between 32°F and 41°F (0–5°C) for maximum longevity — a dedicated mini-fridge or root cellar works excellently. Relative humidity should be kept below 8% inside storage containers and below 50% in the surrounding environment.
Monitor your storage environment consistently with a Govee Digital Hygrometer Thermometer. Place one inside your seed storage area to track both temperature and humidity in real time. Many models send alerts to your smartphone when conditions drift outside your set parameters — a critical feature if you're storing seeds in a basement, root cellar, or outbuilding where conditions can fluctuate seasonally without you noticing.
Testing Viability and Rotating Your Stock
Even under ideal conditions, seeds age. Establish a rotation schedule and conduct germination tests on stored seeds every two years. To test viability, place 10 seeds of a given variety between two damp paper towels, seal them in a zip-lock bag, and keep them in a warm location for the recommended germination period for that species. Count how many sprout. A germination rate above 80% indicates healthy stock. Between 50–80% is acceptable but means you should plant more densely to compensate. Below 50% means it's time to replace that variety.
Always grow out at least a small planting of every variety in your vault each season, both to refresh your seed stock with newly saved seeds and to ensure you maintain the practical growing knowledge that makes those seeds useful in a real emergency.
Your Seed Vault Is a Living System
A seed vault isn't something you build once and forget about. It's a living system that requires annual attention — saving, drying, testing, rotating, and expanding your collection. Start with a comprehensive base collection of non-GMO heirlooms, master the fundamentals of seed drying and storage, invest in proper containers and environmental monitoring, and commit to growing out your collection every season. Done right, your home seed vault becomes one of the most powerful and long-lasting preps you will ever build — one that can sustain your family through any collapse, no matter how long it lasts.
Choose seeds only from your healthiest, most productive plants that have fully matured. Allow fruits and vegetables to ripen past the eating stage until seeds are fully developed. For tomatoes and cucumbers, ferment the seeds in water for 2-3 days to remove the gel coating, then rinse and dry them thoroughly. Spread harvested seeds on paper plates or paper envelopes in a warm, dry location away from direct sunlight for 1-2 weeks. Seeds must reach moisture levels below 8% to prevent mold and deterioration during storage. Test dryness by bending a seed—it should snap rather than bend when properly dried. Write the plant variety name, harvest date, and source location on each container using permanent marker. Include any special growing notes such as days to maturity, disease resistance, or unique characteristics. This documentation becomes critical when you need to select appropriate seeds for future planting seasons. Place dried seeds in glass jars with tight-fitting lids or heat-sealed Mylar bags for maximum protection. Add one or two silica gel packets to each container to absorb any residual moisture. Avoid plastic bags for long-term storage as they allow moisture transfer over time. Keep your sealed seed containers in a cool, dark, and dry location where temperatures remain consistently between 32-41°F. A basement, root cellar, or dedicated refrigerator works well for long-term storage. Avoid areas with temperature fluctuations or high humidity, which dramatically reduce seed viability. Each year, conduct germination tests on a small sample of 10-20 seeds from each variety by placing them on damp paper towels in a sealed container. Count how many sprout within the expected timeframe to determine viability percentage. Replace any varieties that fall below 50% germination rate. Plant a portion of your stored seeds every 2-3 years to refresh your vault with newly harvested seeds. This rotation ensures you maintain viable seeds while also preserving genetic diversity within your collection. Keep detailed records of which seeds were planted and replaced to maintain an effective long-term seed banking system.What You'll Need
Step-by-Step Instructions
Step 1: Select and Harvest Seeds from Healthy Plants
Step 2: Dry Seeds Completely Before Storage
Step 3: Label Each Seed Variety with Complete Information
Step 4: Package Seeds in Moisture-Proof Containers
Step 5: Store Your Seed Vault in Optimal Conditions
Step 6: Test Germination Rates Annually
Step 7: Rotate and Replenish Your Seed Collection