Field Medicine: How to Treat Cuts, Burns, and Infections When There's No Hospital
When hospitals are inaccessible, a minor wound can become a death sentence. Learn how to treat cuts, burns, and infections with what you have on hand.
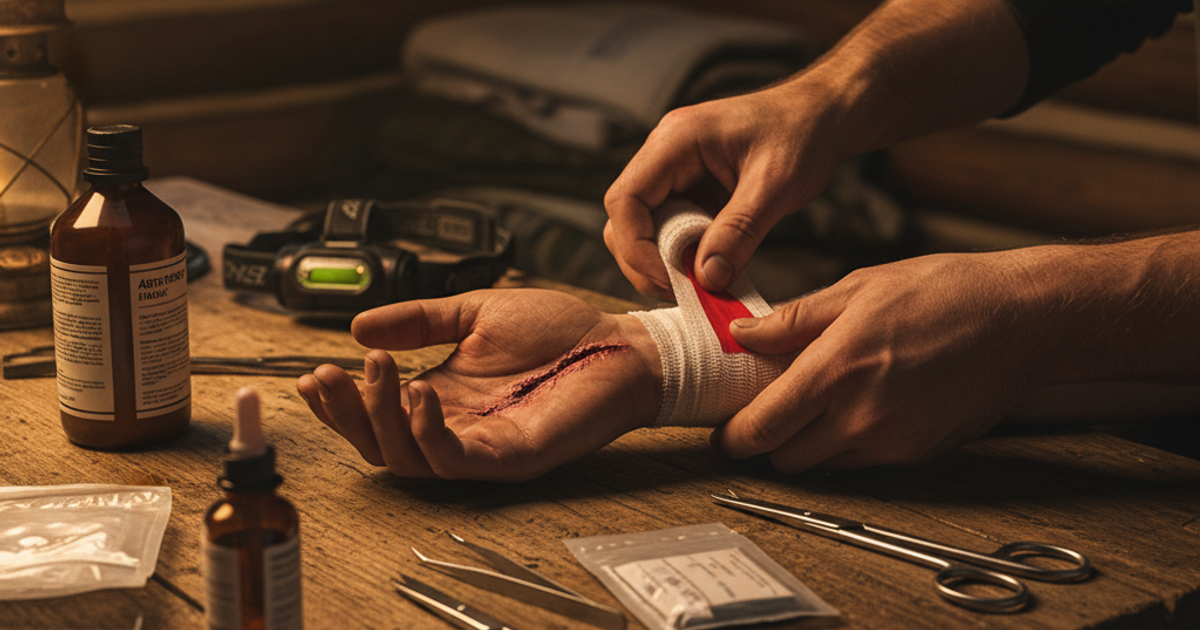
When the grid goes down and hospitals are unreachable, a simple cut, a burn from an improvised cooking fire, or a festering wound can become a life-threatening emergency within days. According to the World Health Organization, wound infections are among the leading causes of preventable death in austere medical environments — and that statistic was compiled during normal times, with functioning supply chains and trained personnel nearby. In a true SHTF scenario, your survival kit and your knowledge may be the only things standing between a minor injury and sepsis.
This guide is written for everyone — the apartment dweller in Chicago, the suburban family in Phoenix, and the rural homesteader in Montana. You don't need land or a barn full of medical supplies. You need the right information and a deliberately stocked trauma kit before disaster strikes.
Why Wound Care Is a Top-Tier Emergency Preparedness Priority
Most preppers focus on emergency food storage, water purification, and defensive tools. Wound care gets pushed to the back of the list — until someone steps on debris during an urban evacuation, burns their hand on a camp stove, or develops a raging infection from a blister that went untreated for three days. In grid-down conditions, you will face more physical labor, more improvised tools, more open fires, and more environmental hazards than you ever would in normal life. Injuries will happen. The question is whether you're prepared to treat them.
Start with a quality pre-assembled kit as your baseline. The Adventure Medical Kits trauma first aid kit is a strong foundation — it includes wound closure strips, irrigation syringes, trauma dressings, and a reference guide, making it suitable for both urban survival scenarios and remote off-grid environments. Build from there based on your household's specific needs.
How to Control Severe Bleeding When EMS Is Not Coming
Uncontrolled hemorrhage is the number one preventable cause of traumatic death. The military learned this the hard way in Iraq and Afghanistan, and the Stop the Bleed campaign has since brought hemorrhage control training to civilians. If you haven't taken that course, do it — many community centers and fire departments still offer free training.
For deep lacerations and penetrating wounds, the protocol is: direct pressure first, packing second, tourniquet for limb wounds third. Wound packing is particularly critical for groin, neck, and axillary (armpit) injuries where a tourniquet cannot be applied. This is where hemostatic agents become life-saving. Celox hemostatic gauze wound packing works by forming a gel-like clot on contact with blood, independent of the body's clotting cascade — meaning it can work even on patients taking blood thinners. Pack the wound tightly, apply firm pressure for at least three minutes, and do not remove the gauze once applied.
For smaller but persistent surface bleeds — common in elderly individuals or those on aspirin therapy — WoundSeal powder emergency bleeding control is an excellent addition to any bug out bag or home trauma kit. It creates a seal over the wound on contact with blood and works without compression, making it ideal for scalp lacerations, facial cuts, and injuries in hard-to-compress locations.
Improvised Tourniquets: What Works and What Doesn't
A commercial CAT or SOFTT-W tourniquet is the gold standard. In a pinch, a belt or strip of cloth with a windlass (a rigid stick twisted to tighten) can work — but thin cordage and bungee cords can cause nerve damage without achieving adequate pressure. Apply 2-3 inches above the wound, tighten until bleeding stops completely, write the time on the patient's forehead or arm with a marker, and do not remove in the field.
Cleaning and Closing Cuts Without a Doctor
Infection prevention begins at the moment of injury. The most important step — and the one most often skipped — is thorough wound irrigation. Debris, bacteria, and dead tissue left in a wound will cause infection regardless of what antibiotic ointment you apply afterward.
- Irrigate aggressively. Use a 20-60ml syringe with an 18-gauge catheter tip or a clean zip-lock bag with a pinhole to create a high-pressure stream. Flush with clean water — ideally sterile saline, but properly treated water works. See our guide on Grid-Down Water Purification: How to Make Any Water Source Safe to Drink When SHTF for making safe irrigation water from any source.
- Debride visible debris. Use clean tweezers to remove gravel, wood splinters, or fabric fragments. Rinse again after debridement.
- Assess closure needs. Clean, straight lacerations under half an inch can often be closed with steri-strips or butterfly closures. Jagged, heavily contaminated, or deep wounds should be left open or loosely closed to allow drainage — closing a dirty wound traps bacteria.
- Dress and protect. Apply an antimicrobial dressing and change it daily, watching for signs of infection.
For wounds requiring ongoing infection prevention without oral antibiotics, Curad silver antimicrobial wound dressings are a clinically proven option. Silver ions have broad-spectrum antimicrobial properties, effective against MRSA and other resistant organisms. These dressings are particularly valuable in grid-down scenarios where antibiotic supplies are limited — they help protect the wound environment without requiring prescription medications.
How to Treat Burns in a Grid-Down Emergency
Burns are one of the most common injuries in disaster scenarios. Open fires for cooking and heating, candles for light, and improvised stoves all dramatically increase burn risk — whether you're in an urban apartment or a rural bug-out location.
Classifying Burns Before You Treat Them
- First-degree burns affect only the outer skin layer. The skin is red, dry, and painful — like a typical sunburn. Cool with running water for 10-20 minutes, do not apply butter or toothpaste, and cover loosely.
- Second-degree burns penetrate into the dermis. Blistering is present and pain is intense. These require careful blister management, antimicrobial dressings, and close monitoring for infection.
- Third-degree burns destroy full skin layers. The wound may appear white, leathery, or charred and is often painless due to nerve destruction. These are life-threatening emergencies requiring evacuation if any possibility of medical care exists.
For second-degree burns, do not pop blisters — they are a sterile barrier against infection. If a blister breaks on its own, treat it as an open wound. The Elastoplast blister burn wound care kit is specifically designed for this scenario, offering hydrocolloid dressings that maintain a moist healing environment, reduce pain, and protect fragile burn tissue from contamination. These should be in every emergency preparedness kit and bug out bag.
For all burns: keep the patient warm (burns destroy the skin's ability to regulate temperature), ensure adequate hydration, and monitor for infection signs daily. Burned skin is extremely vulnerable to bacterial invasion.
Recognizing and Treating Wound Infections Without Antibiotics
This is where grid-down wound care becomes genuinely dangerous. Infections that a doctor would treat with a 10-day antibiotic course can escalate to life-threatening sepsis within 72 hours in an untreated patient. Know the warning signs:
- Increasing redness spreading beyond the wound margins (cellulitis)
- Warmth and swelling that worsens after the first 24 hours
- Purulent (pus) discharge — yellow, green, or foul-smelling
- Red streaking extending from the wound toward the body core (a medical emergency indicating lymphangitis)
- Fever, chills, elevated heart rate, or confusion (systemic infection/sepsis)
What You Can Do Without Prescription Antibiotics
First, reopen the wound if it was closed and drain any abscess. Pus under pressure must be released — a closed, infected wound will not heal. Irrigate aggressively again with clean water. Pack the wound loosely with saline-moistened gauze to allow continued drainage. Change dressings twice daily.
Honey — specifically raw, unpasteurized honey — has documented clinical effectiveness as a wound treatment. Medical-grade Manuka honey dressings are used in hospitals worldwide. If you're in a rural area or have access to a hive, raw honey applied directly to a wound creates an antimicrobial, osmotic environment hostile to bacterial growth. This is not a substitute for antibiotics in serious infections, but it is a legitimate adjunct.
Serious preppers should also explore the topic of building a medical supply reserve that includes antibiotics. Our article on Grid-Down Medication Storage: How to Build a Long-Term Drug Supply That Keeps Your Family Alive covers this subject in detail, including how to discuss antibiotic storage with your physician before an emergency strikes.
Also be aware that oral infections can become severe in grid-down scenarios and share many of the same principles. Our guide on Grid-Down Dental Emergencies: How to Handle Tooth Pain, Infections, and Extractions When There's No Dentist covers that specific risk in depth.
Building Your Grid-Down Wound Care Kit
Whether you're stocking a home trauma kit, a bug out bag, or a vehicle emergency kit, your wound care supplies should cover the full spectrum of likely injuries. Refer to our comprehensive guide on Grid-Down First Aid: How to Build a Trauma Kit That Keeps Your Family Alive When EMS Is Gone for a complete checklist. At minimum, your wound care inventory should include:
- Commercial tourniquet (CAT or SOFTT-W)
- Hemostatic gauze (Celox or QuikClot)
- Sterile saline or irrigation syringe
- Wound closure strips and/or stapler
- Silver antimicrobial dressings
- Hydrocolloid burn dressings
- Hemostatic powder for surface bleeds
- Nitrile gloves (multiple pairs)
- Betadine or chlorhexidine solution
- Medical reference guide
Knowledge is as important as gear. Consider taking a Wilderness First Responder (WFR) course — designed specifically to train practitioners in austere, resource-limited environments. These courses are available nationwide and open to civilians. You can also find excellent reference material on Wilderness Medicine for Preppers: How to Treat Life-Threatening Injuries When Help Is Never Coming.
What You'll Need
- Clean cloth or sterile gauze pads
- Bottled or boiled water
- Soap (antibacterial if available)
- Honey, sugar, or triple antibiotic ointment
- Medical tape or safety pins
- Tweezers and scissors (sterilized)
- Isopropyl alcohol or betadine
- Pain relievers (ibuprofen, acetaminophen)
- Needle and thread or butterfly closures
- Aloe vera gel (for burns)
Step-by-Step Instructions
Step 1: Stop the Bleeding Immediately
Apply direct pressure to the wound using a clean cloth or sterile gauze. Maintain firm, continuous pressure for 10-15 minutes without lifting to check if bleeding has stopped. If blood soaks through, add more material on top rather than removing the saturated layer. Elevate the injured area above the heart level if possible to reduce blood flow to the wound.
Step 2: Clean the Wound Thoroughly
Wash your hands with soap and water before touching the injury. Rinse the wound under clean running water or pour boiled (then cooled) water over it for at least 5 minutes to flush out debris and bacteria. Use soap around the wound edges but avoid getting soap directly inside deep cuts. Remove any visible dirt, glass, or foreign material with sterilized tweezers.
Step 3: Disinfect and Apply Antimicrobial Treatment
Pat the wound dry with clean gauze, then apply isopropyl alcohol or betadine to disinfect the area. Cover the wound with raw honey, granulated sugar, or triple antibiotic ointment—all have antimicrobial properties that prevent infection. Honey is particularly effective as it creates a barrier against bacteria while promoting healing. Avoid using hydrogen peroxide on deep wounds as it can damage tissue.
Step 4: Close the Wound If Necessary
For deep cuts longer than half an inch, bring the edges together using butterfly closures, medical tape, or as a last resort, sterilized needle and thread. If suturing, use small stitches about 1/4 inch apart, tying each one individually. Only close wounds that are fresh (less than 6 hours old) and clean—infected or contaminated wounds should be left open and packed with sterile gauze. Apply stitches just deep enough to hold edges together without cutting through tissue.
Step 5: Treat Burns Based on Severity
For first and second-degree burns, immediately cool the area with clean water for 10-20 minutes—never use ice directly on skin. Gently apply aloe vera gel or honey to soothe pain and prevent infection, then cover loosely with sterile gauze. Do not pop blisters as they provide natural protection against bacteria. For third-degree burns (white or charred skin), cover with clean dry cloth and treat for shock, as these require professional medical care when available.
Step 6: Dress and Protect the Injury
Cover the treated wound with sterile gauze secured with medical tape or clean cloth strips. Change dressings at least twice daily or whenever they become wet or dirty. Keep the wound slightly moist with ointment or honey to promote faster healing and reduce scarring. For burns, use non-stick dressing to prevent painful removal.
Step 7: Monitor for Infection and Respond Quickly
Check the wound daily for signs of infection: increased redness spreading from the wound, warmth, swelling, pus, red streaks, or fever. If infection develops, increase cleaning frequency to 3-4 times daily and apply honey liberally as it fights antibiotic-resistant bacteria. Consider using garlic (crushed and applied topically), which has natural antibiotic properties, or if available, oral antibiotics like amoxicillin or doxycycline. Seek medical help immediately if red streaks appear or fever exceeds 101°F, as these indicate serious infection.
Frequently Asked Questions
What should I put in my bug out bag for wound care?
Your bug out bag wound care kit should include at minimum: a tourniquet, hemostatic gauze, irrigation syringe, wound closure strips, sterile gauze, antimicrobial dressings, nitrile gloves, betadine or chlorhexidine, medical tape, and a hemostatic powder like WoundSeal for surface bleeds. If space allows, add hydrocolloid burn dressings and a small medical reference guide. Compact, purpose-built trauma kits like the Adventure Medical Kits line are designed specifically for bug-out scenarios and cover most of these bases in a single package.
How do I know if a wound is infected and what can I do without antibiotics?
Signs of infection include increasing redness, warmth, swelling, pus, foul odor, red streaking, and fever. Without prescription antibiotics, your best tools are thorough wound irrigation and drainage, silver antimicrobial dressings, raw honey as a topical antimicrobial, and close monitoring for systemic spread. If red streaking appears or the patient develops fever and confusion, this is a life-threatening emergency — evacuate to medical care if any exists. Prevention through aggressive wound cleaning at the time of injury is far more effective than any treatment afterward.
Can I use superglue to close a wound in a survival emergency?
Cyanoacrylate glue (regular superglue) is chemically similar to medical tissue adhesive and has been used in emergency situations. It is not ideal — it can be toxic to internal tissues, generates heat during curing, and should never be used on infected, dirty, or deep wounds. If you use it, clean and dry the wound thoroughly first, apply only to the skin surface edges, and never use it to seal a wound with any signs of contamination. Medical-grade tissue adhesive (like Vetbond or Dermabond) is a safer option and worth including in your survival gear.
Affiliate Disclosure: SHTF Plan participates in the Amazon Services LLC Associates Program. Some links are affiliate links — we may earn a small commission at no extra cost to you.