Wilderness Medicine for Preppers: How to Treat Life-Threatening Injuries When Help Is Never Coming
When the grid goes down and EMS isn't coming, knowing wilderness medicine could be the difference between life and death for you and your family.
When the grid goes down and emergency services are hours — or days — away, a single traumatic injury can become a death sentence. According to the Committee on Tactical Combat Casualty Care (TCCC), approximately 87% of preventable battlefield deaths occur before a casualty ever reaches medical care. That number doesn't change much in a civilian SHTF scenario. Whether you're sheltering in place in a city apartment, bugging out through suburban streets, or managing a remote homestead miles from the nearest hospital, the hard truth is this: when help is never coming, you become the first responder.
This isn't about playing doctor. It's about buying time — or more accurately, saving lives with the knowledge and tools most preppers overlook entirely. Your bug out bag and survival kit might be fully stocked with food and water, but if you can't stop a life-threatening bleed or manage a compromised airway, none of that matters.
The "Survivable Injury" Problem in SHTF Scenarios
Trauma research consistently shows that the majority of preventable deaths in both military and civilian settings fall into three categories: uncontrolled hemorrhage, airway obstruction, and tension pneumothorax (collapsed lung). These are the "Big Three" of wilderness and field trauma medicine — and all three are manageable with the right training and gear.
In everyday life, we outsource these life-or-death decisions to paramedics and emergency rooms. In a true SHTF collapse — grid failure, civil unrest, pandemic overwhelm, or a natural disaster that severs infrastructure for weeks — that option disappears. Your emergency preparedness plan is incomplete if it doesn't include serious trauma care capability.
The good news: the core skills of wilderness medicine are learnable by almost anyone. Organizations like the Wilderness Medical Society, NAEMT (TCCC), and Stop the Bleed have trained millions of civilians in the fundamentals. The gear is affordable and compact enough for any bug out bag or home trauma kit.
How to Stop Life-Threatening Bleeding When EMS Isn't Coming
Uncontrolled hemorrhage is the number-one killer in preventable trauma deaths. A severed femoral artery can cause fatal blood loss in under three minutes. In a grid-down or remote scenario, knowing how to stop arterial and venous bleeding is the single most valuable medical skill you can have.
Tourniquet Application
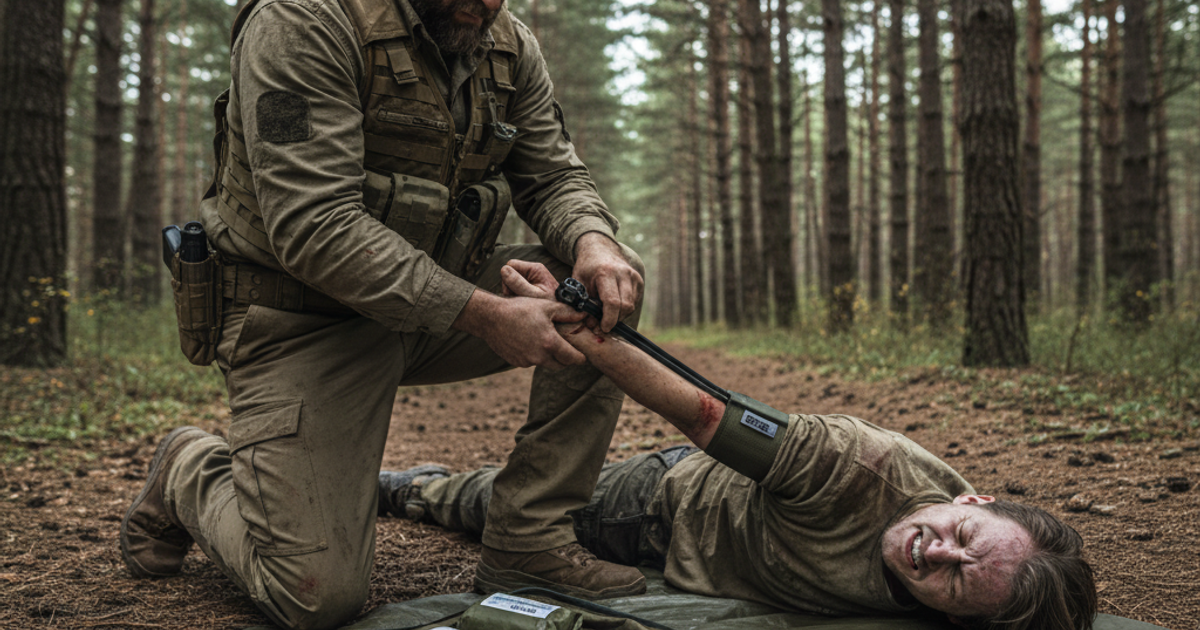
For extremity bleeds — arms and legs — a properly applied tourniquet is the gold standard. The NAR North American Rescue CAT tourniquet is the same device issued to U.S. military personnel and trusted by trauma surgeons worldwide. It's compact, one-hand applicable, and proven to stop life-threatening limb bleeds in seconds. Every prepper — regardless of whether you live in an urban apartment or a rural homestead — should have at least two of these staged in accessible locations.
Apply the tourniquet 2–3 inches above the wound site on bare skin. Tighten until bleeding stops, note the time of application on the device itself, and do not remove it in the field. Contrary to outdated first aid myths, a properly applied tourniquet left on for several hours does not cause permanent nerve or tissue damage in the vast majority of cases.
Wound Packing and Hemostatic Agents
Tourniquets can't be used on junctional wounds — the groin, armpit, neck, and torso. These are the wounds that kill people who otherwise know what they're doing. For these injuries, wound packing with hemostatic gauze is critical.
QuikClot hemostatic gauze is impregnated with kaolin, a mineral that dramatically accelerates the body's natural clotting process. Studies published in the Journal of Trauma and Acute Care Surgery show hemostatic gauze reduces blood loss by up to 90% compared to standard gauze in severe hemorrhage scenarios. To use it: pack the gauze tightly and deeply into the wound cavity — don't be gentle, this must reach the bleed source — then apply firm direct pressure for a minimum of three minutes.
Once the wound is packed, an Israeli bandage emergency pressure dressing provides the sustained compression needed to maintain hemostasis. Originally developed for the Israel Defense Forces, this ingenious device combines a sterile pad, elastic bandage, and pressure bar that allows a single rescuer to apply and maintain battlefield-grade pressure with one hand. It should be in every trauma kit and every survival kit regardless of your environment.
Airway Management in Field Trauma: Keeping Them Breathing
The second major preventable killer in field trauma is airway obstruction. A patient who is unconscious or semi-conscious from head trauma, shock, or severe injury may lose muscle tone in the airway, causing the tongue to obstruct breathing. In a hospital, a trained provider inserts an endotracheal tube. In the field, you have other options.
The jaw-thrust maneuver and recovery position are your first tools — both require only your hands. But when a patient is unconscious and you need to maintain an open airway without continuous hands-on management, a nasopharyngeal airway (NPA) kit is the safest field-applicable adjunct available to trained civilians. An NPA is a soft rubber tube inserted through the nostril that bypasses tongue obstruction and keeps the airway patent. Unlike oral airways, NPAs are tolerated by semi-conscious patients and carry a significantly lower risk of triggering vomiting. They're included in military individual first aid kits (IFAKs) for good reason.
Important: Airway adjuncts should only be used after proper hands-on training. Enroll in a wilderness first responder (WFR) or TCCC course to practice these skills before you need them under stress.
Recognizing and Managing a Tension Pneumothorax
A tension pneumothorax — commonly called a "sucking chest wound" in its open form — occurs when air becomes trapped in the pleural space and begins collapsing the lung and compressing the heart. It is rapidly fatal if untreated.
Field signs include: progressive difficulty breathing, decreasing mental status, tracheal deviation away from the affected side, absent breath sounds on one side, and distended neck veins. In a grid-down scenario, your treatment for an open chest wound is a three-sided occlusive chest seal (available in most tactical trauma kits) to prevent air entry while allowing pressure to escape. For a developing tension pneumothorax in a patient with penetrating chest trauma who is deteriorating, needle decompression is the definitive field treatment — but this is a skill that requires formal training and the appropriate 14-gauge catheter-over-needle.
This is exactly why formal training matters. Reading about these procedures is not the same as practicing them. Seek out courses from the Wilderness Medical Society, NAEMT, or your local Stop the Bleed program.
Building a Field-Grade Trauma Kit for Preppers
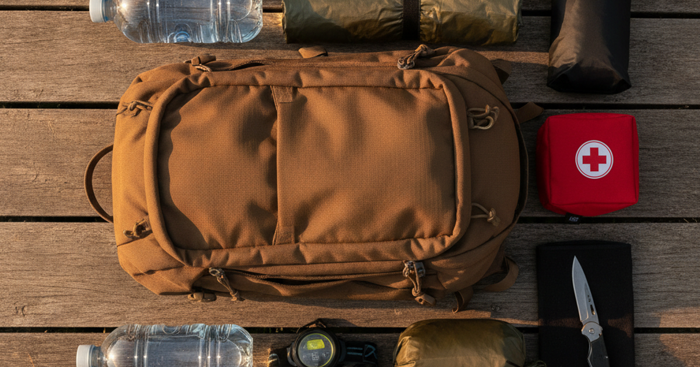
Every prepper should maintain at minimum two trauma kits: a compact version carried in your bug out bag or everyday carry kit, and a more comprehensive kit at your primary location — whether that's an apartment, a suburban home, or an off grid retreat.
A well-structured kit should include:
- Two CAT or SOFTT-W tourniquets
- Hemostatic wound packing gauze (at least two rolls)
- Pressure dressings (Israeli-style)
- Occlusive chest seals (vented, at least two)
- Nasopharyngeal airway with lubricant
- Trauma shears
- Nitrile gloves (multiple pairs)
- Permanent marker (for tourniquet time notation)
- Emergency thermal blanket (shock management)
- SAM splints and elastic bandaging
- Irrigation syringe and saline for wound cleaning
- Broad-spectrum oral antibiotics (if obtainable)
For a comprehensive ready-made starting point, the Adventure Medical Kits wilderness first aid kit provides a solid foundational kit that covers both trauma and general wilderness medical scenarios. It's well-organized, clearly labeled, and appropriate for preppers at every level of experience. Supplement it with the dedicated trauma items listed above and you'll have a kit that rivals what many rural emergency responders carry.
For guidance on building your broader medical stockpile, including medications and long-term pharmaceutical reserves, see our article on medication stockpiling for long-term emergencies. And because injuries don't happen in isolation during a crisis, our guide to building a full trauma kit for long-term emergencies covers the broader scope of what a comprehensive medical preparedness strategy looks like.
Infection: The Slow Killer in Long-Term Scenarios
In a prolonged grid-down scenario, infection becomes as dangerous as the initial injury. Before antibiotics, a simple wound infection could kill within days. In a true SHTF collapse lasting weeks or months, your wound management protocol needs to account for the entire healing arc — not just the initial emergency.
Irrigate all wounds aggressively with clean water under pressure. A 20cc syringe with an 18-gauge tip generates the minimum 8 PSI recommended by the Journal of Emergency Medicine for effective wound decontamination. Keep wounds covered with clean dressings, change dressings at least twice daily, and monitor closely for signs of infection: increasing redness, swelling, warmth, purulent discharge, red streaking (tracking), or systemic fever.
Growing medicinal herbs with natural antimicrobial properties — such as calendula, yarrow, and plantain — can provide supplemental wound care support in extended emergencies. Our article on medicinal herbs you can grow at home for long-term survival covers this topic in detail.
Training Is the Most Important Survival Gear You Own
No kit replaces knowledge and practice. The gear described in this article is only as effective as the person using it. A tourniquet in the hands of someone who's never applied one under stress is far less reliable than one wielded by someone who has practiced the motion hundreds of times.
Minimum recommended training for serious preppers:
- Stop the Bleed — Free or low-cost, available nationwide, covers hemorrhage control fundamentals
- Heartsaver First Aid CPR/AED — American Heart Association baseline certification
- Wilderness First Aid (WFA) — 16–20 hour course covering trauma and medical emergencies in austere environments
- Wilderness First Responder (WFR) — 70–80 hour advanced course; the gold standard for serious preppers and remote travelers
- TCCC/TECC — Tactical Combat Casualty Care or its civilian equivalent, Tactical Emergency Casualty Care
Practice your tourniquet application until you can do it correctly with one hand in under 30 seconds. Practice wound packing on training simulators. Run through your kit in the dark, under stress, with cold hands. That's when it counts.
Recommended Survival Gear for Field Trauma
To summarize, the five pieces of survival gear that form the backbone of any serious field trauma capability are: the NAR CAT tourniquet for extremity hemorrhage control; QuikClot hemostatic gauze for junctional and deep wound packing; the Israeli pressure dressing for sustained wound compression; an NPA airway kit for unconscious airway management; and the Adventure Medical Kits wilderness first aid kit as a comprehensive baseline system. None of these items are expensive. All of them can save a life. None of them work without training.
Also consider the role of your survival community in medical emergencies. Identifying neighbors or group members with medical backgrounds and cross-training each other is one of the most powerful force multipliers in any preparedness group. Our guide to building a neighborhood mutual aid network covers how to organize this kind of community-level resilience before disaster strikes.
What You'll Need
- Tourniquets (CAT or SOFTT-W recommended)
- Hemostatic gauze (QuikClot or Celox)
- Chest seals (vented, for sucking chest wounds)
- Israeli or pressure bandages
- Nasopharyngeal airway (NPA)
- Trauma shears
- Nitrile gloves
- 14-gauge needle for chest decompression
- Suture kit and wound closure strips
- Broad-spectrum antibiotics
- Pain management medications
- IV fluids and administration kit
Step-by-Step Instructions
Step 1: Assess the Scene and Ensure Your Own Safety
Before rushing to help an injured person, survey the environment for ongoing threats such as unstable terrain, wildlife, or the same hazard that caused the injury. You cannot help anyone if you become a casualty yourself. Once safe, quickly determine if the scene is secure enough to begin treatment or if you need to move the patient to a safer location.
Step 2: Control Massive Hemorrhaging Immediately
Life-threatening bleeding from extremities must be stopped within minutes to prevent death from exsanguination. Apply a tourniquet 2-3 inches above the wound on the limb, tightening until bleeding stops completely, then note the time of application. For wounds on the torso, neck, or junctional areas where tourniquets won't work, pack the wound tightly with hemostatic gauze and apply direct pressure for at least 3 minutes.
Step 3: Establish and Maintain an Open Airway
Check for airway obstructions by looking in the mouth for foreign objects, blood, or vomit and clear them immediately. If the patient is unconscious but breathing, position them in the recovery position to prevent aspiration. If facial trauma or swelling threatens the airway, insert a nasopharyngeal airway to maintain an open passage for breathing, and monitor continuously for changes in respiratory status.
Step 4: Identify and Treat Tension Pneumothorax
Look for signs of a collapsed lung: severe difficulty breathing, distended neck veins, absent breath sounds on one side, and decreased chest rise. If a penetrating chest wound is present and "sucking," immediately apply a vented chest seal to prevent air from entering the chest cavity. If tension pneumothorax develops (life-threatening pressure buildup), perform needle decompression by inserting a 14-gauge needle at the second intercostal space, mid-clavicular line on the affected side.
Step 5: Address Shock and Prevent Hypothermia
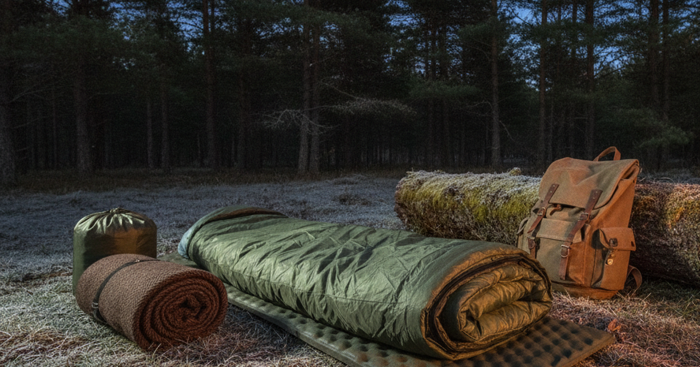
Shock develops rapidly after major trauma and manifests as pale/cool skin, rapid weak pulse, and altered mental status. Lay the patient flat or elevate legs if no spinal injury is suspected, and cover them with blankets or emergency bivvy to maintain body temperature. If trained and supplies are available, establish IV access and administer fluids cautiously, as over-resuscitation can be harmful.
Step 6: Clean and Close Wounds to Prevent Infection
Once immediate threats are controlled, irrigate wounds thoroughly with clean water or saline to remove debris and reduce bacterial load—use at least one liter of fluid per wound. Close smaller lacerations with sutures or wound closure strips after ensuring no foreign material remains inside. For wounds that cannot be closed immediately, pack with sterile gauze and change dressings twice daily while monitoring for signs of infection such as increased redness, warmth, swelling, or purulent drainage.
Step 7: Monitor Vital Signs and Manage Pain
Continuously assess and document the patient's level of consciousness, respiratory rate, pulse, and temperature every 15-30 minutes depending on severity. Deteriorating vital signs may indicate internal bleeding or other complications requiring intervention. Administer appropriate pain medication based on severity—NSAIDs for mild pain, tramadol for moderate pain, and stronger opioids only for severe pain while carefully monitoring for respiratory depression, especially in chest injury patients.
Frequently Asked Questions
What wilderness medicine skills should every prepper know before SHTF?
Every prepper should at minimum know how to apply a tourniquet correctly, pack a wound with hemostatic gauze, perform the jaw-thrust airway maneuver, recognize signs of tension pneumothorax, manage shock with positioning and temperature control, and irrigate and dress wounds to prevent infection. Beyond these basics, completing a formal Wilderness First Aid (WFA) or Wilderness First Responder (WFR) course will dramatically expand your ability to assess and manage life-threatening injuries when no professional help is available. These skills are relevant whether you're in an urban apartment, a suburban neighborhood, or a remote off grid location.
What should I put in a trauma kit for my bug out bag?
A bug out bag trauma kit should be compact but capable. At minimum, include: one or two CAT tourniquets, hemostatic wound packing gauze, an Israeli-style pressure dressing, a vented chest seal, a nasopharyngeal airway with lubricant, trauma shears, nitrile gloves, a permanent marker, and a mylar emergency blanket. Keep the trauma kit in a dedicated pouch with high visibility coloring — often red — so anyone can grab it quickly. Practice accessing and deploying each item so you're not fumbling with unfamiliar gear when lives are on the line.
How do I manage a serious injury at home when there's no access to emergency services?
Your priorities follow the same order as professional trauma care: stop life-threatening bleeding first, then secure the airway, then address breathing and circulation. Control hemorrhage with tourniquets (limbs) or wound packing with hemostatic gauze and direct pressure (junctional or torso wounds). Position unconscious patients in the recovery position to protect the airway. Manage shock by keeping the patient warm, elevating legs if appropriate, and preventing unnecessary movement. Clean and dress all wounds to reduce infection risk. Document everything — time of injury, interventions performed, and any changes in patient condition — so that if professional care eventually becomes available, providers have the information they need to continue treatment effectively.
Affiliate Disclosure: SHTF Plan participates in the Amazon Services LLC Associates Program. Some links are affiliate links — we may earn a small commission at no extra cost to you.