Fire Starting Without Matches: How to Choose and Master Every Ignition Method for Survival
When lighters fail and matches run out, knowing multiple fire-starting methods could save your life. Here's how to master every technique.
Fire is the original survival tool. It purifies water, cooks food, signals for rescue, wards off hypothermia, and provides psychological comfort when everything else has gone sideways. Yet most people rely entirely on lighters and matches — two tools that fail in wet weather, run out of fuel, and degrade in long-term storage. If you're serious about emergency preparedness, you need ignition methods that work when modern conveniences don't.
Whether you're an apartment dweller building out a bug out bag, a suburban homeowner stocking a survival kit, or a rural prepper managing a full off-grid property, understanding multiple fire-starting methods could be the difference between life and death in a SHTF scenario. Cold kills fast. According to the CDC, hypothermia accounts for over 1,300 deaths annually in the United States — most of which occur at temperatures above freezing. Fire is your first line of defense.
This guide covers every major ignition method — from modern ferro rods to ancient bow drills — with honest assessments of which tools belong in your gear and which skills take the most time to master.
Why Matches and Lighters Aren't Enough for Long-Term Survival Preparedness
Disposable lighters fail below 40°F, become unreliable when wet, and run dry. Waterproof matches are better, but a single box contains only 40 strikes — not enough for weeks of fire-starting in a prolonged emergency. Strike-anywhere matches have become increasingly difficult to source as manufacturers have quietly discontinued many formulations.
The prepper mindset demands redundancy. Carry three methods of fire starting at all times: one modern tool, one mechanical backup, and one primitive skill set. Never depend on a single point of failure.
If your preparations also include staying warm indoors during a grid-down scenario, be sure to read our guide on Grid-Down Heating: How to Keep Your Home Warm When the Power Goes Out in Winter — fire-starting skills feed directly into those strategies.
Ferro Rods: The Best Modern Fire-Starting Tool for Your Survival Kit
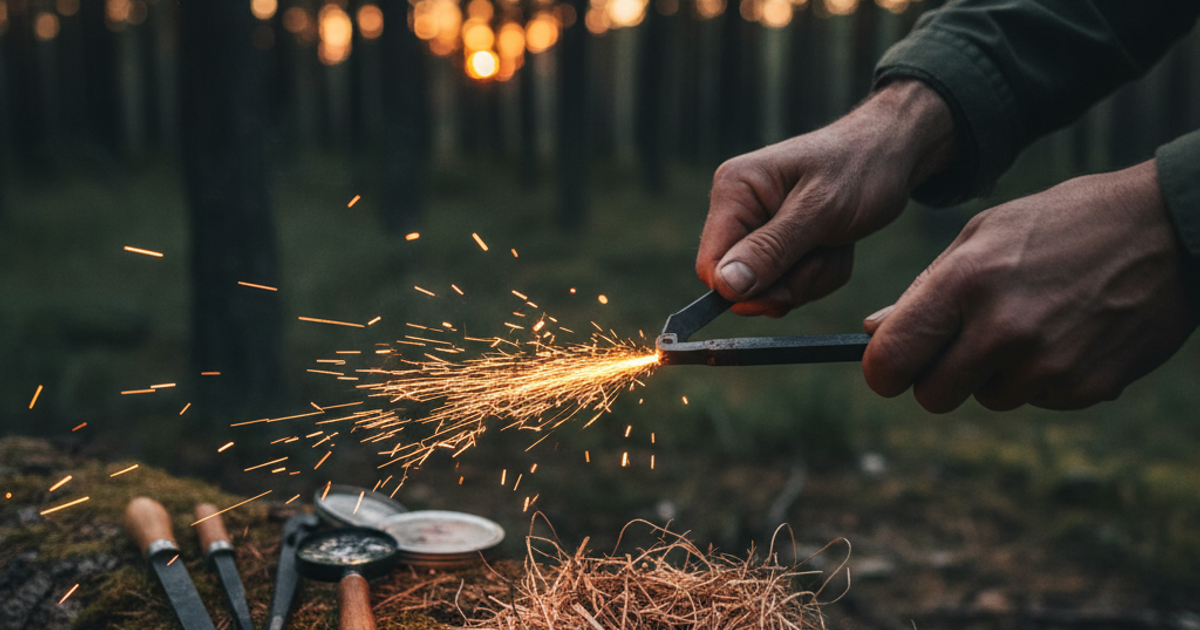
Ferrocerium rods — commonly called ferro rods — are the gold standard of modern emergency ignition. They produce a shower of sparks reaching 3,000°F, work when soaking wet, function at altitude, and last for thousands of strikes. A quality ferro rod can outlast you. There is no reason any survival gear loadout should be without one.
The mechanics are simple: scrape a hardened steel striker across the rod at a 45-degree angle with a firm, controlled stroke. The shaved ferrocerium ignites on contact with air. Direct the sparks into a prepared tinder bundle and you have fire.
Choosing the Right Ferro Rod for Your Bug Out Bag
Not all ferro rods are created equal. Diameter, length, and alloy composition all affect performance. Thin rods wear out faster and are harder to grip with cold or injured hands. Longer rods give you more surface area and more strikes.
The Light My Fire Swedish FireSteel ferro rod is a perennial favorite among experienced preppers for good reason — it's made in Sweden from a proprietary alloy that produces an exceptionally bright, hot spark shower, and it comes with a built-in striker. It's compact enough for an EDC keychain but capable enough for serious backcountry use.
For a more robust option with a thicker rod and longer life, the Überleben Zünden thick ferro rod is worth serious consideration. Its larger diameter makes it significantly easier to grip with gloved or numb hands — a critical feature in winter survival scenarios where fine motor control is impaired.
Budget-conscious preppers building out their first kit should look at the Bayite ferrocerium ferro rod survival fire starter, which offers a thick-diameter rod with a comfortable paracord-wrapped handle at an accessible price point. Having multiple ferro rods staged in your home kit, vehicle emergency kit, and bug out bag is a smart redundancy strategy that doesn't break the bank.
How to Use a Ferro Rod Effectively
- Prepare your tinder bundle before you strike — dry grass, cattail fluff, birch bark, fatwood shavings, or commercial tinder like petroleum-soaked cotton balls.
- Hold the rod close to the tinder — no more than two inches away.
- Use a firm, controlled scrape. Speed matters less than pressure and proximity.
- Once a coal forms, gently blow into the tinder bundle using long, steady breaths, not short puffs.
- Transfer the burning bundle to your fire lay before it burns your hands.
Urban tip: Apartment dwellers should practice this skill in a fireproof container (like a cast iron skillet) on a balcony or in a parking lot. You don't need wilderness access to become proficient — you need repetition.
Flint and Steel: The Historical Backup Every Prepper Should Know
Flint and steel fire-starting predates written history and remained the primary ignition method for most of human civilization until the mid-1800s. It's slower and more skill-dependent than a ferro rod, but it requires no manufactured materials and works indefinitely as long as you have appropriate stone and steel.
The method works by striking high-carbon steel against flint, chert, quartzite, or similar hard silica-rich stones. The impact shaves microscopic steel particles that oxidize rapidly — creating sparks hot enough to ignite char cloth or other carbonized tinder.
The Coghlan's flint and steel fire starting kit is an excellent entry point for learning this method. It includes a pre-shaped flint piece, a carbon steel striker, and char cloth — everything needed to practice the skill without sourcing raw materials.
Char Cloth: The Secret Weapon of Flint and Steel Fire Starting
Char cloth is the critical link in the flint-and-steel chain. It's fabric — typically 100% cotton from old t-shirts or denim — that has been partially combusted in a low-oxygen environment. The result is a fragile, black material that catches even a weak spark and holds a slow coal.
To make char cloth:
- Cut 100% cotton fabric into 2-3 inch squares.
- Place them in a small metal tin with a pinhole in the lid (an Altoids tin works perfectly).
- Hold the tin over a flame until smoke stops coming from the pinhole — about 5-10 minutes.
- Let it cool completely before opening.
The resulting char cloth catches sparks reliably and can be stored indefinitely in a dry container. Making a supply of char cloth before a crisis is a fundamental prepper skill. It costs nothing if you have old cotton clothing.
Bow Drill Fire Starting: The Most Reliable Primitive Ignition Method
The bow drill is the most practical primitive fire-starting method — requiring no manufactured materials whatsoever. In a true long-term SHTF collapse scenario where all stored supplies are exhausted, the bow drill is your last resort and your most important skill.
The system works through friction. A hardwood spindle is rotated rapidly against a softer wood fireboard using a bow to drive rotation. The friction creates a fine powder of combusted wood dust that gradually accumulates into a glowing coal, which is then transferred to a tinder bundle.
For beginners, the Wilderness Solutions bow drill fire starting kit provides pre-matched wood combinations that eliminate one of the biggest beginner failure points — choosing incompatible woods. Pre-made kits let you focus on technique rather than material selection when you're learning.
Wood Selection and Technique for Bow Drill Success
Wood matching is critical. Both the spindle and fireboard must be dry, straight-grained, and appropriately matched in hardness. Good combinations include:
- Willow on willow — one of the easiest combinations for beginners
- Cedar spindle on basswood fireboard — common and effective in North America
- Mullein stalk on cottonwood root — excellent if you're in the right region
Bow drill failure is almost always due to moisture in the wood, misaligned technique, or inconsistent pressure. Practice this skill before you need it. Experienced practitioners can produce fire in under two minutes; beginners often take 20 minutes or fail entirely. The skill gap is real. For further reading on related primitive skills, our article on Primitive Fire Starting: Methods That Work covers additional techniques in depth.
Tinder Preparation: The Skill That Determines Whether You Actually Get Fire
Every ignition method in existence fails without proper tinder preparation. This is where most beginners lose their fire. A spark or coal is fragile — it needs a carefully prepared nest of fine, dry, combustible material to survive the transition from ember to flame.
Best natural tinders by environment:
- Urban/suburban: Dry lint from clothes dryers, shredded newspaper, cotton balls soaked in petroleum jelly, fatwood shavings
- Woodland: Dried grass, cattail fluff, birch bark inner paper, dried bracket fungus, pine resin
- Desert: Dry yucca fiber, shredded dried grass, dried animal dung
Store commercial tinder — petroleum jelly cotton balls, WetFire cubes, or fatwood sticks — in a waterproof container in your bug out bag and home survival kit. They're lightweight, compact, and will save your life when natural tinder is wet or unavailable.
Fire Safety and Situational Awareness in Emergency Scenarios
Building a fire in a survival scenario demands the same situational awareness you apply to every other security decision. An open fire at night is visible for miles. Smoke is visible during the day at even greater distances. In a SHTF environment, fire discipline matters as much as fire-making skill.
Consider building smaller fires that produce less smoke. Use hardwoods rather than green or resinous woods when stealth matters. Build fires in depressions or behind natural screens when possible. In an urban survival scenario, fires on rooftops or in open areas may attract unwanted attention from desperate people. Always have a plan to extinguish quickly.
Fire is also a critical component of survival signaling — smoke signals and fire columns are among the most effective rescue signals available. Read more in our guide on Signal Mirror, Whistle, and Smoke: How to Signal for Rescue When No One Can Hear You.
Building Your Fire-Starting Kit: Recommended Gear for Every Level
A well-rounded fire-starting loadout doesn't need to be expensive or complex. Here's a practical framework:
- Primary: Quality ferro rod (the Überleben Zünden or Light My Fire Swedish FireSteel are excellent choices)
- Secondary: Flint and steel kit with a supply of homemade char cloth
- Emergency tinder: Petroleum jelly cotton balls in a waterproof container
- Primitive backup: A practiced bow drill skill set, with a pre-made kit for learning
- Redundancy: A Bayite ferro rod as a budget duplicate stored in a secondary bag or vehicle kit
All five of the fire-starting products mentioned in this article are worth having. The Bayite ferro rod serves as an affordable backup. The Light My Fire Swedish FireSteel is your everyday EDC option. The Überleben Zünden handles winter conditions. The Coghlan's flint and steel kit teaches a historical skill with real-world staying power. The Wilderness Solutions bow drill kit bridges the gap between reading about primitive fire-starting and actually doing it.
For a complete overview of what belongs in every preparedness loadout, see our Complete 72-Hour Bug Out Bag Checklist for Urban Survival.
What You'll Need
- Tinder materials (dry grass, birch bark, char cloth, cotton balls, or dryer lint)
- Kindling (small dry twigs and sticks)
- Fuel wood (larger dry branches and logs)
- Ferro rod and striker, or magnifying lens, or bow drill components
- Knife or multi-tool
- Fatwood or other resinous materials (optional but helpful)
- Fire board and spindle materials for friction methods
Step-by-Step Instructions
Step 1: Gather and Prepare Your Tinder Bundle
Collect the driest, most fibrous materials available such as birch bark, dry grass, cattail down, or pine needles. Process your tinder by shredding it into fine fibers and fluffing it to maximize surface area and air flow. Create a nest-shaped bundle about the size of a softball that will catch and hold your initial spark or ember. Keep your prepared tinder bundle protected from moisture and wind until you're ready to use it.
Step 2: Select Your Ignition Method Based on Conditions and Available Resources
Evaluate your environment, available materials, and skill level to choose the most appropriate fire-starting method. Ferro rods work in wet conditions and produce intense sparks, making them ideal for beginners and adverse weather. Friction methods like bow drills or hand drills require more skill and dry materials but work without any manufactured tools. Solar ignition with a magnifying lens or water-filled container works only in bright sunlight but requires minimal effort.
Step 3: Create Your Ignition Point Using Your Chosen Method
If using a ferro rod, strike downward at a 45-degree angle with firm, deliberate strokes, directing sparks into your tinder bundle. For friction methods, maintain steady, consistent pressure and speed on your bow drill or hand drill until you see smoke and create a coal in the notch. With solar ignition, focus the concentrated beam of light onto the darkest part of your tinder and hold it steady until smoke appears. Practice your technique multiple times before you're in a true survival situation.
Step 4: Transfer and Nurture Your Ember Into Flame
Once you've created a glowing ember or caught a spark in your tinder, gently lift the bundle and blow on it with steady, controlled breaths. Cup the tinder loosely in your hands to protect it from wind while allowing oxygen to feed the ember. Continue blowing with increasing intensity as smoke builds until flames suddenly burst forth. This critical transition requires patience—rushing or blowing too hard can extinguish your ember.
Step 5: Build Your Fire Structure Progressively
Immediately place your flaming tinder bundle under a pre-built tepee structure of small kindling sticks. Gradually add larger pieces of kindling as the flames grow, always ensuring good airflow through the structure. Transition to finger-thick sticks, then wrist-thick branches, and finally larger fuel logs once you have established flames. Never smother your young fire with pieces that are too large too soon.
Step 6: Maintain and Protect Your Fire
Position yourself to block wind while still allowing adequate oxygen flow to reach the flames. Keep a reserve supply of dry tinder, kindling, and fuel wood nearby to sustain your fire throughout its use. Add fuel logs deliberately and methodically, placing them to create stable structure and consistent heat. Build a reflector wall with rocks or logs to direct heat toward your shelter or body if needed for warmth.
Step 7: Practice Each Method in Controlled Conditions
Master multiple fire-starting techniques before you need them in an actual emergency situation. Dedicate time to practicing each method in various weather conditions—rain, wind, cold, and humidity—to understand their limitations and requirements. Document what works best with different tinder types and environmental factors so you build reliable, repeatable skills. Successful survival fire-starting comes from muscle memory and experience, not theoretical knowledge alone.
Frequently Asked Questions
What is the easiest fire-starting method to learn for beginners?
For most beginners, a ferro rod is the easiest reliable fire-starting method to learn. Unlike bow drills or flint and steel, the technique is straightforward, the equipment is inexpensive, and proficiency comes quickly with practice. Start with a larger diameter rod — it's easier to grip and produces more sparks per stroke. Pair it with petroleum jelly cotton balls as your tinder and you'll be lighting fires consistently within a few practice sessions. Once you're confident with a ferro rod, layer in more complex skills like flint and steel and eventually the bow drill.
How long does a ferro rod last, and how many strikes can I get from one?
A quality ferro rod from a reputable manufacturer typically provides between 3,000 and 15,000 strikes depending on diameter and alloy composition. Thicker rods last significantly longer. In practical terms, a good ferro rod used daily in a survival scenario could last years. The Light My Fire Swedish FireSteel Army model, for example, is rated for approximately 12,000 strikes. Thin budget rods may only deliver a few hundred reliable strikes before they're worn down. This is why diameter matters — buy the largest rod that fits your carry requirements.
Can I practice primitive fire-starting skills if I live in an apartment or the city?
Absolutely. Ferro rod practice only requires a spark-catching tinder and a fireproof surface — a cast iron skillet on a balcony or even in a parking lot works fine. Char cloth can be made on a camping stove or outdoor grill. Flint and steel can be practiced indoors over a fireproof surface. The bow drill requires more space and produces smoke, making it better suited to a park, campground, or backyard — but urban preppers can and should schedule regular skill-building sessions outside their home environment. You don't need land to be prepared. You need deliberate practice.
Affiliate Disclosure: SHTF Plan participates in the Amazon Services LLC Associates Program. Some links are affiliate links — we may earn a small commission at no extra cost to you.