Improvised Splints, Slings, and Fracture Care: How to Treat Broken Bones When There's No ER
When hospitals are unreachable, a broken bone can become life-threatening. Learn how to stabilize fractures and manage pain with what you have on hand.
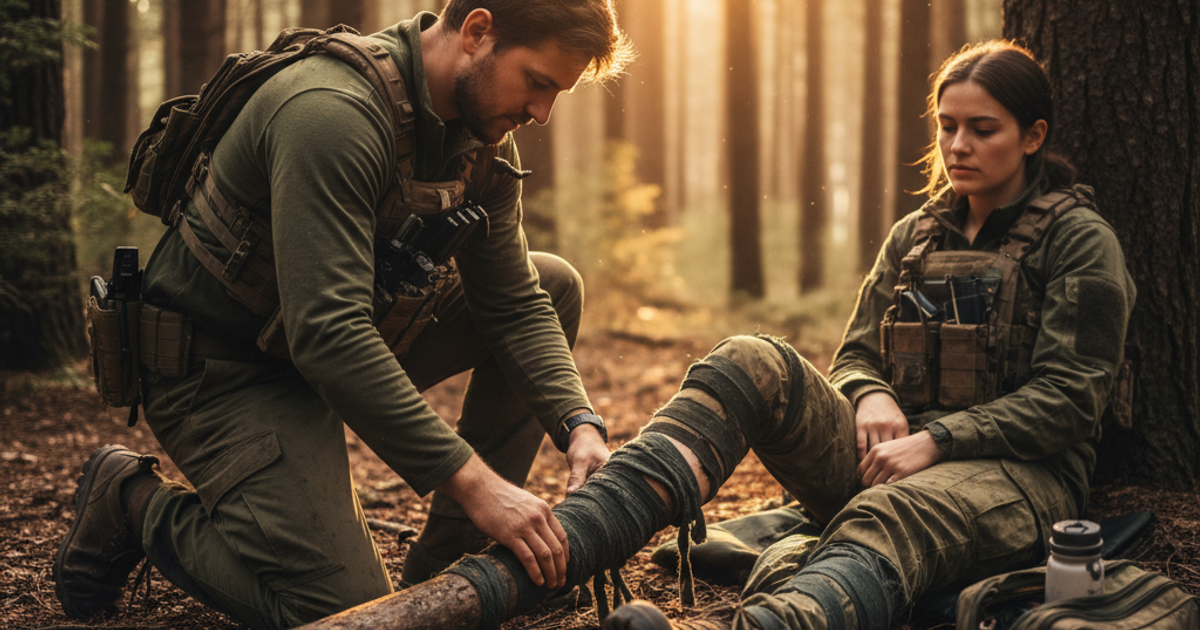
A broken bone is one of the most painful and debilitating injuries you can suffer. In normal times, you'd call 911, get a ride to the ER, and let trained professionals handle it. But when SHTF — when a major earthquake collapses infrastructure, a hurricane cuts off roads for days, or a grid-down event stretches emergency services to the breaking point — that ambulance may not be coming. According to the American Academy of Orthopaedic Surgeons, approximately 6.8 million fractures occur in the United States every year. In a prolonged disaster scenario, a significant number of those injuries will happen without access to professional medical care. Knowing how to improvise fracture care could be the difference between a full recovery and a life-altering complication.
This guide is written for real-world preppers — whether you're in a high-rise apartment in Chicago, a suburb outside Atlanta, or a homestead in rural Montana. The principles of field fracture management don't change based on your zip code. What changes is what materials you have on hand. We'll cover both.
For deeper context on treating a full range of injuries in the field, read our companion guide on Field Medicine: How to Treat Cuts, Burns, and Infections When There's No Hospital. And if you want to build out your full medical preparedness posture, our article on When EMS Is Gone: How to Build a Trauma Kit That Keeps Your Family Alive is required reading.
Understanding Fractures: What You're Actually Dealing With
Not all broken bones are equal. A closed fracture means the bone is broken but the skin is intact. An open (compound) fracture means the bone has broken through the skin — this is a true emergency with a high risk of infection and blood loss. A stress fracture is a hairline crack, often not immediately obvious. In the field, your primary job is not to diagnose the exact type — it's to immobilize, protect, and manage pain and swelling until definitive care is available.
Signs of a fracture include: visible deformity, severe localized pain, inability to bear weight or use the limb, swelling and bruising, a sensation or sound of snapping at the time of injury, and numbness or tingling distal to the injury site. The last two symptoms — numbness and tingling — are red flags indicating possible nerve or vascular compromise. If circulation is impaired below a fracture, you are dealing with a limb-threatening emergency and need to act fast.
What You'll Need
Tools
- Scissors or trauma shears
- Knife or multitool for cutting improvised splint materials
Supplies
- SAM Splint moldable aluminum foam splint
- Mueller arm sling adjustable shoulder immobilizer
- Ace Brand elastic bandage compression wrap
- Triangular bandage or large cloth (for slings)
- Padding material (foam, clothing, towels)
- Rigid splint material (boards, sticks, cardboard, trekking poles)
Before You Touch the Injury: Scene Safety and Assessment
Your first job before treating any fracture is situational awareness. Is the scene still dangerous? If someone broke an arm during an earthquake, are there still falling aftershocks? In an urban environment, is there a traffic hazard? In a rural or wilderness setting, is there a risk of the patient going into shock in a cold environment? Don't create two casualties. Get yourself and the patient to a safe location before beginning treatment.
Next, do a rapid head-to-toe assessment. Fractures are dramatic and painful, but they can distract from more immediately life-threatening injuries. Prioritize: airway, breathing, circulation, and severe bleeding first. If there is major arterial bleeding associated with a fracture — common with femur fractures — hemorrhage control comes before splinting. A North American Rescue tourniquet and trauma bandage kit should be in every serious prepper's medical bag, as controlling catastrophic bleeding is always the first clinical priority.
Similarly, if an open fracture is present, wound management takes priority. Control bleeding with direct pressure, cover the wound with a clean dressing, and do not attempt to push the bone back in. The Quikclot Sport trauma first aid kit contains hemostatic gauze that can dramatically reduce blood loss from serious wounds around open fractures.
How to Build an Improvised Splint When You Have No Medical Supplies
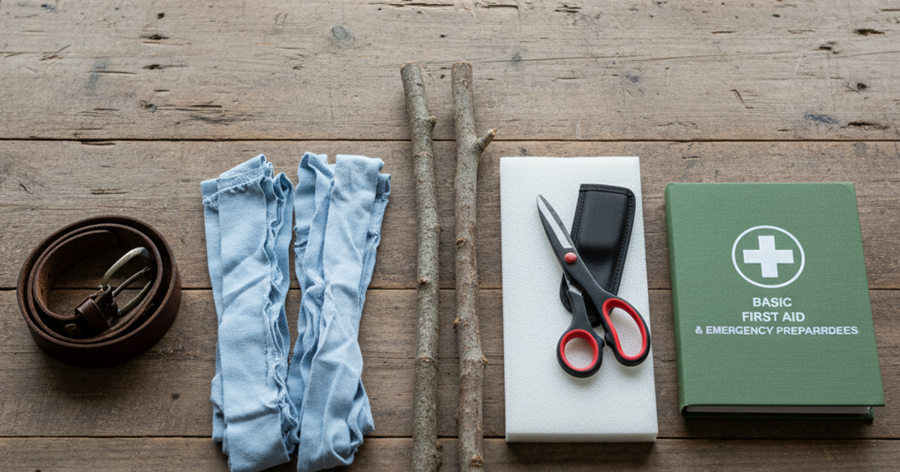
The goal of splinting is simple: immobilize the bone ends and the joints above and below the fracture. Immobilization reduces pain, prevents further tissue damage, and reduces the risk of turning a closed fracture into an open one.
Rigid materials you can use as splint supports: wooden boards, sturdy sticks or branches, trekking poles, tent poles, rolled-up magazines or newspapers (surprisingly effective for forearm fractures), folded cardboard, PVC pipe, or even a ski. In an urban apartment setting, think: a cutting board, a ruler, a yardstick, or the rod from a closet organizer.
Padding is non-negotiable. Never apply a rigid splint directly against skin. Use clothing, foam sleeping pad material, towels, socks, or bubble wrap. A poorly padded splint can create pressure sores, restrict circulation, or cause nerve damage over time.
Securing materials: Bandanas, strips of torn clothing, duct tape, paracord (padded underneath), belt straps, or zip ties (used carefully and not directly on skin). Avoid anything that will cut off circulation. Check frequently.
For preppers who want a purpose-built solution, the SAM Splint moldable aluminum foam splint is one of the best investments you can make. It's lightweight, packable, reusable, and can be bent into virtually any anatomical shape. It takes up almost no room in a bug out bag and covers fractures of the forearm, wrist, ankle, and lower leg effectively.
Another professional-grade option is the Readi-Splint universal vacuum splint, which conforms to the limb's exact shape and then rigidifies when air is evacuated. These are used by EMS and military medics and provide exceptional immobilization. Worth stocking if you're building a serious field medical kit.
How to Construct a Field Sling for Arm and Shoulder Injuries
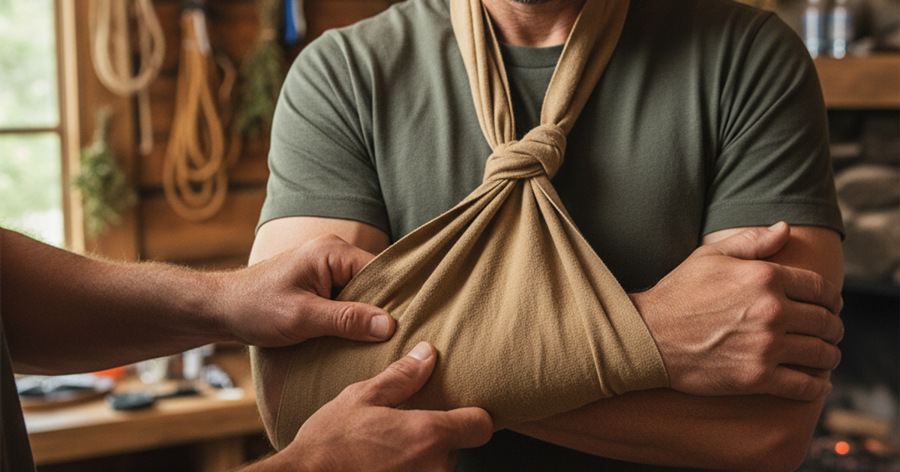
Slings are used to support injured arms, reduce pain from clavicle (collarbone) fractures, and immobilize the arm against the body for shoulder injuries. The most common improvised sling is the triangular bandage sling.
To improvise a triangular bandage from a large square piece of cloth (roughly 40" x 40"), fold it diagonally to create a triangle. Place the point of the triangle at the elbow, with one end going over the uninjured shoulder and across the back of the neck. The other end comes up from under the wrist and meets behind the neck. Tie the ends together with a square knot positioned off-center (not on the spine). Fold the point at the elbow over and pin or tuck it. The hand should be slightly elevated — fingers visible so you can monitor circulation and sensation.
If you have the budget to stock a ready-made solution, the Primacare Medical arm sling triangular bandage is a compact, prefolded option that stores easily and can be deployed in under a minute. It's inexpensive enough to keep multiples in your emergency preparedness kit, your vehicle kit, and your bug out bag.
For more serious shoulder injuries or when additional immobilization is needed, a sling and swathe combines the basic sling with a wrap around the torso binding the arm to the body. This is the preferred approach for dislocated shoulders and proximal humerus fractures. The Mueller arm sling adjustable shoulder immobilizer provides excellent support with adjustable straps and is worth having in any serious survival gear medical kit.
Specific Fractures and Field Treatment Approaches
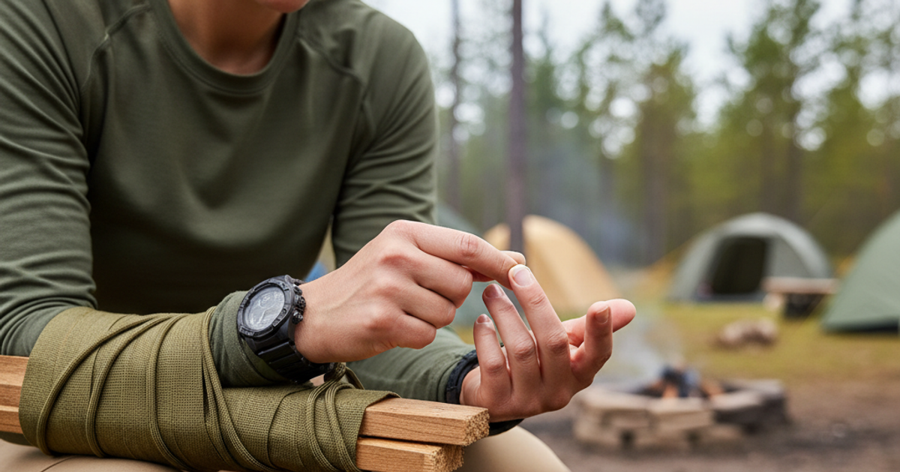
Wrist and forearm fractures are among the most common, especially from fall injuries during evacuations. Splint from the palm to mid-forearm with the wrist in a neutral or slightly extended position. Apply a SAM splint or improvised padded rigid support, secure with an elastic bandage, and support in a sling. Ace Brand elastic bandages are essential here — they provide compression to reduce swelling while conforming to the limb's shape. Keep multiple sizes in your kit.
Ankle and lower leg fractures are treated with a rigid splint extending from the ball of the foot to below the knee. An improvised "pillow splint" using a sleeping bag or blanket wrapped around the ankle and secured provides excellent padding and some rigidity. The patient should be non-weight-bearing.
Femur (thigh bone) fractures are extremely serious. The femur is the largest bone in the body and a fractured femur can cause blood loss of 1-2 liters into the surrounding tissue — enough to cause hemorrhagic shock. A traction splint is the ideal treatment, but these are complex to improvise. In the field, the priority is immobilization of both the hip and knee joints, management of swelling, and urgent evacuation. Monitor for signs of shock: pale, cool, clammy skin; rapid weak pulse; altered mental status.
Clavicle (collarbone) fractures are common and typically managed with a simple sling. A figure-8 clavicle brace can be improvised but is difficult to construct correctly in the field. Keep the arm supported and the patient comfortable.
Rib fractures present a special challenge. The old approach of tight wrapping is now discouraged — it restricts breathing and can lead to pneumonia. Simply provide pain management (OTC analgesics if available), encourage the patient to take regular deep breaths despite the pain, and monitor for signs of pneumothorax (tension in the chest, increasing difficulty breathing, absent breath sounds on one side).
Managing Pain and Monitoring for Complications
Pain management in the field is limited but real. Ibuprofen (an NSAID) addresses both pain and inflammation and is the preferred OTC option for fractures if the patient has no contraindications. Acetaminophen addresses pain but not inflammation. Aspirin is generally not recommended due to its blood-thinning effects, especially in trauma patients.
Elevation reduces swelling dramatically. Any splinted limb should be elevated above the level of the heart whenever possible. Apply ice or a cold pack for the first 24-48 hours if available — 20 minutes on, 20 minutes off.
Circulation, sensation, and movement (CSM) checks must be performed before and after splinting, and every 30-60 minutes thereafter. Ask the patient: Can you feel me touching your fingers/toes? Can you wiggle them? Check the nail beds — press and release and confirm blood returns within 2 seconds. If any of these checks are abnormal, the splint may be too tight. Loosen it and reassess.
Step-by-Step Instructions
Step 1: Assess the Scene and Patient for Life-Threatening Injuries
Before addressing any fracture, confirm the scene is safe and rule out airway compromise, severe breathing difficulty, and uncontrolled hemorrhage. Control major bleeding with direct pressure, hemostatic gauze, or a tourniquet before splinting. A fracture that distracts from an arterial bleed can kill in minutes.
Step 2: Expose and Evaluate the Injured Limb
Carefully cut or remove clothing over the injury site — do not pull clothing over a fractured limb. Look for deformity, open wounds, bone protrusion, severe swelling, and bruising. Check pulse, sensation, and movement distal to the injury and document your baseline findings.
Step 3: Gather and Prepare Your Splinting Materials
Select a rigid support that extends beyond the joint above and below the fracture. Cut or tear padding material and prepare your securing strips (bandages, cloth strips, or elastic wraps). Have everything laid out before you begin so you can work efficiently and minimize patient movement.
Step 4: Apply Padding Generously Over the Injury Site
Wrap the injured limb in soft padding — clothing, foam, or commercial roll padding — before applying any rigid component. Pay extra attention to bony prominences like the wrist, ankle, and knee. Inadequate padding is one of the most common causes of field splinting complications.
Step 5: Position and Apply the Rigid Splint
Place the rigid support (SAM splint, board, sticks, or other improvised material) along the padded limb, spanning the joint above and below the fracture. Mold the splint to the natural shape of the limb — do not force a fractured limb into an unnatural position unless circulation is critically compromised. For SAM splints, bend a curved ridge along the center for added rigidity.
Step 6: Secure the Splint Without Restricting Circulation
Wrap the splint firmly with elastic bandages or cloth strips, working from distal to proximal (from the far end toward the body). You should be able to slip one finger under the wrap. Secure with clips, tape, or tied strips — never tie directly over the fracture site or over a bony prominence.
Step 7: Construct and Apply a Sling for Upper Extremity Injuries
For arm and wrist fractures, construct a triangular sling using a large cloth folded diagonally. Support the forearm so the hand is slightly elevated and the fingers are visible. Add a swathe (wrap around the torso) for shoulder injuries to prevent movement. Ensure the knot is positioned to the side, not the spine.
Step 8: Perform Circulation, Sensation, and Movement Checks
Immediately after securing the splint, recheck CSM: capillary refill, skin color, ability to feel light touch, and ability to wiggle fingers or toes. Repeat checks every 30-60 minutes. If you detect any deterioration, loosen the splint immediately and reassess. Elevation of the limb above heart level should begin immediately and continue as long as possible.
Recommended Gear for Your SHTF Medical Kit
Building a comprehensive fracture management kit doesn't require a medical degree — it requires deliberate planning. The Adventure Medical Kits Wilderness First Aid kit is one of the most complete pre-assembled kits available for preppers. It includes splinting materials, wound care supplies, blister treatment, and a comprehensive manual — everything organized and ready to deploy in a true off grid or disaster scenario. It's an excellent complement to our deeper guide on Wilderness Medicine for Preppers: How to Treat Life-Threatening Injuries When Help Is Never Coming.
For urban preppers in apartments or suburban homes, fracture supplies don't require much storage space. A small dedicated medical bin with SAM splints, elastic bandages, triangular bandages, and basic analgesics can be stored in a closet, under a bed, or in a vehicle. If you're building out a broader survival kit, visit our Recommended Survival Gear & Equipment page for a curated list of field-tested supplies.
Also consider the role of stockpiling medications. Managing pain from fractures in a long-term grid-down scenario will require more than what's typically on hand. Our article on Stockpiling Antibiotics and First Aid Supplies: What to Hoard Before a Medical Crisis Hits walks through the smart approach to building a long-term medical supply for exactly these scenarios.
Frequently Asked Questions
How do I know if a bone is actually broken or just badly bruised?
In the field without X-ray equipment, the distinction isn't always possible — and for practical purposes, it doesn't need to be. The field rule is simple: if there is significant localized pain over a bone, swelling, and inability to use the limb normally, treat it as a fracture. Splinting a bad bruise causes no harm. Failing to splint a fracture can cause serious additional injury. Point tenderness directly over the bone (rather than diffuse soft tissue pain) is the most reliable field indicator of a fracture.
Can I straighten a broken limb that looks crooked before I splint it?
Generally, splint the limb in the position you find it. Attempting to realign a fracture without training and proper equipment can cause additional tissue, nerve, and vascular damage. The critical exception is when circulation is compromised distal to the fracture — if the limb below the break is cold, pulseless, or turning blue, a single gentle attempt at realignment is warranted because the limb may not survive without it. This is a last resort in a true SHTF scenario with no hope of rapid evacuation.
What should I include in my bug out bag for fracture emergencies?
At minimum: two SAM splints (one 36-inch for lower extremity, one 18-inch for upper extremity), two triangular bandages, four elastic bandage wraps in assorted sizes, medical tape, ibuprofen and acetaminophen, nitrile gloves, and trauma shears. For a more complete setup, add a tourniquet, hemostatic gauze, and a comprehensive wilderness first aid kit. These items collectively weigh less than two pounds and can handle the majority of fracture scenarios you'll encounter in an urban survival or rural emergency setting.
Affiliate Disclosure: SHTFPlan.net participates in the Amazon Services LLC Associates Program. Some links are affiliate links — we may earn a small commission at no extra cost to you.