Dead of Night: How to Choose and Use Night Vision Optics for Home Defense and Perimeter Security
When the lights go out and threats move under cover of darkness, night vision optics can mean the difference between seeing the threat and becoming the victim.
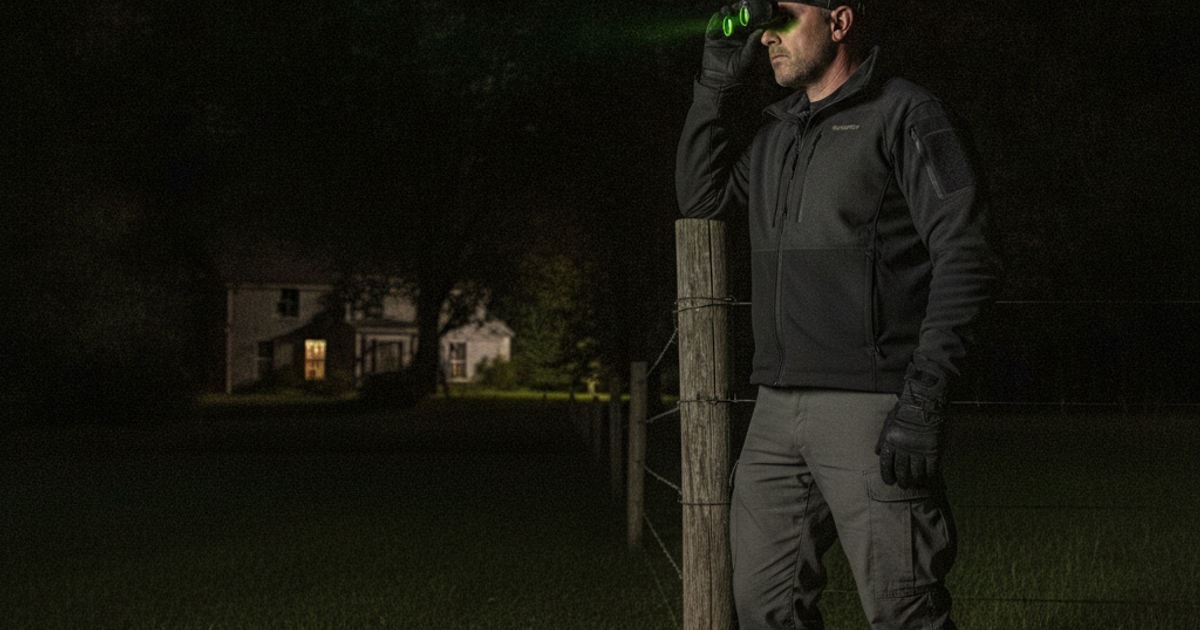
When the grid goes down or a genuine SHTF scenario unfolds, the hours between dusk and dawn become the most dangerous period of any 24-hour cycle. Criminals, opportunists, and hostile actors know that darkness is their ally — and historically, they're right. According to FBI crime statistics, a disproportionate percentage of home invasions and burglaries occur during nighttime hours, when visibility is lowest and response times are slowest. For the serious prepper, that gap in visibility is unacceptable.
Night vision and thermal optics aren't just military toys anymore. Affordable consumer-grade options have brought genuine low-light and no-light capability within reach of the average homeowner, apartment dweller, and rural homesteader alike. Whether you're watching a 40-acre perimeter in rural Montana or monitoring the stairwell outside a third-floor apartment in Chicago, the right optic can be the difference between detecting a threat early and being caught completely off guard. This guide will help you understand your options, build a layered nocturnal detection system, and integrate night vision into your broader emergency preparedness and home defense plan.
What You'll Need
Tools
- Pulsar Axion thermal monocular
- AGM Global Vision night vision monocular
- Bushnell Equinox Z digital night vision binoculars
- Mounting hardware or head mount strap for hands-free use
- IR illuminator (if using image-intensifier-based optics)
Supplies
- Spare batteries (AA, CR123A, or proprietary — match to your device)
- Anti-fog lens wipes
- Protective carry case or pouch for each optic
- Map of your property or building layout for sector assignments
Understanding Night Vision vs. Thermal: Which Technology Is Right for You?
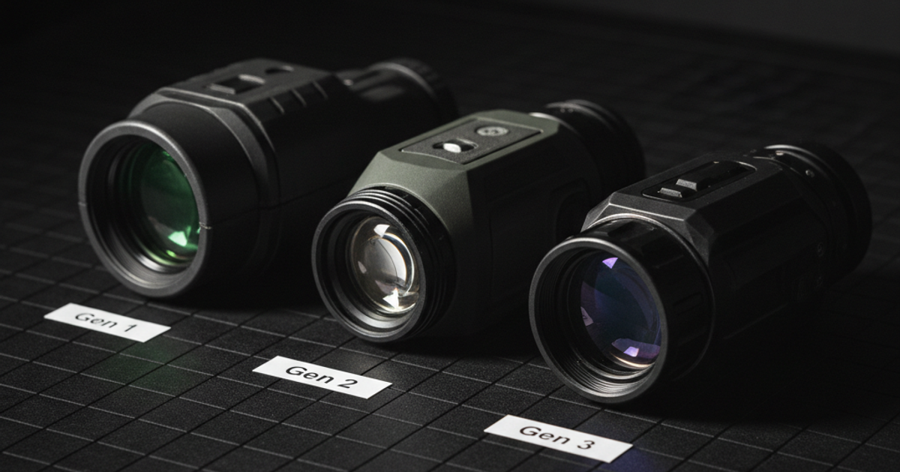
Before you spend a dollar on optics, you need to understand what you're actually buying. Night vision and thermal imaging are fundamentally different technologies with different strengths, weaknesses, and ideal applications. Conflating the two is one of the most common mistakes new preppers make.
Traditional night vision (image intensification, or I²) works by amplifying available ambient light — moonlight, starlight, or distant artificial glow — through a photomultiplier tube. The result is a bright green or black-and-white image that lets you see in near-total darkness. Generation 1 (Gen 1) devices are the most affordable and widely available, offering basic capability for under $300. Gen 2 and Gen 3 devices — used by law enforcement and the military — offer dramatically better resolution, range, and performance in absolute darkness, but they carry price tags from $1,500 to $10,000 or more.
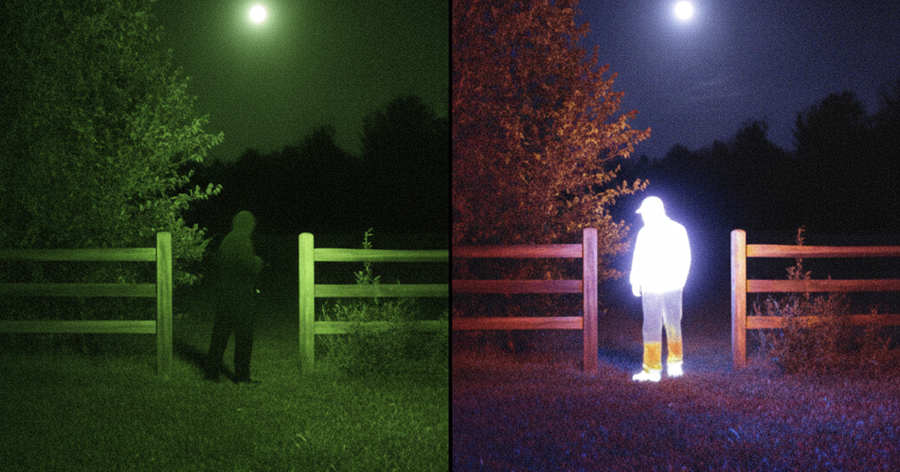
Thermal imaging doesn't amplify light at all. Instead, it detects infrared radiation — heat — emitted by all objects. A warm human body stands out brilliantly against a cool nighttime background, regardless of whether there's any ambient light whatsoever. Thermal optics work in complete darkness, through light fog, and in smoky conditions that would blind conventional night vision. They cannot, however, see through glass, and they don't provide the fine facial detail that image-intensification optics can at close range.
For home defense and perimeter security, the ideal setup uses both technologies in a layered approach: thermal for initial detection at range, and night vision for positive identification up close. If budget limits you to one device, thermal wins for pure threat detection, while night vision wins for identification and weapon-mounted applications.
Choosing the Right Optic for Your Environment and Budget
Your living situation matters enormously here. Urban and suburban preppers face different challenges than rural homesteaders — and thankfully, the optics market offers solutions at every price point and for every environment.
Entry-Level Options for Urban and Suburban Preppers
If you're in an apartment, condo, or suburban home with limited sightlines, you don't need a device rated for 500-yard detection. A compact, affordable monocular or handheld binocular gives you the ability to scan a parking lot, check a dark stairwell, or observe movement outside a ground-floor window. The Rexing B1 night vision binoculars infrared represent an accessible entry point for preppers who want reliable IR-enhanced vision without a significant financial investment — they're compact, battery-friendly, and easy to hand off to another member of your household during a watch rotation.
Similarly, the Night Owl Optics NOB5X night vision binocular offers a user-friendly binocular form factor with built-in IR illumination, making it a solid choice for someone new to night vision who wants a familiar, intuitive interface. For suburban use — scanning a backyard, driveway, or side yard — this form factor is highly practical.
Mid-Range Digital Night Vision
Digital night vision captures an image via a sensor and renders it on an internal display, similar to a camera with night mode. These devices are generally more affordable than true image-intensification tubes, more durable, and increasingly capable. The Bushnell Equinox Z digital night vision binoculars are a well-regarded mid-range option that provides a clear image out to useful distances for most home defense scenarios, with a video output feature that lets you record what you observe — a critical capability for documentation during a prolonged grid-down situation.
For weapon-mounted applications, the Sightmark Wraith HD digital night vision scope is one of the most popular options in the prepper and home defense community. It mounts to a standard Picatinny rail, offers both day and night capability, and includes a built-in IR illuminator. It's a legitimate force multiplier for rural property defense where engaging a threat at distance may become necessary.
Thermal Options: From Budget to Professional
The FLIR Scout TK thermal monocular is frequently recommended as the best entry-level thermal device for civilian preppers. It detects heat signatures out to several hundred yards, fits in a cargo pocket, and runs on a single USB-chargeable battery. It won't identify faces, but it will tell you immediately whether that shape in the shadows is a deer or a person — and in a grid-down scenario, that distinction is everything.
Stepping up in capability, the Pulsar Axion thermal monocular offers significantly improved resolution, longer detection range, and Pulsar's well-regarded image processing. This is a serious piece of kit for the prepper who wants professional-grade thermal performance in a compact handheld form factor. It's particularly valuable for rural homesteaders who need to monitor wood lines, field edges, and approach routes at range.
For those who want thermal integrated with a rifle scope, the ATN Thor 4 thermal rifle scope is a top-tier option that combines detection, identification, and engagement capability in a single platform. It includes ballistic calculators, video recording, WiFi streaming, and a dedicated rangefinder input. This is the choice for the well-resourced rural prepper who takes perimeter defense seriously. Paired with our article on choosing the right firearm for home defense, this combination represents a comprehensive nighttime defensive capability.
For a versatile handheld observation device, the AGM Global Vision night vision monocular rounds out a layered observation kit nicely — compact, affordable, and capable enough for close-in perimeter checks and hallway clearance in a dark structure.
Building a Layered Nocturnal Security System
No single optic covers every angle. Effective nighttime situational awareness requires a layered approach that combines passive detection, active observation, and denial of easy approach. Think of it in three rings: outer detection, middle observation, and inner response.
The outer ring uses your longest-range thermal or night vision device to scan likely approach routes — roads, tree lines, alleys, and open fields. The middle ring involves camera systems, motion-activated lighting, and trip-wire alarms that alert you to movement you may have missed. The inner ring is your immediate response capability — a weapon-mounted optic, a handheld monocular, or a light/laser combination that lets you positively identify and respond to a threat that has penetrated your outer layers.
For perimeter alarm integration, see our detailed guide on perimeter alarms and trip wires for SHTF intruder detection. And if you're building a comprehensive home security camera system to complement your optics, check out our article on setting up a home security camera system for SHTF.
Step-by-Step Instructions
Step 1: Assess Your Environment and Define Your Threat Perimeter
Walk your property or building during daylight and identify every likely approach route a threat could use after dark. Map choke points, dead zones, and areas with natural concealment like dense shrubs, parked vehicles, or shadows cast by structures. In an urban apartment, this includes stairwells, hallways, and the approach to your front door. In a rural setting, this extends to fence lines, tree lines, driveways, and low-ground approach routes.
Step 2: Select Your Primary and Secondary Optics Based on Range Requirements
Choose a primary detection device based on your longest required observation distance. Rural preppers with sightlines beyond 200 yards should prioritize thermal. Urban and suburban preppers with sightlines under 100 yards can work effectively with quality digital night vision. Select a secondary handheld optic for close-in identification and interior checking.
Step 3: Mount and Zero Any Weapon-Attached Optics in Daylight
If using a weapon-mounted night vision or thermal scope, mount it to your firearm and zero it during daylight hours before you depend on it in darkness. Verify zero at your most likely engagement distance. If your device has a separate IR illuminator, confirm it activates correctly and is aimed at the same point of impact as your reticle.
Step 4: Conduct Night Familiarization Walks to Understand Your Optic's Limitations
Take each optic out after dark and walk your perimeter or scan your environment at different distances and angles. Learn what your device can and cannot see — every optic has blind spots, resolution limits, and sensitivity thresholds you must know before a crisis forces you to learn them under stress. Note how weather conditions like humidity and ambient temperature affect thermal performance.
Step 5: Establish Sector Assignments for Watch Rotations
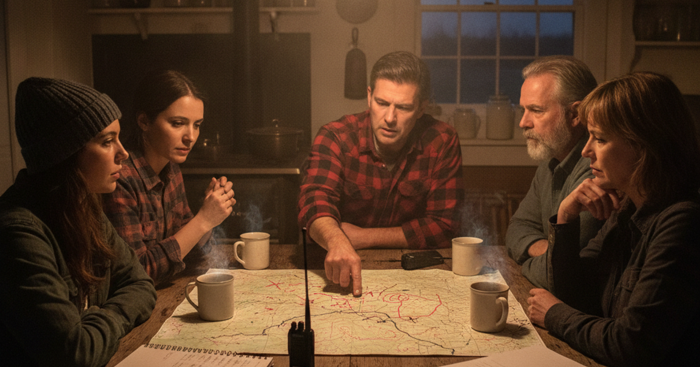
Assign specific observation sectors to each device and, if you have a survival group or family watch rotation, to each person. Clear sector boundaries prevent overlapping observation that wastes attention and leaves other areas unmonitored. Document these sectors on a hand-drawn map so every member of your group understands their responsibilities. For guidance on structuring watch rotations, see our article on setting up a rotating security watch schedule for your survival group.
Step 6: Integrate Detection Devices with Passive Alert Systems
Night vision optics are active tools — someone must be looking through them. Passive detection systems (motion sensors, perimeter alarms, trail cameras with IR triggers) work continuously without requiring active monitoring. Connect your passive alerts so that when one triggers, you know which sector to immediately observe with your active optic.
Step 7: Test and Maintain All Devices Regularly
Night vision and thermal devices require regular maintenance. Clean lenses with appropriate anti-fog optical wipes. Check and replace batteries on a schedule — never let them run down to empty before replacement. Store devices in their protective cases with silica gel desiccant packets to prevent moisture damage. Test every device at least monthly to confirm it's functional before you need it.
Step 8: Practice Positive Identification Protocols Before Engaging Any Target
The single most important skill in nighttime home defense is positive identification before any defensive action. Your thermal device will show you a heat signature — your night vision will show you a shape. Neither automatically tells you whether that shape is a threat, a family member, a neighbor, or an animal. Establish clear rules of engagement, communication signals, and identification challenges with every person in your household before a crisis occurs.
Frequently Asked Questions
What is the difference between night vision and thermal imaging for home defense?
Night vision amplifies existing ambient light to let you see in low-light conditions, while thermal imaging detects heat signatures and works in complete darkness, fog, and smoke. For home defense, thermal is generally superior for initial threat detection at range because it doesn't require any light source. Night vision excels at identification at closer ranges and is often more affordable at entry-level price points. The best setup for a serious prepper uses both technologies in a layered approach.
Can you use night vision optics in an apartment or urban setting?
Absolutely. Urban preppers with limited sightlines don't need long-range thermal devices — a compact digital night vision monocular or binocular is sufficient for checking a dark hallway, scanning a parking lot from a window, or monitoring the immediate approach to your door. The key is matching the device's detection range to your actual environment. A $300 entry-level device can provide meaningful capability in an urban apartment setting where your observable perimeter extends only 50-100 feet.
How do I maintain my night vision or thermal optic for long-term emergency preparedness?
Store all optics in padded, sealed cases with silica gel desiccant to prevent moisture damage. Clean lenses only with optical-grade cloths — never paper towels or clothing. Rotate batteries out before they fully discharge, and keep a supply of spare batteries in your bug out bag or emergency preparedness kit matched to each device's requirements. Inspect all optics monthly and conduct a full functional test in darkness at least quarterly to confirm performance hasn't degraded.
Affiliate Disclosure: SHTFPlan.net participates in the Amazon Services LLC Associates Program. Some links are affiliate links — we may earn a small commission at no extra cost to you.