Surveillance on a Budget: How to Set Up a Home Security Camera System for SHTF
A well-placed camera system can detect threats before they reach your door. Here's how to build an affordable, reliable surveillance setup for any emergency.
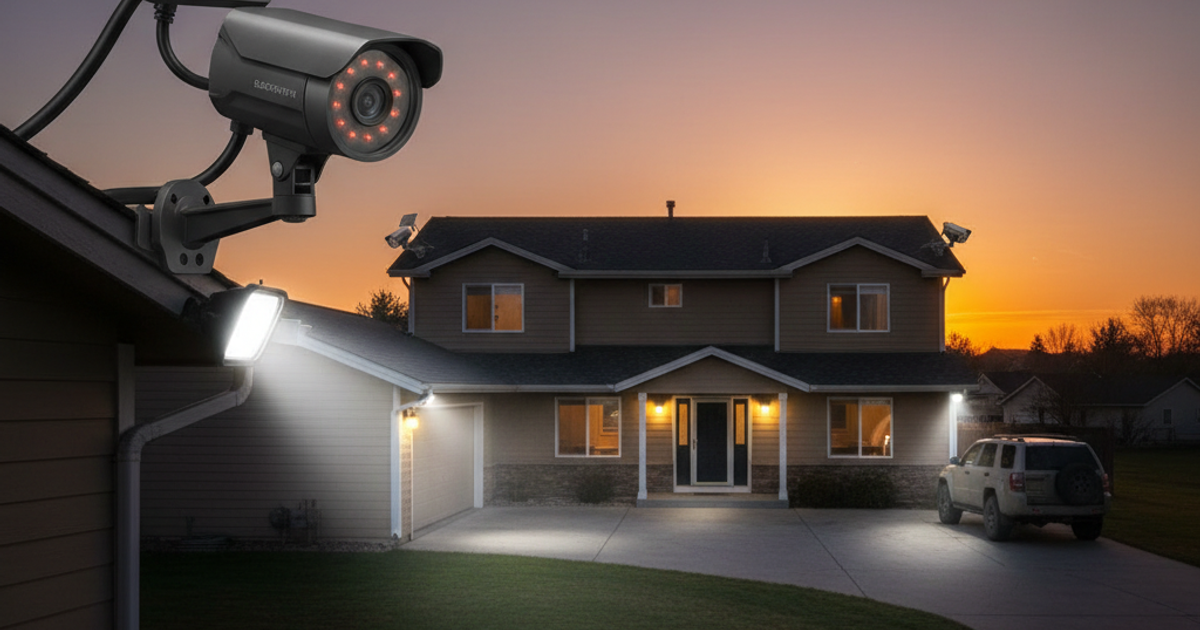
When the grid goes down, when civil unrest spills into your neighborhood, or when a desperate stranger starts casing your property, your ability to see threats before they reach your door could be the difference between safety and catastrophe. A well-designed home surveillance system is not a luxury — it's a core component of any serious emergency preparedness strategy, right alongside your survival kit, emergency food storage, and bug out bag.
The good news: you don't need to spend thousands of dollars or hire a professional security firm to build a capable system. Whether you're in a high-rise apartment, a suburban home, or a rural homestead miles from the nearest neighbor, there is a camera setup that fits your situation and your budget. This guide breaks it all down.
Why Surveillance Is a Core SHTF Security Strategy
Situational awareness is one of the most critical survival skills a prepper can develop. As we've covered in our guide on how to detect threats before they become dangerous, the ability to identify danger early gives you options — time to hide, escape, call for help, or defend yourself. A camera system extends your natural senses beyond walls and around blind corners, 24 hours a day.
According to the FBI's Uniform Crime Report, burglaries spike during economic downturns and civil instability — exactly the conditions a SHTF scenario creates. Studies by the University of North Carolina found that 60% of convicted burglars said the presence of security cameras directly influenced their decision to target a different property. In a grid-down or high-tension environment, deterrence alone is worth the investment.
For preppers who have put serious effort into hardening their home's physical security, cameras are the natural next layer — the eyes that monitor what your locks and barriers can't speak to.
Wired vs. Wireless Security Cameras: Which Is Right for Preppers?
This is the first and most important decision you'll make. Both systems have genuine trade-offs, and the right answer depends heavily on your living situation and threat model.
Wired Systems: Reliability Over Convenience
Wired cameras — particularly Power over Ethernet (PoE) systems — are the gold standard for serious preppers. They transmit both power and data through a single ethernet cable, which means no batteries to replace, no Wi-Fi dependency, and significantly less vulnerability to signal jamming or network interruptions. For a robust, long-term surveillance setup, the Reolink 4K wired PoE security camera system is one of the most cost-effective options on the market, offering ultra-high-definition footage and local storage without monthly fees.
The downsides of wired systems: installation is more involved (running cables through walls and attics), and they're less practical for renters or apartment dwellers who can't make structural modifications.
Wireless Systems: Flexibility for Urban and Rental Settings
For apartment preppers, renters, or anyone who needs a fast deployment without drilling, wireless cameras are the practical choice. The Wyze Cam outdoor wireless security camera is an excellent budget-friendly entry point — weather-resistant, easy to install, and capable of storing footage locally on a microSD card (critical when internet connectivity is down). The trade-off is dependence on Wi-Fi and batteries or outlet power.
Key wireless trade-offs to understand:
- Wi-Fi networks can be overwhelmed or taken offline during emergencies
- Battery-powered cameras need regular maintenance
- Cloud-dependent systems are useless without internet — always prioritize local storage options
- Wireless signals can theoretically be jammed by sophisticated adversaries
Strategic Camera Placement for Maximum Coverage
Having cameras is only half the battle. Where you place them determines how effective your system actually is.
For Suburban and Urban Homes
- All entry points first: Every exterior door, including garage doors, should have coverage. Most break-ins occur at front and back doors.
- Driveway and approach angles: Position cameras to capture faces and license plates — aim for a downward angle of 30–45 degrees, close enough for facial recognition but wide enough for context.
- Side yards and fence lines: These are common approach routes that homeowners overlook.
- Interior chokepoints (optional): A camera in a hallway or stairwell provides evidence and alerts if someone breaches the exterior.
For Rural Properties and Homesteads
Rural preppers face a different challenge: large perimeters, long driveways, and often limited power infrastructure. For off-grid coverage of outbuildings, barns, or property boundaries, solar-powered cameras are a game-changer. The Amcrest UHD solar powered security camera outdoor can be mounted on fence posts, trees, or outbuilding eaves without any wiring at all — making it ideal for monitoring distant areas of a rural property entirely off the grid.
For rural setups, also consider:
- Covering driveway entrances at least 100–200 feet from the main structure for early warning
- Overlapping camera fields of view to eliminate blind spots
- Using motion-triggered flood lights paired with cameras to both alert and deter
- Integrating with trip wire alarms or driveway sensors for a layered approach
If you're building a comprehensive rural security plan, pairing your camera system with a trained guard animal is worth considering — our guide on guard dogs for preppers covers how to select and train a security dog as another critical layer of perimeter defense.
Building a Multi-Camera System on a Budget
For preppers who want to go beyond one or two standalone cameras, a multi-channel NVR (Network Video Recorder) system provides centralized recording, easier management, and redundant storage. The Annke 8 channel NVR security camera system kit is a solid mid-range option that supports up to eight cameras, includes local hard drive storage, and doesn't require cloud subscriptions — a critical feature when internet infrastructure is compromised during a SHTF scenario.
Budget tiers to consider:
- Under $150: 2–4 wireless cameras with local SD card storage; suitable for apartments and small homes
- $150–$400: 4-channel wired PoE system with NVR and 1TB storage; covers a standard suburban home
- $400–$800: 8-channel NVR system with a mix of wired and solar cameras; suitable for larger properties and rural setups
Always prioritize local storage over cloud-only systems. A hard drive or microSD card in your home keeps your footage accessible even when the internet is down, the power company is on strike, or your subscription lapses.
Off-Grid Power Options for Your Camera System
A surveillance system is worthless if it goes dark when the grid does. Power redundancy is non-negotiable for serious preppers.
Options from simplest to most robust:
- Battery backup (UPS): An uninterruptible power supply keeps a small wired system running for several hours during an outage — useful for short disruptions
- Solar-integrated cameras: Self-contained units like the Amcrest solar cam eliminate the power problem at the camera level
- Portable power stations: A quality unit like the Jackery portable power station solar generator can run a full NVR system and multiple cameras for days when paired with solar panels — making it the backbone of a truly off-grid surveillance setup
- Whole-home generator: The most powerful option for rural homesteads, covered in detail in our article on grid-down power and backup generators
For most urban and suburban preppers, a portable power station paired with a small solar panel array represents the sweet spot between cost, portability, and capability.
Network Security and the Grey Man Principle
A surveillance system that broadcasts your security setup to the neighborhood defeats its own purpose. The grey man principle — staying inconspicuous and not advertising your preparedness — applies directly to how you install and operate your cameras.
- Mount cameras discreetly; avoid obvious housing and large visible mounting brackets where possible
- Keep your NVR and router in a secure, non-obvious location inside the home
- Change default passwords on every device immediately upon setup
- Use a dedicated VLAN or isolated network for security cameras to reduce hacking exposure — relevant guidance can be found in our article on cyber security for preppers
- Disable cloud uploading features if you don't need them — every cloud connection is a potential vulnerability
What You'll Need
- 2-4 wired or wireless security cameras (preferably with night vision)
- DVR or NVR recording device, or dedicated computer with large hard drive
- MicroSD cards (64GB or larger) for camera-based storage backup
- Power supply: solar panels with battery bank or UPS backup system
- Ethernet cables (Cat5e or Cat6) if using wired cameras
- Monitor or old laptop for viewing feeds
- Weatherproof camera housings for outdoor placement
- Mounting hardware: brackets, screws, and anchors
- Cable management supplies: conduit, clips, and weatherproof sealant
Step-by-Step Instructions
Step 1: Assess Your Property's Vulnerable Points
Walk your property perimeter and identify all entry points including doors, windows, gates, and access roads. Mark blind spots where intruders could approach undetected, paying special attention to areas obscured by vegetation or structures. Prioritize coverage for main entry points, supply storage areas, and escape routes. Create a simple sketch map noting where camera coverage will provide the most strategic advantage.
Step 2: Choose Cameras That Work Off-Grid
Select cameras with low power consumption that can operate on 12V DC power for solar compatibility. Look for models with local storage capability via microSD cards so footage isn't dependent on cloud services or internet connectivity. Ensure cameras have adequate night vision range (at least 30-50 feet) and weatherproof ratings of IP65 or higher. Avoid cameras that require proprietary apps or constant internet connection to function.
Step 3: Install Cameras at Strategic Vantage Points
Mount cameras 8-10 feet high to prevent tampering while maintaining clear facial recognition capability. Position cameras to cover multiple zones with overlapping fields of view, ensuring no blind spots between coverage areas. Angle cameras slightly downward and avoid pointing them directly at light sources or reflective surfaces. Use weatherproof housings and seal all cable entry points with silicone to protect against moisture infiltration.
Step 4: Set Up Independent Power Systems
Connect cameras to a dedicated solar panel system with deep-cycle battery backup to maintain operation during grid failures. Calculate total power draw of all cameras and recording equipment, then size your solar array and battery bank for at least 3-5 days of autonomous operation. Install a charge controller to prevent battery damage and consider a small backup generator for extended cloudy periods. Wire critical cameras on separate circuits so the system can run reduced coverage if power is limited.
Step 5: Configure Local Recording and Storage
Set up a DVR/NVR system or dedicated computer in a secure, climate-controlled location to record all camera feeds continuously. Enable motion-detection recording to conserve storage space while capturing all significant events. Configure cameras to record simultaneously to both the central system and their individual microSD cards for redundancy. Aim for at least 2-4 weeks of rolling storage capacity based on your camera resolution and number of devices.
Step 6: Create a Monitoring Station
Designate a secure room with good sightlines as your monitoring hub where you can view all camera feeds simultaneously. Set up a monitor or multiple screens connected to your recording system for real-time viewing. Ensure this location has backup power and can be secured quickly if you need to defend your property. Keep a logbook nearby to document suspicious activity and maintain situational awareness records.
Step 7: Test the System and Establish Protocols
Run the complete system for at least one week, checking all cameras daily for proper function, adequate coverage, and recording quality. Walk your property at different times of day to verify cameras capture clear footage in various lighting conditions and weather. Establish family protocols for monitoring shifts, response procedures when threats are detected, and backup communication methods if the primary system fails. Regularly clean camera lenses and inspect all connections monthly to maintain optimal performance.
Frequently Asked Questions
What is the best security camera system for preppers who want off-grid power?
For off-grid preppers, the best approach combines solar-powered cameras for remote locations with a portable power station (like the Jackery series) to run a central NVR during grid outages. Cameras with built-in solar panels — such as the Amcrest UHD solar model — are ideal for outbuildings, fence lines, and rural perimeters where running power cables isn't practical. Always ensure your system stores footage locally on a hard drive or SD card rather than relying on cloud storage.
Do home security cameras work without internet or Wi-Fi during a SHTF situation?
Yes — but only if you've set them up correctly before a crisis. Wired PoE cameras connected to a local NVR record continuously without any internet connection. Many wireless cameras also support local microSD storage and will continue recording without Wi-Fi, though you lose remote viewing capability. The critical step is to configure and test local recording before an emergency, and to avoid systems that are entirely cloud-dependent.
How many security cameras do I need for a home security system?
For a standard suburban home, 4–6 cameras typically provide comprehensive coverage: two covering front and back entry doors, one on the driveway or parking area, one or two covering side yards or gates, and optionally one interior camera at a hallway chokepoint. Apartment dwellers can often get meaningful coverage with just 1–2 cameras focused on the front door area and any accessible windows. Rural homesteads with large perimeters may need 8 or more cameras, ideally managed through a centralized NVR system.
Affiliate Disclosure: SHTF Plan participates in the Amazon Services LLC Associates Program. Some links are affiliate links — we may earn a small commission at no extra cost to you.