No Dentist Available: How to Handle Tooth Pain, Infections, and Emergency Extractions
When the grid goes down, a dental infection can kill you. Learn how to manage tooth pain, abscesses, and extractions when professional care is gone.
Dental pain doesn't care about grid-down scenarios, natural disasters, or societal collapse. In fact, a severe toothache or spreading oral infection can become one of the most incapacitating medical emergencies a prepper will face — and it's one of the least prepared-for threats in most survival kits. According to the American Dental Association, dental emergencies account for over 2 million emergency room visits annually in the United States, and that's when professional care is readily available. When SHTF and dentists are inaccessible for days, weeks, or indefinitely, knowing how to manage dental emergencies could mean the difference between a manageable inconvenience and a life-threatening septic infection.
Whether you're sheltering in place in a city apartment, hunkered down in the suburbs, or managing a rural homestead, dental preparedness belongs in your emergency preparedness plan with the same urgency as trauma care, water purification, and food storage.
Why Dental Emergencies Become Life-Threatening in a Grid-Down Situation
Most people underestimate oral infections. A tooth abscess — a pocket of infection at the root of a tooth or in the gum — can spread rapidly to the jaw, neck, and airway. Ludwig's Angina, a bacterial infection of the floor of the mouth that originates from a lower tooth abscess, can obstruct the airway and kill within hours without surgical intervention. Dental infections have historically killed people at surprisingly high rates; before antibiotics, they were a leading cause of death. In a prolonged SHTF scenario with no access to IV antibiotics or surgical drainage, a neglected abscess is a genuine survival threat.
This is why dental preparedness isn't just about managing discomfort — it's wilderness medicine applied to your mouth. If you've already built out your grid-down trauma kit, adding a dental module is a logical and critical next step.
Build a Survival Dental Kit Before You Need One
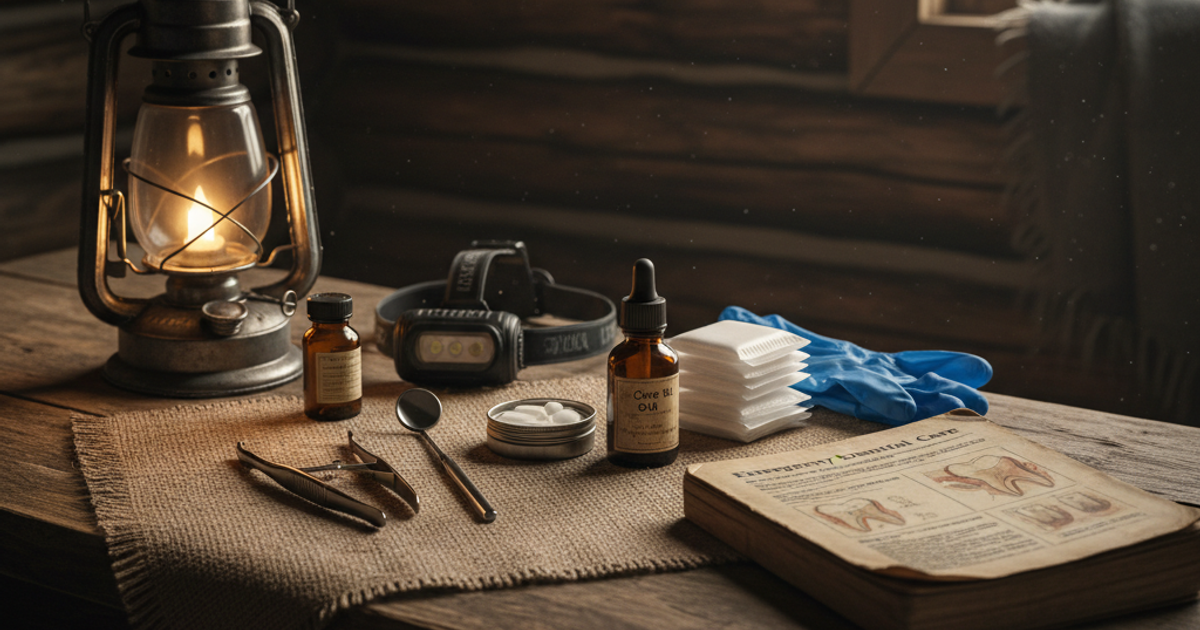
A dedicated dental emergency kit is compact, inexpensive, and can be stored in your bug out bag, your vehicle emergency kit, or your home medical supplies. Here's what it should contain:
Over-the-Counter Pain Management
Your first line of defense is topical anesthetics. Orajel Maximum Strength Toothache Pain Relief Gel contains 20% benzocaine, which is the highest concentration available without a prescription. Applied directly to the affected tooth and surrounding gum, it can provide meaningful short-term relief while you assess the situation and determine your next steps. Keep multiple tubes in your survival gear — they're cheap and have a reasonable shelf life.
For more comprehensive topical pain management, the Red Cross Toothache Complete Medication Kit includes eugenol (clove oil), which has been used as a dental analgesic for centuries. Eugenol has genuine anesthetic and antimicrobial properties, making it one of the most practical natural remedies you can carry in a compact survival kit. The kit also includes cotton pellets for application and temporary filling material — making it a multi-function tool in a small package.
- Ibuprofen (400-600mg) — An NSAID that addresses both pain and inflammation; arguably more effective for dental pain than acetaminophen alone
- Acetaminophen — Can be alternated with ibuprofen for around-the-clock coverage when pain is severe
- Clove oil (eugenol) — Natural analgesic with antimicrobial properties; dilute before applying to soft tissue
- Topical benzocaine gel — Fast-acting surface anesthetic
- Sterile gauze pads — For controlling bleeding and applying medications
Temporary Filling and Crown Repair Materials
Lost fillings, broken crowns, and cracked teeth are among the most common dental emergencies. Exposed dentin is extremely sensitive and vulnerable to further damage and infection. Temporary filling materials can seal the tooth and provide significant pain relief while protecting the nerve.
Dentemp Emergency Dental Cement Filling Repair is a consumer-grade temporary cement that can re-cement loose crowns, fill cavities temporarily, and protect exposed tooth structure. It's easy to use without training — you simply mix and press it into place — and it's been trusted for decades as a stopgap between emergencies and professional care. In a grid-down situation, "stopgap" may last months.
For a more professional-grade option, Cavit Temporary Filling Material is the same product used by dental professionals for temporary restorations. It sets in the presence of moisture, making it easier to apply without specialized equipment, and provides a more durable seal than many consumer alternatives. Serious preppers who understand that dental emergencies can drag on for weeks should consider keeping Cavit in their long-term medical supplies.
Infection Control and Oral Hygiene
In any grid-down scenario, preventing oral infections from starting or spreading requires maintaining oral hygiene with limited resources. Colgate Peroxyl Antiseptic Oral Cleanser Rinse is a hydrogen peroxide-based antiseptic mouthwash that actively cleanses wounds, reduces bacteria, and promotes healing of oral soft tissue injuries. It's particularly valuable for managing gum infections, post-extraction care, and irritated tissues when you can't get professional treatment. A few bottles stored with your medical supplies weigh almost nothing but can be invaluable.
Don't overlook the basics for your long-term oral health stockpile:
- Extra toothbrushes and fluoride toothpaste (stockpile at least a 6-month supply)
- Dental floss — critical for preventing the gum infections that lead to abscesses
- Salt for saline rinses (mix ½ teaspoon salt in 8 oz. clean water)
- Oral antibiotics if you can acquire them through your physician (discuss with your doctor as part of your grid-down medication storage plan)
- Small dental mirror and pick for visual assessment
- Irrigation syringe for cleaning around infected teeth
How to Identify and Manage a Dental Abscess Without Professional Care
An abscess presents as throbbing, severe pain that may radiate to the jaw, ear, or neck. It's often accompanied by swelling of the face or gum, fever, a bad taste in the mouth, and sensitivity to hot or cold. If you notice swelling spreading toward the neck, difficulty swallowing, or trouble breathing, you are looking at a potentially life-threatening emergency that requires evacuation to medical care by any means available — this overrides grey man or situational awareness concerns in a crisis.
For a localized abscess that hasn't spread:
- Start oral antibiotics immediately if available. Amoxicillin (500mg three times daily) or metronidazole are first-line treatments. Discuss acquiring these with your physician as part of your emergency preparedness medical planning.
- Rinse with warm salt water every few hours. This draws out infection and reduces bacterial load.
- Use hydrogen peroxide rinse (diluted 1:1 with water) to kill bacteria — do not swallow.
- Apply clove oil or benzocaine for pain management.
- Never apply heat externally to a swollen jaw — this can cause the infection to spread faster.
- Cold compresses on the outside of the face can reduce inflammation.
- Monitor closely for signs of spreading infection: increasing swelling, fever above 103°F, difficulty swallowing or breathing.
Managing a Knocked-Out or Broken Tooth in the Field
A knocked-out permanent tooth (avulsion) has the best chance of survival if reimplanted within 30-60 minutes. If you're in an urban environment with any access to emergency dental care, keep the tooth moist — ideally stored in milk or between the cheek and gum — and get to a dentist immediately. In a true grid-down scenario where reimplantation isn't possible, your priority shifts to controlling bleeding and preventing socket infection.
For a broken tooth with exposed pulp (you can see into the pink interior of the tooth), cover the exposed area with temporary filling material immediately to protect the nerve and prevent infection. Pain will be intense — rotate ibuprofen and acetaminophen while applying topical benzocaine for localized relief.
Emergency Tooth Extraction: A Last Resort
Field extraction of a tooth should be considered only when a tooth is causing life-threatening infection that is visibly spreading, all other options have been exhausted, and the tooth is clearly mobile and near the surface. This is not a procedure to undertake lightly. Improper extraction can drive infection deeper, fracture the root (leaving a fragment that becomes a chronic infection source), cause significant hemorrhage, or damage adjacent teeth.
If extraction is absolutely necessary:
- Use the strongest available local anesthetic — topical benzocaine plus oral ibuprofen and acetaminophen at maximum safe doses
- Work with dental forceps if available, using a rocking motion to widen the socket before applying extraction force
- Control bleeding with firm gauze pressure held for 30-45 minutes
- Keep the socket clean with saline rinses starting 24 hours after extraction
- Watch for dry socket (severe pain 3-5 days post-extraction) — pack the socket with eugenol-soaked gauze if this occurs
For comprehensive guidance on trauma and medical procedures when professional help is unavailable, review resources like the wilderness medicine guide for preppers — the same principles of improvised care apply to oral emergencies.
Prevention: The Best Dental Survival Strategy
The single most effective dental preparedness strategy is prevention. Before any anticipated disruption — whether regional disaster, extended off-grid living, or societal instability — schedule a comprehensive dental exam. Get cavities filled, have questionable teeth assessed, and address any existing gum disease. Every dental problem you resolve now is one less crisis you'll face when SHTF.
Maintain consistent oral hygiene even under stress. Grid-down hygiene for your entire family, including oral care, should be a documented part of your emergency plan. Review best practices for grid-down hygiene for kids to ensure your children's dental health doesn't become a crisis during an extended emergency.
Consider that poor nutrition during prolonged emergencies accelerates dental decay. Vitamin C deficiency causes scurvy, which manifests first as bleeding, swollen gums. Stockpile vitamin C supplements as part of your long-term food storage strategy, and prioritize foods that support immune function and gum health.
What You'll Need
- Dental emergency kit (dental mirror, explorer tool, tweezers)
- Pain relief: clove oil (eugenol), benzocaine gel, ibuprofen, aspirin
- Antibiotics: amoxicillin or fish antibiotics (amoxicillin 500mg equivalent)
- Temporary filling material (dental cement or zinc oxide powder mixed with clove oil)
- Sterile gauze pads and cotton pellets
- Hydrogen peroxide 3% solution and saline for irrigation
- Dental floss and toothpicks
- Extraction tools: dental forceps, elevator tool (only for extreme emergencies)
- Nitrile gloves and LED headlamp or flashlight
- Ice packs and heating pads
Step-by-Step Instructions
Step 1: Assess the Dental Emergency and Identify the Problem
Examine the mouth thoroughly using a dental mirror and good lighting to locate the source of pain or swelling. Check for visible cavities, cracked teeth, loose fillings, abscess formations (swelling with pus), or gum infections. Take note of specific symptoms: throbbing pain suggests pulp involvement or abscess, sharp pain when chewing indicates a crack or cavity, and swelling with fever signals a serious infection requiring immediate antibiotic treatment. Document your findings and temperature if infection is suspected.
Step 2: Control Pain with Topical and Systemic Medications
Apply clove oil directly to the affected tooth using a cotton pellet or swab for immediate localized pain relief—eugenol in clove oil is a natural anesthetic and antiseptic. Take ibuprofen 400-600mg every 6-8 hours for inflammation and pain (do not exceed 2400mg daily), or alternate with acetaminophen 500-1000mg every 6 hours if ibuprofen is contraindicated. For severe pain, apply benzocaine gel 20% directly to the gum tissue around the affected tooth. Avoid placing aspirin directly on gums as this causes chemical burns.
Step 3: Address Infections with Antibiotics and Drainage
If you observe swelling, pus, fever, or facial cellulitis, begin antibiotic therapy immediately with amoxicillin 500mg three times daily for 7-10 days (or fish-grade equivalent if prescription unavailable). For visible abscesses with a white or yellow head, apply warm compresses externally to encourage natural drainage—never lance an abscess yourself unless you have medical training and no other option. Rinse the mouth with warm salt water (1 teaspoon salt per 8 oz water) every 2-3 hours to promote drainage and reduce bacterial load. Seek professional medical help if swelling spreads to the eye, neck, or causes difficulty breathing or swallowing.
Step 4: Manage Cavities and Lost Fillings with Temporary Repairs
Clean the cavity or empty filling space thoroughly by rinsing with hydrogen peroxide solution, then dry completely with sterile gauze. Mix temporary dental cement according to package directions or create an emergency filling by combining zinc oxide powder with a few drops of clove oil to form a putty-like consistency. Pack the material firmly into the cavity using a dental tool or clean toothpick, building slightly above the tooth surface, then have the patient bite down gently to shape it. This temporary seal protects exposed nerves and prevents food impaction until professional dental care is available.
Step 5: Treat Tooth Infections Without Extraction When Possible
Continue aggressive antibiotic therapy and maintain rigorous oral hygiene by brushing gently twice daily and rinsing with hydrogen peroxide diluted 50/50 with water after meals. Keep the affected area as clean as possible using dental floss carefully and irrigating with saline solution using a syringe if available. Apply cold compresses externally for 20 minutes on, 20 minutes off to reduce swelling and pain. Monitor for worsening symptoms—if infection is controlled, the tooth may be saved; extraction should be a last resort only when infection is spreading despite antibiotics or the tooth is completely non-viable.
Step 6: Prepare for Emergency Extraction Only as a Last Resort
Tooth extraction without professional training is extremely dangerous and should only be attempted when sepsis is imminent, antibiotics have failed, and no medical help is available for days or weeks. Before attempting extraction, have the patient take maximum dose ibuprofen and apply topical anesthetic; understand that you cannot safely anesthetize the tooth without injectable lidocaine. Use dental forceps to rock the tooth slowly back and forth (not side to side) for 15-20 minutes to break periodontal ligaments before applying extraction pressure. After extraction, pack the socket with sterile gauze, have patient bite down firmly for 45 minutes, and continue antibiotics for 7 days while monitoring for complications like dry socket or continued infection.
Step 7: Maintain Oral Hygiene and Monitor for Complications
Establish a strict twice-daily brushing routine using whatever toothpaste or baking soda is available, and floss carefully around affected areas once pain subsides. Continue warm salt water rinses 4-6 times daily for at least one week after any dental emergency to promote healing and prevent secondary infections. Watch for warning signs of complications: increasing pain after 48 hours, fever above 101°F, difficulty swallowing or breathing, swelling that spreads to eyes or neck, or foul-smelling discharge. Keep the dental emergency kit stocked and accessible, and prioritize finding professional dental
Frequently Asked Questions
What should I put in a prepper dental emergency kit?
A well-stocked prepper dental kit should include temporary filling material (Dentemp or Cavit), topical benzocaine gel (Orajel Maximum Strength), clove oil or a Red Cross Toothache Kit for eugenol-based pain relief, an antiseptic oral rinse like Colgate Peroxyl, sterile gauze, an oral irrigation syringe, dental wax, a small dental mirror, ibuprofen and acetaminophen, and ideally a course of broad-spectrum antibiotics prescribed by your physician. This kit fits easily in a bug out bag or survival kit and costs under $50 to assemble.
How do you treat a tooth infection without a dentist during a disaster?
If you suspect a tooth abscess or infection, begin salt water rinses (½ tsp salt in 8 oz. clean water) every few hours to reduce bacterial load. Use hydrogen peroxide rinse diluted 1:1 with water. Take ibuprofen to address both pain and inflammation. Apply clove oil or benzocaine gel for localized pain relief. If you have access to antibiotics — ideally amoxicillin prescribed in advance by your physician for emergency preparedness — begin a full course immediately. Monitor for spreading swelling, fever, or any difficulty swallowing or breathing, which require immediate evacuation to medical care. Never apply heat to a swollen jaw infection.
Can you pull your own tooth in a survival situation?
Emergency self-extraction is an absolute last resort and should only be attempted when a visibly infected, highly mobile tooth is causing a life-threatening spreading infection and no professional care is accessible. Improper extraction carries serious risks including driving infection deeper, leaving root fragments, uncontrolled hemorrhage, and nerve damage. If extraction is necessary, use maximum available pain management, work slowly using a rocking motion with dental forceps, and follow up with antiseptic rinses and close monitoring. Under most realistic grid-down scenarios, managing the infection medically with antibiotics and rinses is far safer than field extraction.
Affiliate Disclosure: SHTF Plan participates in the Amazon Services LLC Associates Program. Some links are affiliate links — we may earn a small commission at no extra cost to you.