Thermal Imaging and Night Vision: How to See Threats Before They See You
Night is when threats move. Learn how thermal and night vision technology gives you the decisive edge when darkness falls and danger closes in.
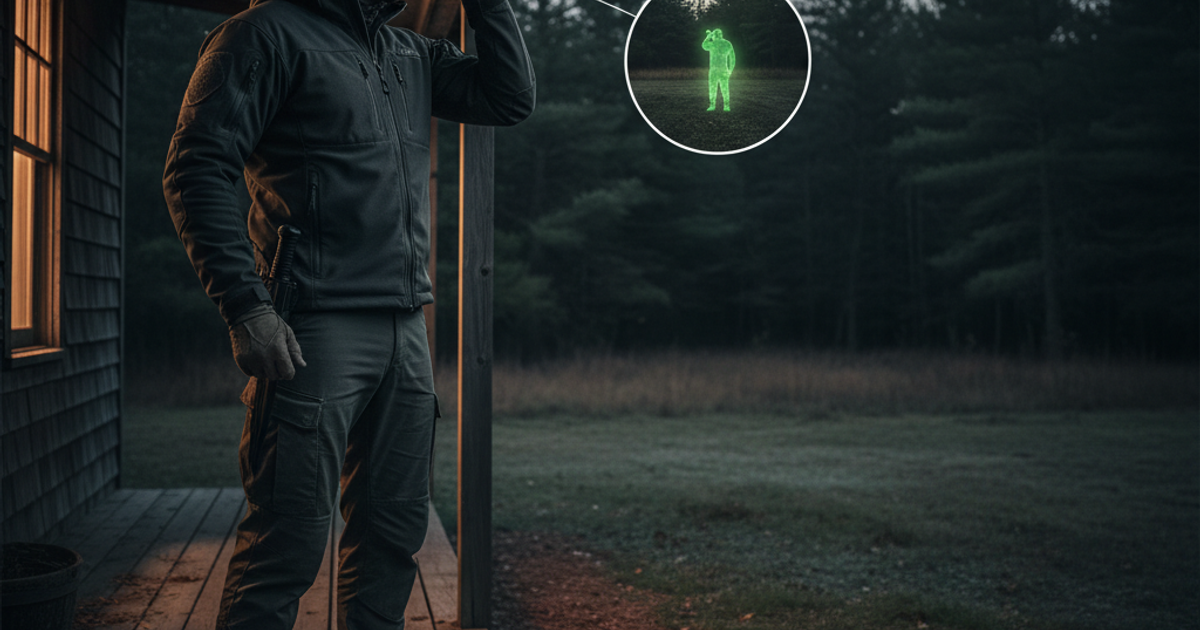
When the grid goes down, when social order fractures, when a threat approaches your home at 2 a.m. — darkness is no longer your friend unless you've made the right investments. The ability to see in low-light or no-light conditions is one of the most tactically significant advantages a prepper can have. Whoever sees first, decides first. And in a crisis scenario, that decision window can mean the difference between life and death.
Modern thermal imaging and night vision technology — once exclusive to military and law enforcement — has become increasingly accessible to civilians. Whether you're in a rural homestead, a suburban house, or an urban apartment, understanding how these tools work and how to deploy them effectively should be part of every serious emergency preparedness plan. This article breaks down everything you need to know to integrate optical surveillance technology into your home security and SHTF survival strategy.
Understanding the Difference: Thermal Imaging vs. Night Vision
Before you spend a dollar on survival gear in this category, you need to understand the fundamental difference between these two technologies — because they work in completely different ways and serve different purposes.
Night vision devices (NVDs) amplify available ambient light — moonlight, starlight, or infrared illumination — to produce a visible image. Traditional image-intensifier (Gen 1, Gen 2, Gen 3) tubes magnify photons; digital night vision uses sensors similar to a camera. Night vision is excellent for navigating terrain, identifying people at moderate range, and general low-light observation. However, night vision can be defeated by total darkness, heavy rain, or fog.
Thermal imaging works on an entirely different principle. It detects heat signatures emitted by all objects — living bodies, warm engines, recently fired weapons — and converts those differences into a visible image. Thermal does not require any light whatsoever. A human body radiating heat at 98.6°F will glow like a beacon against a cool nighttime background regardless of whether it's pitch black, overcast, or raining. This makes thermal imaging arguably the more powerful technology for detecting threats.
According to a 2021 industry report by Markets and Markets, the global thermal imaging market was valued at over $3.8 billion and is expected to grow significantly through 2026, driven in part by civilian security and outdoor applications. The prices for entry-level units have dropped dramatically — you can now find capable thermal monoculars for under $500, putting this technology within reach of the serious prepper.
Thermal Imaging Options for Every Budget and Use Case
For a compact, handheld thermal monocular that balances performance and portability, the Pulsar Axion thermal monocular is one of the most respected options on the civilian market, offering sharp thermal resolution in a pocket-sized form factor that can be carried in a bug out bag or kept on a bedside table. For those who want to mount optics to a firearm for defensive use, the AGM Global Vision thermal imaging scope provides weapon-mountable thermal capability that extends your effective engagement range in total darkness.
If you want an extremely capable but more budget-friendly entry point, the FLIR Scout TK thermal monocular is a popular choice among preppers and homesteaders. FLIR is the industry leader in thermal technology, and the Scout TK provides genuine heat-detection capability in a small package — ideal for scanning a tree line, checking a perimeter, or watching a road approach. For those who want to integrate thermal imaging into a smartphone-based setup, the ATN OTS thermal monocular offers smart features like video recording and WiFi streaming, making it versatile for both personal use and stationary observation posts.
Night Vision Devices for Urban Survival and Suburban Security
Not everyone needs or can afford thermal. For many urban and suburban preppers, a quality digital night vision device is a practical, cost-effective alternative. Night vision is well-suited for hallway clearing, watching a parking lot or alleyway, or observing a perimeter when there's at least some ambient light present.
The Bushnell Equinox Z night vision monocular is a solid mid-range digital night vision device that performs well in suburban settings where streetlights or ambient city glow provide at least minimal illumination. Its built-in infrared illuminator extends its capability in truly dark environments. For apartment dwellers or anyone who wants a compact, easy-to-use system, the Sionyx Aurora night vision camera uses color night vision technology and can record video, making it suitable as a hand-held observation device or mountable camera for stationary monitoring.
When you need hands-free capability — for patrolling your property, navigating without a flashlight, or working with both hands — goggles are the answer. The Nightfox Cape night vision goggles offer wearable night vision at an accessible price point, giving you the ability to move through your home or property without illuminating yourself to potential threats outside. And if you prefer binoculars for extended observation — watching a road, a trail, or a neighboring property line — the Rexing B1 night vision binoculars digital provide a wide field of view with binocular depth perception, which is significantly less fatiguing during long observation shifts than a monocular.
Layering Your Night Observation Strategy
Experienced preppers don't rely on a single tool — they layer their security and observation systems. Think of it in three tiers:
- Detection layer: Thermal imaging, motion-activated cameras, perimeter alarms and trip wires that alert you to a threat before it reaches your structure
- Observation layer: Night vision monoculars, binoculars, or mounted cameras that let you identify, assess, and track a detected threat without revealing your position
- Response layer: Illumination tools, thermal weapon sights, communications, and defensive options if a threat escalates
Thermal excels in the detection layer because it works in absolute darkness and through light vegetation. Night vision excels in the observation and response layers when you need finer detail — distinguishing whether someone is armed, for example. Pairing a thermal monocular with a digital night vision device gives you both capabilities at a cost far below military-grade equipment.
This layered approach also pairs well with a home security camera system — using cameras for passive 24/7 monitoring while keeping handheld thermal and night vision devices available for active threat assessment.
Situational Awareness Considerations for Urban and Apartment Preppers
If you live in an apartment or dense urban environment, your night observation strategy looks different from a rural prepper's, but the principles still apply. You're not scanning 40 acres — you're watching hallways, stairwells, parking structures, and building entry points. A compact digital night vision monocular or the Sionyx Aurora camera mounted at a window can give you eyes on your building entrance or parking lot without ever opening your door.
Urban survival also demands a grey man approach to your equipment. Walking through a city with military-spec night vision goggles mounted on your head makes you a target. Keep devices concealed in a jacket pocket or discreet bag. Your goal is to maintain situational awareness without advertising your capabilities.
For those in suburban settings, perimeter coverage is manageable with two or three fixed camera positions supplemented by a handheld thermal device. A thermal monocular kept next to your bed allows you to check a suspected noise in the backyard without turning on a light that signals your position to anyone outside.
What You'll Need
Tools
- Pulsar Axion thermal monocular
- Bushnell Equinox Z night vision monocular
- Nightfox Cape night vision goggles
- Mounting hardware or tripod adapter for stationary observation
- Tactical flashlight with red-light mode for use alongside NVDs
Supplies
- Spare CR123A and AA batteries (check your specific device requirements)
- Lens cleaning cloths and anti-fog solution
- Protective carry case or padded pouch
- Notebook and pencil for logging observation times and anomalies
Step-by-Step Instructions
Step 1: Assess Your Environment and Identify Observation Priorities
Walk your property or building in daylight and identify all approach vectors — driveways, paths, alleys, stairwells, windows. Map these locations on a simple sketch and prioritize them by likely threat approach. Understanding where threats will come from before it's dark is the foundation of any effective night observation plan.
Step 2: Select the Right Device Type for Your Setting
Match your device to your environment. Urban and apartment dwellers typically benefit most from compact digital night vision devices or a small thermal monocular for window observation. Suburban preppers should consider a combination of fixed cameras plus a handheld thermal. Rural preppers with larger properties gain the most from dedicated thermal imaging due to longer detection ranges across open fields and wood lines.
Step 3: Test and Calibrate Your Devices in Daylight and Low Light
Never wait for a crisis to learn how your gear works. Practice operating your thermal or night vision device in various lighting conditions — dusk, full darkness, with and without the IR illuminator active. Learn how to switch modes, adjust brightness and contrast, and use any recording functions so these actions are automatic under stress.
Step 4: Establish Fixed Observation Points Inside Your Home
Identify one or two windows in your home that provide the best angles on your priority approach vectors. From these positions, you should be able to conduct surveillance without backlighting yourself — keep interior lights off when observing. A monocular or thermal device can be used freehand or rested on a window sill for stability during extended observation.
Step 5: Integrate Night Observation into Your Security Watch Rotation
If you're sheltering in place with family or a group, establish scheduled observation periods — especially in the hours between midnight and 4 a.m., which historically represent peak criminal activity. Assign observation duties, log anything unusual, and brief incoming watch personnel on what has been observed. Pair this with your situational awareness protocols for a complete security posture.
Step 6: Maintain Battery Readiness and Backup Power
Thermal and night vision devices are power-hungry. Stock a substantial supply of compatible batteries and rotate them regularly. Consider a small USB battery bank to recharge devices that support USB charging. For extended grid-down scenarios, review your overall power strategy — our guide on blackout battery banks and portable power covers how to keep critical electronics operational when the grid fails.
Step 7: Practice Movement and Navigation Using Night Vision
Detection is only part of the equation. Practice moving through your home and immediate property while using night vision goggles or a monocular. The depth perception distortion of monocular night vision takes getting used to, and stairs or uneven terrain can be hazardous until you've developed the muscle memory. Conduct practice drills so movement in darkness becomes second nature.
Step 8: Store Devices Properly to Extend Operational Life
Thermal and night vision optics are sensitive instruments. Store them in a padded case away from moisture and extreme temperatures. Remove batteries when storing for extended periods to prevent leakage. Clean lenses with appropriate optics cloths — never household paper towels. Proper maintenance ensures your devices are functional when an emergency demands it.
Recommended Gear Summary
To recap the core equipment options covered in this article: for primary thermal detection, consider the Pulsar Axion thermal monocular or the FLIR Scout TK thermal monocular. For weapon-mounted thermal, the AGM Global Vision thermal imaging scope is worth evaluating. For digital night vision, the Bushnell Equinox Z night vision monocular, Sionyx Aurora night vision camera, ATN OTS thermal monocular, Nightfox Cape night vision goggles, and Rexing B1 night vision binoculars digital each serve different use cases across the urban, suburban, and rural preparedness spectrum. Browse our full recommended survival gear page for additional vetted equipment options.
Frequently Asked Questions
What is the best night vision device for a prepper on a budget?
For budget-conscious preppers, digital night vision devices offer the best value. Units like the Bushnell Equinox Z or the Nightfox Cape goggles provide usable performance for under $150-$250. While they don't match Gen 3 military-grade image intensifiers, they are dramatically better than the naked eye and represent a meaningful upgrade to your home security and SHTF preparedness posture. If budget allows, pairing a mid-tier night vision device with even an entry-level thermal monocular gives you a layered capability that covers most realistic threat scenarios.
Is thermal imaging legal for civilians to own and use?
In the United States, civilian ownership of thermal imaging devices is generally legal at the federal level with no license required for handheld and observation units. However, there are restrictions on exporting thermal devices, and some states may have specific regulations regarding their use for hunting or other activities. Always check your state and local laws. Weapon-mounted thermal scopes have additional considerations — consult applicable regulations in your jurisdiction before mounting thermal optics to a firearm.
Can thermal imaging see through walls?
No — this is a common misconception. Consumer and professional thermal imaging devices detect surface temperature differences and cannot see through solid walls, concrete, or most building materials. What thermal imaging can detect are thermal signatures radiating through thin barriers, heat bleed-through at poorly insulated areas, or the heat signature of a person standing near or just beyond a glass window. For home security purposes, thermal is most effectively used outdoors to detect threats in the open before they reach your structure — not as an X-ray tool for seeing inside buildings.
Affiliate Disclosure: SHTFPlan.net participates in the Amazon Services LLC Associates Program. Some links are affiliate links — we may earn a small commission at no extra cost to you.