Wind Turbines for Preppers: How to Choose and Install a Small Wind Generator for Off-Grid Power
Solar gets all the attention, but wind power can keep your lights on when clouds block the sun. Here's how to choose, size, and install a small wind turbine.
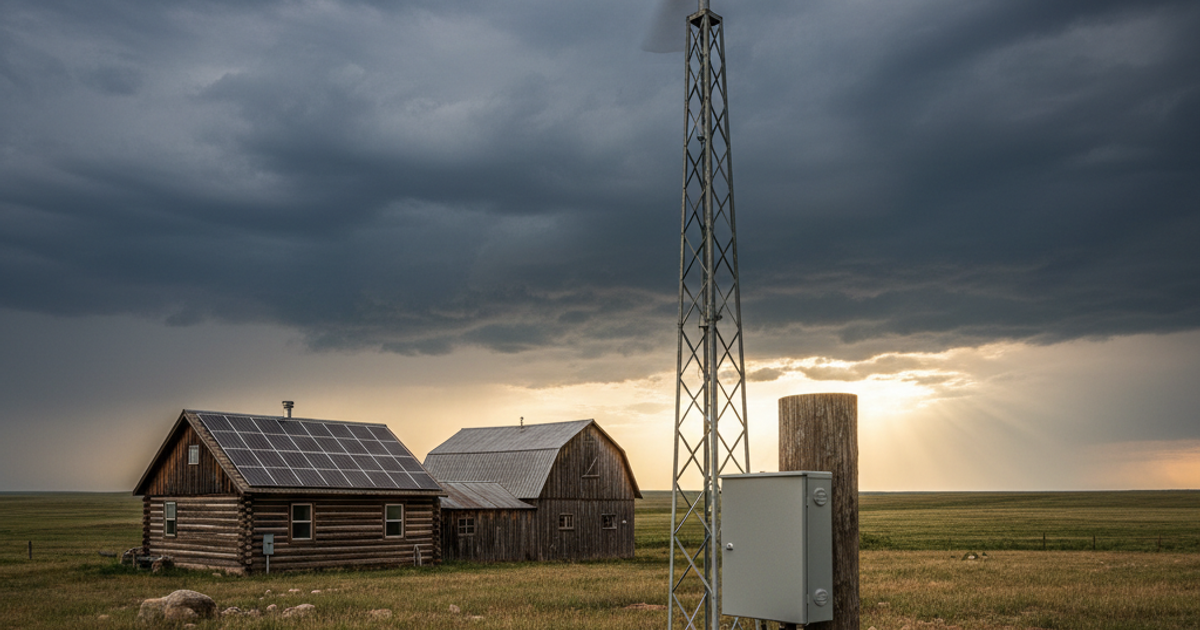
When the grid goes down — whether from a hurricane, an EMP strike, cyberattack, or long-term infrastructure collapse — your ability to generate your own electricity becomes one of the most critical survival advantages you can have. Solar panels get most of the attention in the off-grid prepper community, and for good reason. But wind energy is a powerful, underutilized complement to solar that can keep your batteries charged when clouds roll in, storms hit, or the sun simply isn't cooperating. For any serious emergency preparedness strategy, small wind turbines deserve a place in the conversation.
This guide will walk you through everything you need to know about small wind generators: how they work, what to look for, realistic power expectations, installation basics, and how to integrate wind power into your overall SHTF energy plan — whether you're on a rural homestead, a suburban lot, or working within the constraints of urban survival.
Why Wind Power Belongs in Your Off-Grid Emergency Preparedness Plan
The U.S. Department of Energy estimates that wind energy is available at usable speeds in a significant portion of the country — and unlike solar, wind often blows at night and during overcast weather. That complementary nature is what makes a wind-solar hybrid system so valuable for preppers. When you pair both sources, your battery bank stays topped off far more consistently than with either source alone.
Small wind turbines — typically defined as units generating 100 watts to 10 kilowatts — are designed for exactly this kind of distributed, off-grid power generation. According to the American Wind Energy Association, small wind turbines have been installed in all 50 states, proving their viability across a range of climates and geographies. For a prepper focused on off-grid resilience, a 400–600 watt turbine combined with a modest battery bank can realistically power LED lighting, a ham radio setup, critical communication equipment, phone charging, and small appliances for an indefinite period during a grid-down scenario.
How to Assess Whether Your Property Has Enough Wind for a Small Turbine
Before spending money on hardware, you need to evaluate your site. Most small wind turbines require a minimum average wind speed of 8–10 mph (Class 2 wind or higher) to generate meaningful power. The National Renewable Energy Laboratory (NREL) maintains free wind maps that show average wind speeds by county and elevation — these are your first stop.
Key site assessment factors include:
- Average wind speed: Use NREL's Wind Exchange tool or a handheld anemometer to measure your site over several weeks if possible.
- Obstructions: Trees, buildings, and terrain features create turbulence. The general rule is to mount your turbine at least 30 feet above any obstruction within 300 feet.
- Tower height: Higher towers access faster, cleaner wind. A 60–80 foot tower on a rural property dramatically outperforms a rooftop mount in most cases.
- Zoning and HOA restrictions: Suburban and urban preppers must check local ordinances before installing any tower structure. Many municipalities have height restrictions, setback requirements, or outright bans on wind turbines.
Urban and suburban preppers face the most restrictions here. If you live in an apartment or dense neighborhood, a small wind turbine is likely not a viable primary power solution — but it may work as a balcony-mounted micro-turbine for trickle charging batteries, supplementing a larger solar array, or as part of a budget solar and alternative energy setup. Focus your primary energy preparedness efforts on solar panels, hand-crank generators, and battery banks if you're in a high-density environment.
Understanding Small Wind Turbine Specifications: What the Numbers Actually Mean
Wind turbine marketing can be misleading. A turbine rated at "400 watts" doesn't mean it produces 400 watts continuously — it means it can produce up to 400 watts under ideal, rated wind conditions (usually around 27–30 mph). In real-world conditions with average winds of 10–12 mph, you're more likely generating 50–150 watts from that same unit. Plan accordingly.
Key specs to evaluate:
- Rated wattage vs. startup wind speed: Lower startup speeds (6–8 mph) mean more consistent generation in light-wind areas.
- Rotor diameter: Larger rotors sweep more air and generate more power. A 400W turbine typically has a rotor diameter of 4–6 feet.
- Blade material: Fiberglass and carbon fiber blades outperform plastic in durability and efficiency.
- Charge controller type: Look for a turbine kit that includes a PWM or MPPT charge controller specifically designed for wind input.
- Overspeed protection: Critical for storm survival — turbines without automatic braking or furling systems can destroy themselves in high winds.
For a solid entry-level option, the Renogy wind turbine generator 400W is a well-regarded choice in the prepper community, offering a low startup wind speed, durable blade construction, and compatibility with Renogy's broader solar and battery ecosystem — making integration straightforward for those already running Renogy solar components.
Choosing the Right Small Wind Turbine for SHTF Power Generation
Your turbine selection should be driven by your specific power needs, site conditions, and budget. Here's a practical breakdown by use case:
Budget-Conscious Preppers: 300–400W Entry-Level Turbines
If you're just getting started with wind power, a 300–400 watt turbine provides a reasonable introduction without a massive upfront investment. The Marsrock small wind turbine generator 300W is a compact, lightweight option well-suited to smaller properties or as a secondary charging source alongside a solar array. At this wattage, you're looking at powering lights, charging devices, and running a small radio setup during a prolonged outage.
Mid-Range Systems: 400–500W for Serious Off-Grid Capability
For preppers looking to power a more complete emergency setup — including a chest freezer for emergency food storage, power tools, or a dedicated off-grid shelter — step up to a 400–500W kit with a robust charge controller and battery bank. The VEVOR wind turbine generator kit 500W offers a complete package that includes the turbine, charge controller, and mounting hardware, reducing the complexity of sourcing components separately. VEVOR kits are known for being accessible to DIY installers without an electrical engineering background.
The Windmill DB 400W wind turbine generator kit is another strong contender at this tier, featuring a cast aluminum body, a 3-phase AC permanent magnet generator, and a 20-amp charge controller. Its reputation for build quality and customer support makes it a popular choice among preppers investing in a long-term off-grid power solution.
Hybrid Solar-Wind Systems: Maximum Resilience
The gold standard for off-grid emergency preparedness power is a hybrid system that combines solar panels, a wind turbine, and a battery bank with a hybrid charge controller. This eliminates the single points of failure inherent in either source alone. The Pikasola wind turbine generator 400W hybrid is specifically designed for this application, featuring a hybrid charge controller that manages simultaneous input from both wind and solar sources — maximizing battery charge efficiency and minimizing the gaps in your power supply during any weather condition.
How to Install a Small Wind Turbine: Step-by-Step Overview
Installation complexity varies significantly between a simple pole-mount on a rural property and a tower installation. Here's a practical overview for most small-turbine installs:
- Select and prepare your tower location: Clear the area of obstructions and ensure you have adequate setback from structures and property lines per local code.
- Set the tower: Guyed towers (held upright by wire cables) are the most common for small wind turbines and can often be DIY-installed with help. Tilt-up tower designs allow you to raise and lower the turbine without climbing, which is ideal for maintenance.
- Mount the turbine and blades: Follow manufacturer instructions precisely. Torque specs on blade and hub hardware matter for safety.
- Run wiring: Use appropriately sized wire for the run length from turbine to charge controller. Voltage drop is a serious efficiency killer — use a voltage drop calculator for your specific run.
- Connect charge controller and battery bank: Wire the turbine output to the wind charge controller, then to your battery bank. Never connect a wind turbine without a charge controller — unlike solar panels, wind turbines can overcharge and destroy batteries if left unregulated.
- Connect your loads: Attach your inverter or DC loads to the battery bank with appropriate fusing on all connections.
- Test and commission: Verify the system at low wind before a major storm to ensure everything is functioning correctly.
Important safety note: A spinning wind turbine is a mechanical hazard. Always short the turbine's output leads together (or use a dump load/brake) before working on the system. Never work on a turbine in high winds.
Integrating Wind Power Into Your Broader SHTF Preparedness Strategy
Wind power is one layer of a complete emergency preparedness energy plan. Think of it as part of a system that also includes a backup generator for high-draw needs, solar panels for daytime charging, and a robust battery bank as your buffer. Prioritize your loads carefully — in a true SHTF scenario, you're powering critical systems: communication gear, lighting, medical equipment, water purification pumps, and refrigeration for medications and food.
For rural preppers, wind power integrates naturally into a homestead energy system. For suburban preppers, a smaller turbine on a modest tower can serve as a meaningful supplemental source if local codes allow. For urban preppers and apartment dwellers, focus your energy resilience strategy on portable solar, hand-crank devices, and high-capacity power stations — and keep situational awareness sharp about when it's time to implement your urban evacuation route to a more capable location.
Don't neglect fuel storage as a backup either. A small generator for cloudy, low-wind periods rounds out your energy redundancy. See our guide on safely stockpiling gasoline, diesel, and propane for long-term emergencies for best practices.
What You'll Need
- Small wind turbine kit (400W-1000W rated for your location)
- Tower or mounting pole (20-40 feet minimum height)
- Charge controller (compatible with turbine voltage output)
- Deep-cycle batteries or battery bank
- Inverter (pure sine wave recommended)
- Guy wires and anchors
- Concrete for base foundation
- Heavy-duty wrenches and sockets
- Wire cutters and crimping tools
- Multimeter for electrical testing
- Protective gear (gloves, safety glasses, harness)
Step-by-Step Instructions
Step 1: Assess Your Property's Wind Resources
Use an anemometer to measure wind speeds at your location for at least 30 days, ideally during different seasons. Your site needs consistent average wind speeds of at least 10 mph to justify wind power investment. Check topographical maps and observe tree flagging patterns to identify the best installation location with minimal obstructions. Avoid turbulent areas near buildings or dense tree lines that reduce efficiency by up to 50%.
Step 2: Select the Right Size Turbine for Your Needs
Calculate your essential daily power consumption in kilowatt-hours to determine turbine size requirements. For basic prepper needs (lights, radio, phone charging, small refrigerator), a 400-1000W turbine typically suffices, generating 40-100 kWh monthly in good wind conditions. Choose models with sturdy construction, low cut-in speeds (6-8 mph), and automatic shut-off features for storm protection. Research manufacturer reputation and warranty coverage, as cheap turbines often fail within the first year.
Step 3: Obtain Necessary Permits and Check Zoning Laws
Contact your local building department to determine permit requirements, as most jurisdictions regulate structures over 10 feet tall. Review HOA restrictions, setback requirements, and height limitations that vary widely by location. Some rural areas have streamlined processes for alternative energy while suburban zones may prohibit turbines entirely. Budget 2-8 weeks for approval processes and be prepared to provide engineering specifications and property surveys.
Step 4: Install the Tower Foundation and Mounting System
Dig a foundation hole at least 3-4 feet deep and pour a reinforced concrete base sized according to your tower specifications and local frost line depth. Install anchor bolts or ground anchors for guy wires at 120-degree intervals around the tower base, positioned according to manufacturer guidelines. Allow concrete to cure for minimum 7 days before proceeding with tower erection. Ensure the foundation is perfectly level, as even small deviations cause excessive vibration and premature component failure.
Step 5: Erect the Tower and Mount the Turbine
Assemble the tower sections on the ground with at least two helpers, following manufacturer torque specifications for all bolts. Use a gin pole or tilting base system to raise the tower safely, securing guy wires at proper tension intervals as you lift. Mount the turbine head at the top with blades initially removed to reduce weight and wind resistance during installation. Double-check all electrical connections are weatherproofed and guy wire tension is balanced before attaching blades.
Step 6: Wire the System to Your Charge Controller and Battery Bank
Run appropriately gauged copper wire (typically 10-6 AWG) from the turbine down through the tower to your charge controller, using conduit for protection against weather and rodents. Connect the charge controller output to your deep-cycle battery bank, ensuring proper polarity and fusing on all connections. Install a dump load resistor to dissipate excess power when batteries are full, preventing turbine overspeeding. Test all connections with a multimeter before energizing the system to prevent expensive component damage.
Step 7: Commission the System and Establish Maintenance Schedule
With blades attached and brakes released, monitor initial operation during light winds to verify proper rotation direction and charging function. Document baseline performance metrics including voltage, amperage, and RPM at various wind speeds for future troubleshooting reference. Create a quarterly maintenance checklist including visual inspections, guy wire tension checks, bolt tightening, and bearing lubrication. Plan for annual blade inspection and balancing, as even minor damage significantly reduces output and increases mechanical stress on the entire system.
Frequently Asked Questions
How much power can a small wind turbine realistically produce for off-grid prepper use?
A 400–500W rated turbine in a location with average wind speeds of 10–12 mph will realistically generate 50–150 watts on an average day, and significantly more during storms or high-wind events. Over 24 hours, this translates to roughly 1–3 kilowatt-hours of energy daily under average conditions. That's enough to keep LED lighting, communication gear, phone charging, and a small refrigerator running if you're managing your loads carefully. Pairing your turbine with a solar array and a 200–400 amp-hour battery bank will dramatically increase your reliability and total available power.
Can I install a small wind turbine in a suburban neighborhood or on my property in the city?
It depends heavily on your local zoning laws, HOA rules, and property size. Many suburban municipalities have height restrictions that limit tower structures to 35 feet or less, and setback requirements that make installation impractical on smaller lots. Some jurisdictions require permits and engineering sign-offs. Before purchasing any equipment, check with your local building department and review your HOA covenants. If a full tower turbine isn't feasible, consider smaller rooftop-mount turbines (understanding their limitations), micro-turbines for supplemental charging, or focus on building out a strong solar panel and battery bank system instead.
What size battery bank do I need to store wind turbine power for emergency preparedness?
For most preppers running a 400–600W wind turbine as part of an off-grid emergency power system, a battery bank in the 200–400 amp-hour range at 12 or 24 volts is a practical starting point. This gives you 1–2 days of energy storage at modest consumption levels without any input from the turbine. Lithium iron phosphate (LiFePO4) batteries offer superior cycle life, depth of discharge, and weight compared to lead-acid, but at higher upfront cost. Size your battery bank based on your critical loads — calculate your daily watt-hour consumption for essential devices and multiply by the number of days of autonomy you want when the wind isn't blowing.
Affiliate Disclosure: SHTF Plan participates in the Amazon Services LLC Associates Program. Some links are affiliate links — we may earn a small commission at no extra cost to you.