HAM Radio for Preppers: How to Build a Reliable Emergency Communication Network
When cell towers fail and the internet goes dark, HAM radio keeps you connected. Here's how to get licensed, choose the right gear, and build a resilient comms network.
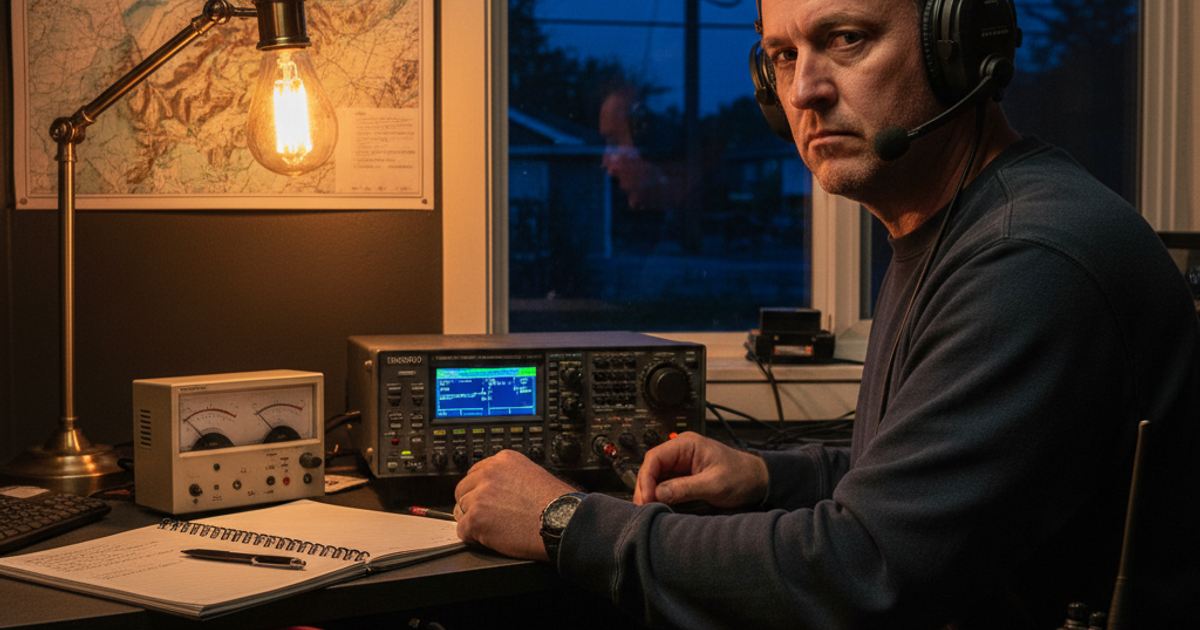
When the grid goes down, cell towers fail, and internet access disappears, your ability to communicate could mean the difference between life and death. Whether you're sheltering in place in a downtown apartment, riding out a storm in the suburbs, or managing a rural homestead, amateur (HAM) radio remains one of the most resilient, reliable, and versatile emergency communication tools available to preppers today. Unlike commercial radio systems or cellular networks, HAM radio operates independently of centralized infrastructure — and in a true SHTF scenario, that independence is everything.
According to the American Radio Relay League (ARRL), there are over 775,000 licensed amateur radio operators in the United States alone. During major disasters — including Hurricane Katrina, Hurricane Maria, and the 2011 Joplin tornado — amateur radio operators provided critical communication support when every other system failed. This isn't theory. It's a proven track record. If emergency preparedness is serious business to you, it's time to add HAM radio to your survival gear arsenal.
Why HAM Radio Belongs in Every Prepper's Emergency Communication Plan
Most preppers focus heavily on emergency food storage, water purification, and physical security. Communication often gets pushed to the back burner — until it's too late. The reality is that situational awareness during a crisis depends almost entirely on your ability to send and receive information. HAM radio gives you that capability across a range of distances, from a few miles to across continents, without relying on any third-party infrastructure.
For urban survival situations, HAM radio allows apartment dwellers and city-based preppers to maintain contact with family members, monitor emergency broadcasts, and coordinate with local preparedness groups — all without leaving their building. For suburban and rural preppers, the range and flexibility of HAM radio makes it ideal for farm-to-town communication, bug-out coordination, and monitoring regional emergency networks.
For a broader look at building redundant communication systems, check out this excellent resource on Off-Grid Communication: Building a Reliable Network When the Internet Goes Down — it pairs well with everything covered here.
How to Get Your HAM Radio License: Easier Than You Think
The single biggest barrier most preppers cite is licensing. The good news: it's far simpler than people assume. The FCC requires a license to transmit on amateur radio frequencies, but there are no Morse code requirements anymore, and the entry-level Technician Class license requires passing just a 35-question multiple choice exam.
To prepare, pick up the Gordon West ham radio license study guide — it's widely considered the gold standard for exam prep and walks you through every question pool in plain language. Most motivated preppers pass the Technician exam within two to four weeks of study. You can find local testing sessions through the ARRL website, and fees are typically under $20.
The three license tiers are:
- Technician Class: Entry-level; grants access to all VHF/UHF frequencies and some HF privileges. Perfect for local and regional communication.
- General Class: Expands HF access significantly, enabling long-distance (hundreds to thousands of miles) communication.
- Amateur Extra Class: Full privileges across all amateur bands. The gold standard for serious preppers and emergency communicators.
For most emergency preparedness purposes, a Technician license combined with a capable handheld radio will get you 80% of the way there. Upgrade when you're ready.
Choosing the Right HAM Radio Survival Gear for Your Situation
Not all HAM radios are created equal, and the right choice depends on your budget, living situation, and communication goals. Here's a practical breakdown:
Budget Entry Point: The Baofeng UV-5R
If you're just getting started, the Baofeng UV-5R handheld ham radio transceiver is the most popular entry-level option in the prepper community — and for good reason. Available for under $30, it's a dual-band VHF/UHF radio capable of transmitting and receiving on a wide range of frequencies. It's lightweight enough for a bug out bag and rugged enough for field use. New operators should note that programming it requires some patience, but free software (CHIRP) makes it manageable.
Step Up: The Yaesu FT-60R
For preppers who want a more durable, user-friendly handheld with better build quality and receiver performance, the Yaesu FT-60R dual band handheld radio is a significant upgrade. It features a rugged, weather-resistant body, wide-band receive capability (meaning you can monitor frequencies beyond the amateur bands, including aircraft and marine), and a reputation for outstanding reliability in harsh conditions. This is a radio that belongs in both your everyday carry kit and your emergency preparedness loadout.
Advanced Digital Features: The Kenwood TH-D74A
For the technically inclined prepper who wants advanced capability, the Kenwood TH-D74A handheld amateur radio is a premium tri-band radio with built-in APRS (Automatic Packet Reporting System) functionality. APRS allows GPS position reporting, text messaging, and data transmission over radio — capabilities that become invaluable for tracking group members during a bug-out or coordinating a mutual aid network across a region.
Long-Range HF Base Station: The Icom IC-7300
If you're building a fixed home station — whether in a suburban house or a rural off-grid homestead — the Icom IC-7300 HF base station transceiver represents one of the best values in amateur radio today. It covers HF bands (shortwave), allowing communication across hundreds or thousands of miles without repeaters or infrastructure. Paired with a wire antenna and a solar-charged battery bank, this radio can function entirely off grid — making it a cornerstone of any serious prepper communication setup.
Building Your HAM Radio Emergency Communication Network
Owning a radio is just the beginning. A true emergency communication network requires planning, practice, and community involvement.
Step 1: Program Local Repeaters
Repeaters are automated relay stations (typically on hilltops or tall buildings) that dramatically extend the range of handheld radios. A 5-watt handheld hitting a local repeater can communicate across 50–100+ miles. Program your area's repeaters before an emergency — not during one. The RepeaterBook app and website are excellent free resources for locating repeaters near you.
Step 2: Establish a Family or Group Communication Plan
Assign primary and backup frequencies. Set scheduled check-in times. Designate a net control operator who manages communications during an event. This mirrors exactly how amateur radio emergency nets operate at the county and state level. Building these habits now ensures your group operates efficiently when stress is high and time is short.
Step 3: Join ARES or RACES
The Amateur Radio Emergency Service (ARES) and Radio Amateur Civil Emergency Service (RACES) are volunteer organizations that coordinate with FEMA, the Red Cross, and local emergency management. Joining connects you with experienced operators, training opportunities, and the local emergency management infrastructure. It's also one of the best ways to maintain sharp radio skills during peacetime. You can find a list of emergency radio resources through our article on the Office of Emergency Management and Emergency Radio Stations in the United States.
Step 4: Power Your Radio Off-Grid
A radio without power is useless. Build a dedicated power supply using 12V lithium or AGM batteries paired with a small solar charging panel. Most handheld radios draw less than 2 amps on transmit, meaning even a modest 20Ah battery can provide many hours of operation. For base stations, a larger battery bank is appropriate. This pairs naturally with broader off-grid power planning — and protecting that equipment from EMP threats is equally important. See our guide on Faraday Cages: How to Protect Your Electronics from an EMP Attack for practical shielding strategies.
Step 5: Practice Regularly
Participate in weekly nets, contest weekends, and ARES drills. The more you operate under normal conditions, the more instinctive your radio skills become. Many amateur radio clubs host "Fox Hunt" events and emergency communication exercises that are both educational and genuinely fun.
HAM Radio for Urban Preppers: Apartment and City Considerations
Urban survival presents unique antenna challenges. Most apartment buildings prohibit external antennas, and reinforced concrete limits indoor signal propagation. Solutions include:
- Mag-mount antennas placed near windows or on metal surfaces
- Roll-up J-pole antennas that can be deployed from a balcony or fire escape temporarily
- Attic installations for those in houses or top-floor units with attic access
- Portable go-kits that can be deployed to a rooftop, park, or higher-ground location
Grey man principles apply here too — operating discreetly and avoiding drawing unnecessary attention to your radio activities in a dense urban environment is simply good situational awareness. For more on low-profile preparedness, the article on Top 10 Tips for Using Gray Man Methodology in a Societal Breakdown is essential reading.
What You'll Need
- FCC amateur radio license (Technician class minimum)
- Dual-band VHF/UHF handheld transceiver (5 watts minimum)
- Mobile or base station HF transceiver (100 watts recommended)
- Outdoor antenna (dipole or vertical for HF, J-pole or Yagi for VHF/UHF)
- Coaxial cable (RG-8X or better) and appropriate connectors
- 12V deep-cycle battery and solar panel or generator backup
- SWR meter for antenna tuning
- Waterproof notebook for logging contacts and frequencies
- Regional repeater directory and frequency list
Step-by-Step Instructions
Step 1: Obtain Your Amateur Radio License
Study for and pass the FCC Technician class exam, which grants access to VHF and UHF bands essential for local emergency communications. Use free online resources like HamStudy.org or purchase a study guide to learn basic radio theory, regulations, and operating procedures. The exam consists of 35 multiple-choice questions and costs around $15. Once licensed, your callsign becomes your legal identification for all radio transmissions.
Step 2: Select and Purchase Appropriate Radio Equipment
Start with a quality dual-band handheld radio like the Baofeng UV-5R for budget builds or Yaesu FT-65R for better reliability. For extended-range communications, invest in an HF transceiver such as the Icom IC-7300 or Yaesu FT-891 that covers 80m through 10m bands. Prioritize radios with manual tuning capabilities and simple controls that don't rely on complex digital menus. Ensure all equipment can operate on 12V DC power for battery backup compatibility.
Step 3: Install and Tune Your Antenna System
Mount your antenna as high and clear as possible, away from metal objects and electrical interference. For HF operations, install a dipole or end-fed wire antenna at least 20 feet high; for VHF/UHF, use a vertical or directional antenna with clear line-of-sight. Use an SWR meter to tune the antenna for minimum standing wave ratio (below 2:1 ideally) on your primary frequencies. Properly weatherproof all outdoor connections with self-amalgamating tape and sealant to prevent corrosion.
Step 4: Program Essential Frequencies and Repeaters
Identify and program all local emergency, ARES/RACES, and public service repeaters into your radio's memory channels. Include simplex frequencies (no repeater required) for direct communication on 146.52 MHz and 446.0 MHz, which are designated calling frequencies. Research and add NOAA weather radio frequencies for your area, plus shortwave frequencies used by emergency networks like the Hurricane Watch Net. Create a written backup list of all programmed frequencies in case you need to reprogram in the field.
Step 5: Establish a Reliable Off-Grid Power System
Connect your radios to a dedicated 12V deep-cycle battery with at least 100Ah capacity for extended operations. Install a 100-watt solar panel with a charge controller to maintain battery power indefinitely during daylight hours. Keep Anderson Powerpole connectors standardized across all equipment for quick setup and compatibility. Test your complete system regularly by running on battery power alone for 24-48 hours to identify any weaknesses.
Step 6: Join Local Radio Networks and Practice Regularly
Connect with your local amateur radio emergency service (ARES) group or community emergency response team (CERT) to participate in nets and drills. Check into weekly nets on both VHF/UHF and HF bands to practice proper radio procedures and maintain proficiency. Participate in events like Field Day or Simulated Emergency Tests to practice operating under realistic conditions. Building relationships with other operators now creates a reliable network you can depend on during actual emergencies.
Step 7: Create and Maintain Communication Plans
Develop written communication plans that specify primary and alternate frequencies, check-in schedules, and protocols for different emergency scenarios. Establish communication trees with family members and mutual assistance group members, assigning specific frequencies and times for scheduled contacts. Store laminated quick-reference cards with your radio equipment listing essential frequencies, phonetic alphabet, Q-codes, and basic operating procedures. Review and update your plans quarterly, and conduct unannounced communication drills to test effectiveness and identify gaps in your preparedness.
Frequently Asked Questions
Do I really need a license to use a HAM radio in an emergency?
Technically, FCC rules include a provision allowing unlicensed individuals to transmit in a genuine life-or-safety emergency. However, this is a narrow exception — not a loophole for general preparedness use. More importantly, operating without a license before a disaster means you have no practice, no knowledge of proper procedures, and no network connections. Get licensed now so you're genuinely capable when it matters. The Technician exam takes a few weeks to prepare for and is well worth the investment.
How far can a handheld HAM radio communicate in an emergency?
On VHF/UHF frequencies, a handheld radio with a standard antenna can reach 1–5 miles line-of-sight, or 50–100+ miles through a repeater. Elevated terrain dramatically increases range. HF base stations (like the Icom IC-7300) can communicate hundreds or thousands of miles under the right atmospheric conditions, making them ideal for regional and national emergency networks. Your effective range depends heavily on terrain, antenna quality, transmit power, and whether repeaters are available.
What's the best HAM radio setup for someone just starting out in emergency preparedness?
Start with a Baofeng UV-5R or Yaesu FT-60R handheld, study for and pass your Technician license, and program your local repeaters. Join a local amateur radio club or ARES group for training and community. Then gradually build toward a more capable setup — better antennas, an HF base station, off-grid power — as your skills and budget allow. Communication is a layered system, and any capability is better than none. Even a single programmed handheld in your bug out bag puts you ahead of the vast majority of people in any crisis scenario.
Affiliate Disclosure: SHTF Plan participates in the Amazon Services LLC Associates Program. Some links are affiliate links — we may earn a small commission at no extra cost to you.