DIY Composting Toilet: Off-Grid Sanitation When the Grid Goes Down
When sewage systems fail, sanitation becomes a life-or-death issue. Learn how to build a low-cost composting toilet to handle waste safely off-grid.
Why Off-Grid Sanitation Should Be a Core Part of Your Emergency Preparedness Plan
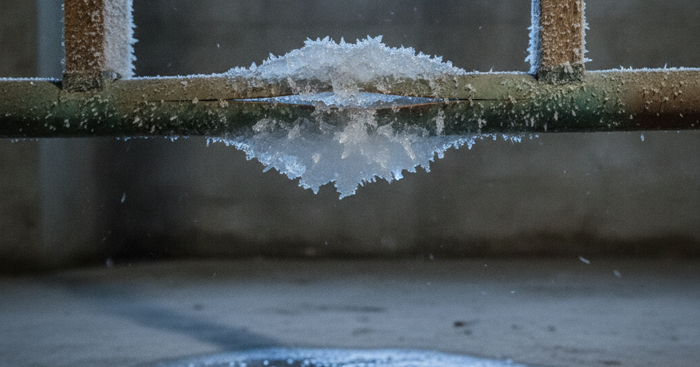
When preppers talk about what kills people in prolonged grid-down scenarios, the conversation usually centers on food, water, and security. Sanitation rarely gets the attention it deserves — and that's a potentially fatal oversight. History tells a grim story: during the 1994 Rwandan refugee crisis, cholera outbreaks killed tens of thousands within weeks, almost entirely due to failed sanitation. After Hurricane Katrina, contaminated floodwaters carrying raw sewage turned neighborhoods into disease vectors. The pattern repeats itself in every major collapse scenario.
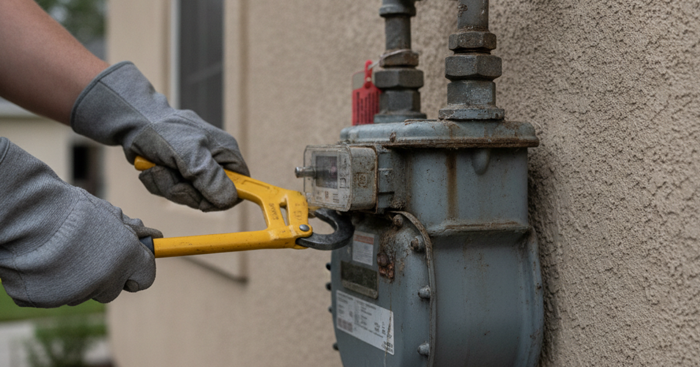
The average American flushes roughly 80-100 gallons of water per day, and a significant portion of that goes directly to waste management. When the grid goes down, municipal sewer systems that depend on electric pumping stations fail within hours. Septic systems can manage for a while, but without water pressure, even basic flushing becomes impossible. Every serious prepper needs a sanitation plan that functions completely independent of grid infrastructure — and a composting toilet is one of the most practical long-term solutions available.
This guide will walk you through building a functional DIY composting toilet, understanding how the composting process works, and integrating proper sanitation into your broader emergency preparedness strategy.
Understanding How Composting Toilets Work in Off-Grid Survival Situations
A composting toilet works on a deceptively simple principle: it separates liquid waste from solid waste, then uses aerobic decomposition to break down solid waste into safe, pathogen-free compost. Properly managed, the end product — called humus — is safe to handle and can even be used as a soil amendment for non-food gardens.
The key variables in any composting toilet system are:
- Urine diversion — Separating liquids from solids dramatically reduces odor and speeds decomposition
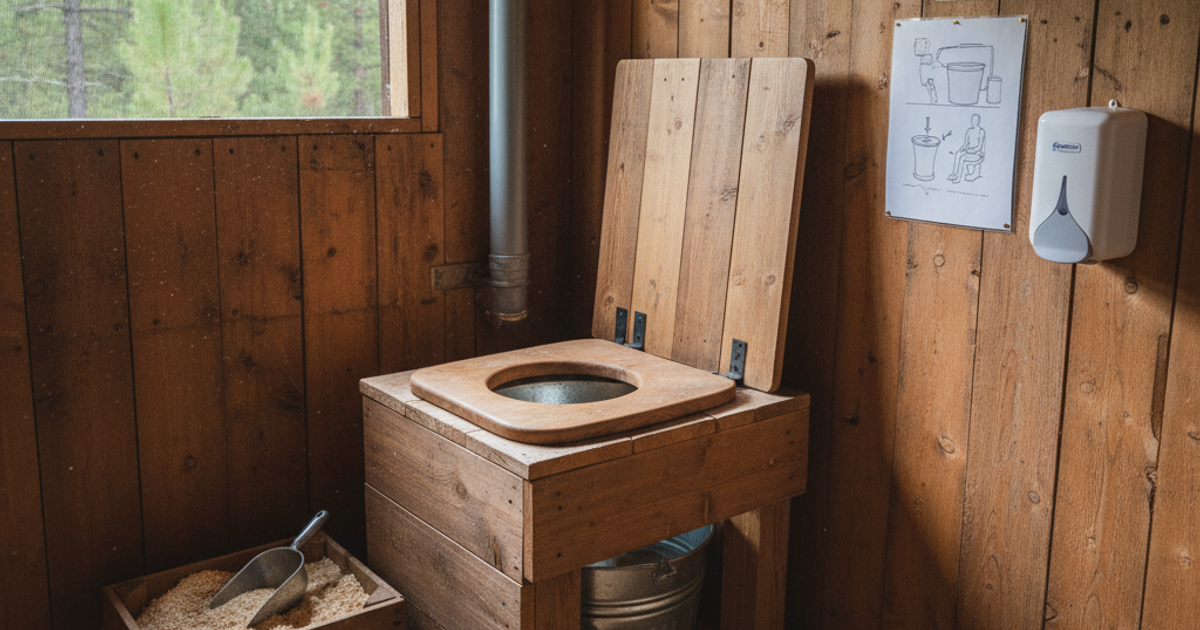
- Carbon cover material — Sawdust, peat moss, or coconut coir added after each use absorbs moisture and feeds the aerobic bacteria
- Aeration — Oxygen is essential for aerobic (non-smelling) decomposition; anaerobic decomposition produces methane and sulfur compounds
- Temperature — Decomposition accelerates significantly above 55°F; pathogen die-off occurs reliably above 131°F
- Time — Finished compost requires a minimum of 6-12 months of curing before it's considered safe
Commercial units like the Nature's Head Self Contained Composting Toilet with Close Quarters Spider Handle Design and the SUN-MAR GTG TOILET | Portable Toilet, Compost are engineered around these principles and require zero water or grid power. They represent the gold standard for permanent off-grid installations — but you can build a highly functional DIY version for under $50 in materials.
How to Build a DIY Composting Toilet Step by Step
Materials You'll Need
- One 5-gallon bucket with a tight-fitting lid
- A toilet seat designed to fit a 5-gallon bucket (widely available at hardware stores)
- Carbon cover material: sawdust, peat moss, or hydrated Coco Coir Brick - Compressed Coconut Fiber Growing Medium
- A second bucket for urine diversion (optional but strongly recommended)
- A small scoop or cup for applying cover material
- A larger secondary composting container (a 30-55 gallon drum or a dedicated compost bin)
Step-by-Step Construction
- Prepare your bucket base: Place 2-3 inches of hydrated coconut coir or sawdust at the bottom of your 5-gallon bucket. This initial layer absorbs liquid and jump-starts the decomposition process.
- Install the toilet seat: Snap the bucket toilet seat firmly onto the rim of the 5-gallon bucket. Test for stability before use — you don't want any surprises in a real emergency.
- Set up urine diversion: For a basic system, position a separate smaller container at the front of the seat. Many DIY builders cut a urine-diverting insert from HDPE plastic sheeting. Diluted urine (10:1 water to urine ratio) can be safely applied to the base of compost piles or fruit trees. Undiluted urine is too high in nitrogen and will burn plants.
- Establish your cover material station: Keep a bucket of your carbon material and a scoop directly beside the toilet. After every solid waste deposit, add a generous scoop — approximately 1 cup — of cover material. This is the single most important habit for odor control.
- Build a secondary composting chamber: A 5-gallon bucket is a collection vessel, not a composting chamber. When the bucket reaches about 2/3 capacity, transfer the contents to a larger, dedicated composting bin with a lid. A 55-gallon drum with ventilation holes drilled in the sides works excellently. Label the drum with the fill date — contents need to compost for a minimum of 6 months before handling.
- Ventilation: If you're installing this in an outhouse or enclosed structure, run a 4-inch PVC vent pipe from the composting chamber upward and out through the roof. This creates passive airflow that carries odors up and out while introducing oxygen for aerobic decomposition.
Accelerating Decomposition with Microbial Activators
Healthy decomposition depends on a thriving microbial community. In cooler climates or during the initial startup phase, you can dramatically accelerate the process with a dedicated microbial activator. Bioforce Microbial Composter Activator by Roebic Laboratories introduces billions of beneficial bacteria that break down organic waste efficiently while suppressing the anaerobic bacteria responsible for odor. Add it to your secondary composting chamber when you transfer waste, and again every 30 days.
Emergency Short-Term Sanitation Options for Bug-Out and Shelter-in-Place Scenarios
Not every SHTF scenario allows time to build a permanent composting system. If you're bugging out or have had to evacuate quickly, you need portable sanitation options that work immediately. A Reliance Products Luggable Loo Portable 5 Gallon Toilet is a compact, durable solution that belongs in every serious bug out bag plan or vehicle kit. Pair it with Cleanwaste Toilet Waste Bags with Poo Powder Deodorizer, which use a gelling agent to solidify waste and neutralize pathogens — making disposal safe even in situations where digging a proper cat hole isn't possible.
These short-term solutions are critical inclusions in your survival kit, alongside water purification, emergency food storage, and first aid supplies. Check out our Complete 72-Hour Bug Out Bag Checklist for Urban Survival for a full breakdown of what should be in your mobile kit.
Siting, Hygiene, and Disease Prevention Around Your Off-Grid Toilet System
Where you place your composting toilet system matters enormously for both function and safety. Follow these siting guidelines:
- Distance from water sources: Maintain a minimum 200-foot setback from any well, stream, pond, or rainwater collection system. This is non-negotiable — fecal contamination of drinking water sources is how cholera, typhoid, and hepatitis A spread. For more on protecting your water supply, see our guide on DIY Rainwater Harvesting: Build a Low-Cost Collection System for Off-Grid Water Security.
- Downhill from living areas: Always site waste management downhill and downwind from your shelter and food storage areas.
- Sun exposure: South-facing placement in the northern hemisphere maximizes solar heat, which accelerates composting and kills pathogens more effectively.
- Accessibility in all weather: You'll need to reach this facility in rain, snow, and darkness — a covered walkway or at minimum a clear path with stable footing is essential.
Hand hygiene after toilet use is critical. Without running water, maintain a simple handwashing station: a plastic jug with a spigot, soap, and a small basin. Alcohol-based hand sanitizer is a backup, not a replacement — it doesn't effectively kill all fecal-oral pathogens. Proper sanitation protocols, combined with your broader trauma kit and medical preparedness planning, form a disease-prevention system that can save your group from preventable illness in a prolonged emergency.
Legal Considerations and Long-Term Integration into Your Homestead
In many U.S. states, composting toilets are fully legal and even encouraged as part of sustainable building codes — but regulations vary significantly by county and municipality. States including Oregon, Vermont, Texas, and Montana have explicit legal frameworks permitting composting toilet use. Others require permits or professional installation. In a true SHTF scenario, code enforcement isn't your primary concern — but if you're building this system proactively as part of your homestead, research your local regulations to avoid complications.
A permanent composting toilet also pairs naturally with other off-grid homestead systems. The compost it produces can feed fruit trees, ornamental plantings, and perimeter hedgerows. The water you save — up to 6,600 gallons per person per year by eliminating toilet flushing — becomes available for emergency food storage crops, livestock, and drinking water reserves.
What You'll Need
- Two 5-gallon buckets with lids
- One standard toilet seat (or pool noodle for rim padding)
- Carbon-rich cover material (sawdust, peat moss, or shredded leaves)
- Heavy-duty trash bags or compost-safe bags
- Small scoop or garden trowel
- Rubber gloves
- Optional: plywood and screws for a basic enclosure
Step-by-Step Instructions
Step 1: Prepare Your Primary Waste Bucket
Select one 5-gallon bucket as your primary waste container and line it with a heavy-duty trash bag or compostable liner. If using a standard toilet seat, ensure it fits securely over the bucket rim by testing the fit before installation. For added comfort without a toilet seat, wrap foam pipe insulation or a split pool noodle around the bucket rim and secure it with duct tape to create a cushioned sitting surface.
Step 2: Create Your Cover Material Station
Fill the second 5-gallon bucket with dry, carbon-rich cover material such as sawdust, peat moss, coconut coir, or finely shredded leaves. Keep this bucket and a small scoop next to your toilet bucket at all times. The cover material will absorb moisture, reduce odors, and provide the necessary carbon balance for proper composting.
Step 3: Establish Your Toilet Location
Position your composting toilet in a private, well-ventilated area away from food preparation and water sources. If indoors, choose a bathroom, closet, or dedicated corner with airflow to minimize odors. For outdoor setups, construct a simple privacy screen or place the toilet inside a tent, shed, or outhouse structure to protect it from weather and maintain dignity during use.
Step 4: Use the Toilet Properly
After each solid waste deposit, immediately cover the waste completely with 2-3 cups of your carbon cover material using your dedicated scoop. For liquid waste, consider separating urine into a different container if possible, as this reduces odor and moisture in your composting bucket. Keep the lid sealed when the toilet is not in use to contain smells and prevent insect access.
Step 5: Monitor and Manage Fill Levels
Check your bucket daily and plan to empty it when it reaches about two-thirds full, typically after 3-7 days depending on the number of users. Never allow the bucket to become overfilled, as this makes handling difficult and increases spillage risk. Keep extra bags and cover material stocked to avoid running out during critical times.
Step 6: Empty and Process the Waste
When the bucket is ready for emptying, seal the bag tightly and remove it carefully while wearing rubber gloves. Bury the sealed bag in a dedicated composting area at least 200 feet from water sources and 12-18 inches deep, or transfer the contents to a proper humanure composting system. Never apply fresh human waste directly to food gardens; it requires at least 12-24 months of hot composting to become safe.
Step 7: Clean and Reset Your System
After removing the waste bag, wipe down the inside of the bucket with a diluted bleach solution or vinegar spray and allow it to air dry completely. Install a fresh liner bag, add a 2-inch base layer of cover material to the bottom, and return the bucket to service. Wash your hands thoroughly with soap and water, or use hand sanitizer if water is limited, after completing the maintenance process.
Frequently Asked Questions
How do you keep a composting toilet from smelling in a survival situation?
The number one cause of odor in any composting toilet system is insufficient carbon cover material and inadequate aeration. After every use, add at least one full cup of sawdust, peat moss, or coconut coir over solid waste — this is non-negotiable. Ensure your composting chamber has passive ventilation through an upward-venting pipe. Avoid adding meat, oils, or dairy to the system. In a properly managed setup, a composting toilet should smell earthy at worst, not foul. If you detect sulfur or ammonia odors, your system is anaerobic — add more carbon material and increase airflow immediately.
How long does it take for composting toilet waste to be safe to use as fertilizer?
The EPA and most composting experts recommend a minimum of 12 months of active composting followed by an additional curing period before humanure is considered safe for any garden application. Thermophilic composting — where the pile reaches and sustains temperatures above 131°F (55°C) for at least three consecutive days — can accelerate pathogen kill-off significantly, but requires careful temperature monitoring. For SHTF purposes, assume a minimum of 6 months for secondary composting before you handle the material, and never apply it to root vegetables or anything eaten raw. Use it only on fruit trees, ornamentals, or as a soil amendment dug deeply into non-food beds.
What can I use as a composting toilet if I don't have any materials in an emergency?
In a true emergency with no supplies, you can improvise with any container that has a lid — a trash can, a bucket, even a cardboard box lined with a garbage bag. The key principles remain the same: add carbon material (torn newspaper, dry leaves, or soil) after each use, keep the container covered between uses, and manage it away from living spaces and water sources. For short-term emergencies lasting days to weeks, even a properly dug cat hole (6-8 inches deep, at least 200 feet from water) is a viable option. For anything longer than a few days, a structured collection and composting system is essential to prevent disease. Having a survival gear kit that includes a portable toilet and waste bags before an emergency strikes will always be safer than improvising under pressure.
Affiliate Disclosure: SHTF.Plan participates in the Amazon Services LLC Associates Program. Some links are affiliate links — we may earn a small commission at no extra cost to you.