DIY Rainwater Harvesting: Build a Low-Cost Collection System for Off-Grid Water Security
Learn how to build an affordable rainwater harvesting system that provides a reliable off-grid water supply when municipal sources fail.
Water is the single most critical resource in any survival scenario. You can survive weeks without food, but only three days without water — and in a true SHTF situation, municipal water systems are often among the first infrastructure components to fail. Whether you're facing a natural disaster, grid-down emergency, or simply working toward genuine off-grid independence, building a DIY rainwater harvesting system is one of the highest-value investments any serious prepper can make.
The math is compelling: a modest 1,000-square-foot roof can capture roughly 600 gallons of water from a single inch of rainfall. For most of the continental United States, that adds up to tens of thousands of gallons annually — essentially free water falling from the sky, waiting to be collected. The question isn't whether to harvest rainwater. It's how to do it effectively, affordably, and safely.
Why Rainwater Harvesting Belongs in Every Emergency Preparedness Plan
Most emergency preparedness guides recommend storing a minimum of one gallon of water per person per day. A family of four needs at least 12 gallons for a 72-hour emergency — and considerably more if you factor in sanitation, cooking, and garden irrigation during an extended crisis. Static water storage alone has serious limitations: containers can be contaminated, supplies can run out, and hauling water from distant sources is physically demanding and potentially dangerous.
Rainwater harvesting solves the replenishment problem. Instead of a fixed reserve that depletes over time, a properly built collection system creates a renewable water supply that refills itself every time it rains. Paired with solid emergency water storage practices, a rainwater system gives you both a buffer and a long-term resupply mechanism — a genuine two-layer defense against water insecurity.
Before you begin, check your local and state regulations. While most states now permit residential rainwater collection, a handful still have restrictions on collection volume. Colorado, for example, recently loosened its laws to allow up to 110 gallons per household. A quick check with your county extension office will clarify what's legal in your area.
How to Choose the Right Rain Barrel Setup for Off-Grid Water Collection
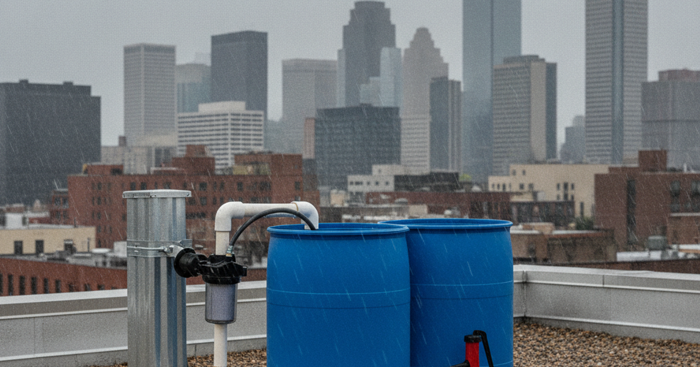
The simplest and most affordable starting point for any rainwater system is the classic rain barrel. A single 50-gallon barrel connected to a downspout can be set up in an afternoon with minimal tools and under $100 in materials. For most households, starting with two to four barrels linked in series is ideal — giving you 100–200 gallons of capture capacity per rain event.
When selecting a barrel, look for food-grade polyethylene construction, a sealed top with a screened inlet to keep out debris and mosquitoes, and a brass or stainless spigot positioned high enough to fill a standard watering can. The RTS Home Accents 50-Gallon Rain Barrel with Brass Spigot is a well-regarded option that checks all these boxes, with an overflow port that allows you to daisy-chain multiple barrels.
If space is a constraint or you need a portable solution for a bug out location or secondary property, consider a collapsible design. The Goplus 60-Gallon Collapsible Rain Barrel with Downspout Diverter Kit packs flat when not in use and comes with its own diverter — a solid choice for preppers who need flexibility across multiple locations.
Step-by-Step: Building Your Rainwater Collection System
Step 1: Assess Your Roof and Gutters
Your roof is your catchment surface. Asphalt shingles are the most common and generally acceptable for non-potable uses like irrigation. Metal roofs are ideal — they're clean, durable, and shed water efficiently. Avoid collecting from roofs with lead flashing, heavy moss treatments, or chemical coatings if you plan to use the water for anything beyond garden irrigation.
Clean your gutters thoroughly before connecting any collection equipment. Debris-laden gutters introduce organic matter that accelerates bacterial growth in stored water.
Step 2: Install a Downspout Diverter
A downspout diverter is the critical connector between your gutter system and your collection barrel. It intercepts water from the downspout and redirects it into your barrel, automatically bypassing to the normal drain once the barrel is full. The Downspout Diverter Kit fits most standard 2x3 and 3x4 downspouts and requires only basic tools to install — typically a drill, a utility knife, and about 30 minutes.
If your downspout doesn't align perfectly with your barrel placement, the Downspout Extension Flexible Adjustable lets you route water exactly where you need it without major modifications.
Step 3: Elevate Your Barrels
Place your rain barrels on a stable platform — cinder blocks, pressure-treated lumber, or purpose-built stands — at least 12 to 18 inches above ground. This does two things: it creates enough gravity-fed pressure to run a garden hose or drip line, and it makes accessing the spigot significantly easier. A barrel sitting directly on the ground produces almost no useful water pressure.
Step 4: Link Multiple Barrels
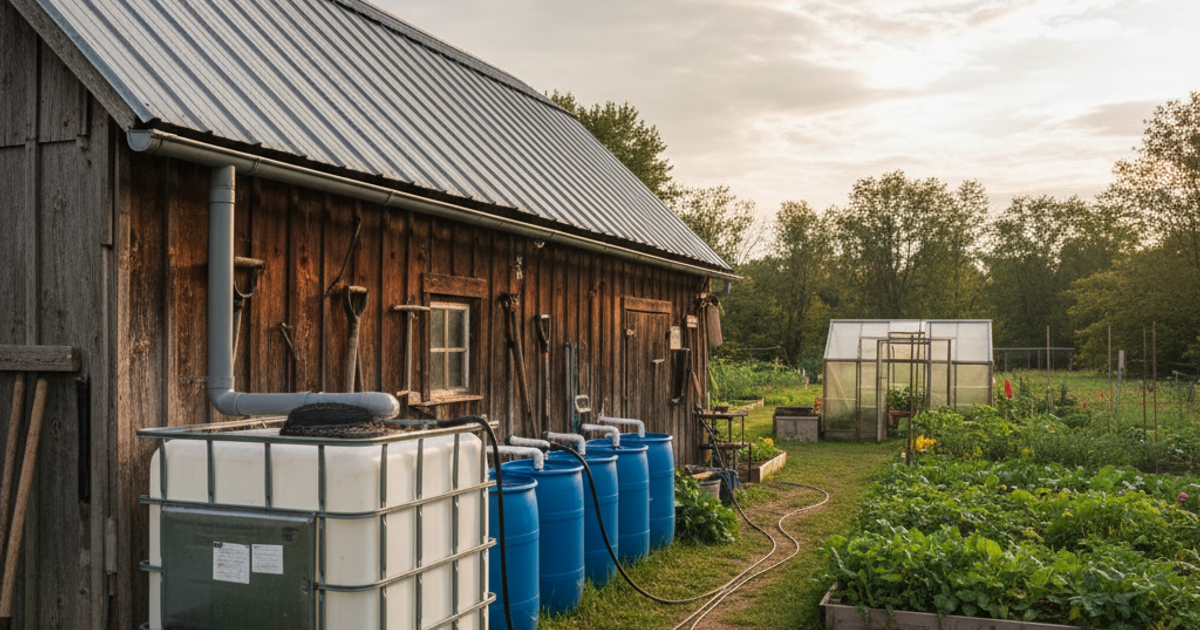
To expand capacity, connect barrels in series using overflow hose fittings. When the first barrel reaches capacity, water flows automatically into the second, then the third, and so on. Use food-grade vinyl tubing and bulkhead fittings rated for outdoor use. Four linked 50-gallon barrels give you 200 gallons of storage — enough to meet basic household needs for several weeks in a water-constrained emergency.
Step 5: Scale Up with Larger Storage Tanks
Serious long-term off-grid water security requires going beyond rain barrels. For those building a more robust system, large-format tanks dramatically increase your buffer capacity. The Augason Farms 55-Gallon Water Storage Barrel - BPA-Free Plastic Barrel - Emergency Water Storage Drum for Home Preparedness is designed specifically for emergency preparedness applications, with food-grade construction— making it an excellent complement to a roof-fed collection system.
Putting Your Collected Water to Work: Irrigation and Distribution
For garden irrigation — one of the highest water uses during a self-sufficiency scenario — a gravity-fed drip system connected directly to your rain barrel is extraordinarily efficient. Drip irrigation uses up to 50% less water than overhead sprinklers, delivering moisture precisely to root zones with minimal evaporation loss. The Rain Bird DRIP KIT Drip Irrigation Starter Kit works well with gravity-fed pressure from elevated barrels and can be configured to serve raised beds, container gardens, or row crops — an ideal pairing if you're also working on off-grid food production strategies.
Water Purification: Never Assume Rainwater Is Safe to Drink
This is where many DIY rainwater guides fall dangerously short: collected rainwater is not automatically safe for drinking. Atmospheric pollutants, roof contaminants, bird droppings, and bacterial growth in storage tanks all introduce potential pathogens. The EPA has confirmed that even rainwater collected in pristine areas can contain detectable levels of PFAS chemicals and biological contaminants.
For any potable use, harvested rainwater must be treated. Your options, in order of increasing effectiveness:
- First-flush diverters: Automatically discard the first 10–15 gallons of a rain event, which carry the highest concentration of roof contaminants.
- Sediment pre-filtration: A 50–100 micron mesh screen or settling chamber removes particulate matter before storage.
- Activated carbon filtration: Removes chemical contaminants, heavy metals, and improves taste.
- UV sterilization or chemical treatment: Kills biological pathogens. Unscented liquid chlorine bleach (8 drops per gallon) is an effective, low-cost option in an emergency.
- Ceramic or hollow-fiber filtration: High-performance filters rated to 0.1 micron will remove bacteria and protozoa reliably.
For a deeper dive into treating collected water, see our guide on mastering water harvesting and purification and our hands-on breakdown of DIY water filtration using household items.
Long-Term Maintenance: Keeping Your System Reliable When It Matters Most
A rainwater system that fails during a crisis is worse than no system at all — it creates false confidence. Build a maintenance schedule into your emergency preparedness routine:
- Clean gutters and screens at least twice per year (spring and fall).
- Inspect barrel interiors annually for algae, sediment, and cracks.
- Drain and scrub storage tanks before the first freeze of the season.
- Test stored water quarterly if using it for potable purposes.
- Replace filter cartridges and purification media on the manufacturer's recommended schedule.
- Document your system's capacity and condition in your household preparedness binder.
If you're building toward true off-grid independence, a rainwater harvesting system doesn't exist in isolation. Pair it with a sustainable food production strategy — explore our guides on building a DIY root cellar for long-term food preservation — and your homestead becomes significantly more self-reliant across multiple critical systems.
What You'll Need
- Food-grade 55-gallon plastic barrel or rain barrel with lid
- Downspout diverter kit or PVC elbow fitting
- Fine mesh screen or gutter guard material
- Spigot or ball valve (3/4-inch)
- Drill with 1-inch hole saw bit
- Silicone sealant or plumber's putty
- Cinder blocks or treated lumber for platform
- Overflow hose (garden hose works)
- Teflon tape
- Hacksaw or PVC cutter
Step-by-Step Instructions
Step 1: Select and Prepare Your Collection Barrel
Choose a food-grade barrel to ensure water safety, avoiding containers that previously held chemicals or non-food products. Thoroughly clean the barrel with a mixture of water and white vinegar, scrubbing all interior surfaces and rinsing completely. Inspect the barrel for cracks or damage that could cause leaks, and ensure the lid fits securely to prevent debris and mosquitoes from entering.
Step 2: Install the Spigot Near the Barrel Bottom
Measure 4-6 inches up from the bottom of the barrel and mark the location for your spigot to allow sediment to settle below the tap. Use a hole saw to drill a clean opening that matches your spigot size, then wrap the spigot threads with Teflon tape. Insert the spigot through the hole and secure it tightly with the included washer and nut, applying silicone sealant around the connection to prevent leaks.
Step 3: Cut an Inlet Hole and Add First-Flush Filtration
Drill or cut a 3-4 inch hole in the barrel lid or upper side panel where your downspout will connect. Cover this opening with fine mesh screen, securing it with waterproof adhesive or hardware to create a first-stage filter that blocks leaves, insects, and large debris. This simple filtration step significantly improves water quality and reduces maintenance by keeping contaminants out of your storage system.
Step 4: Create an Overflow System
Drill a second hole near the top of the barrel, about 2-3 inches below the rim, to prevent overflow during heavy rainfall. Attach a short length of hose or PVC pipe using a threaded fitting and sealant, directing the overflow away from your home's foundation. This safety measure prevents water damage and allows excess rainwater to drain to a secondary barrel or appropriate drainage area.
Step 5: Build an Elevated Platform
Construct a stable platform using cinder blocks or pressure-treated lumber that raises the barrel 12-24 inches off the ground for better water pressure and easier bucket filling. Ensure the platform is level and positioned on solid, compacted ground to support the barrel's weight when full (approximately 450 pounds). Place the platform directly beneath your downspout for optimal placement and easy connection.
Step 6: Connect the Downspout Diverter
Install a downspout diverter kit at an appropriate height on your existing gutter downspout, following manufacturer instructions for cutting and fitting. Connect the diverter outlet to your barrel's inlet using flexible tubing or PVC pipe, ensuring a downward slope for proper water flow. The diverter allows you to redirect water back to the original downspout when the barrel is full or during winter months when you need to drain the system.
Step 7: Test and Optimize Your System
Run water through your gutters with a garden hose to test all connections for leaks, tightening fittings and adding sealant where needed. Check that water flows smoothly into the barrel, the overflow functions properly, and the spigot dispenses without dripping. Make final adjustments to screen positioning and consider adding a second barrel with a connecting hose between spigots to double your storage capacity as your system proves successful.
Frequently Asked Questions
Is it legal to collect rainwater for off-grid use in the United States?
In most U.S. states, residential rainwater harvesting is legal and increasingly encouraged. States like Texas, Oregon, and Arizona actively incentivize it. A small number of states have historically restricted collection, but most have relaxed those laws in recent years. Colorado now permits up to 110 gallons per household. Always verify your specific state and county regulations before building a system, as rules can vary at the municipal level as well.
How much rainwater can I realistically collect from my roof?
The standard formula is: Roof area (sq ft) × Rainfall (inches) × 0.623 = Gallons collected. A 1,500-square-foot roof receiving one inch of rain will yield approximately 935 gallons — minus losses to evaporation and first-flush diversion, figure on 75–80% efficiency in a well-built system. In areas with 30–40 inches of annual rainfall, a mid-sized home can realistically harvest 15,000 to 25,000 gallons per year.
Can I drink rainwater collected from my roof without purification?
No — you should never drink untreated collected rainwater. Even in areas with clean air, roof surfaces accumulate bird droppings, atmospheric pollutants, and organic debris that introduce bacteria, parasites, and chemical contaminants. Always run harvested rainwater through a multi-stage treatment process — sediment filtration, activated carbon filtration, and either UV sterilization or chemical disinfection — before using it as drinking water. For emergency situations where you have limited options, boiling for a full minute (three minutes at elevation) will neutralize biological threats.
Affiliate Disclosure: SHTF Plan participates in the Amazon Services LLC Associates Program. Some links are affiliate links — we may earn a small commission at no extra cost to you.