The Urban Prepper's Guide to Rooftop and Balcony Rainwater Harvesting
Learn how to collect, store, and purify rainwater from your rooftop or balcony — even in a city apartment — before the next water crisis hits.
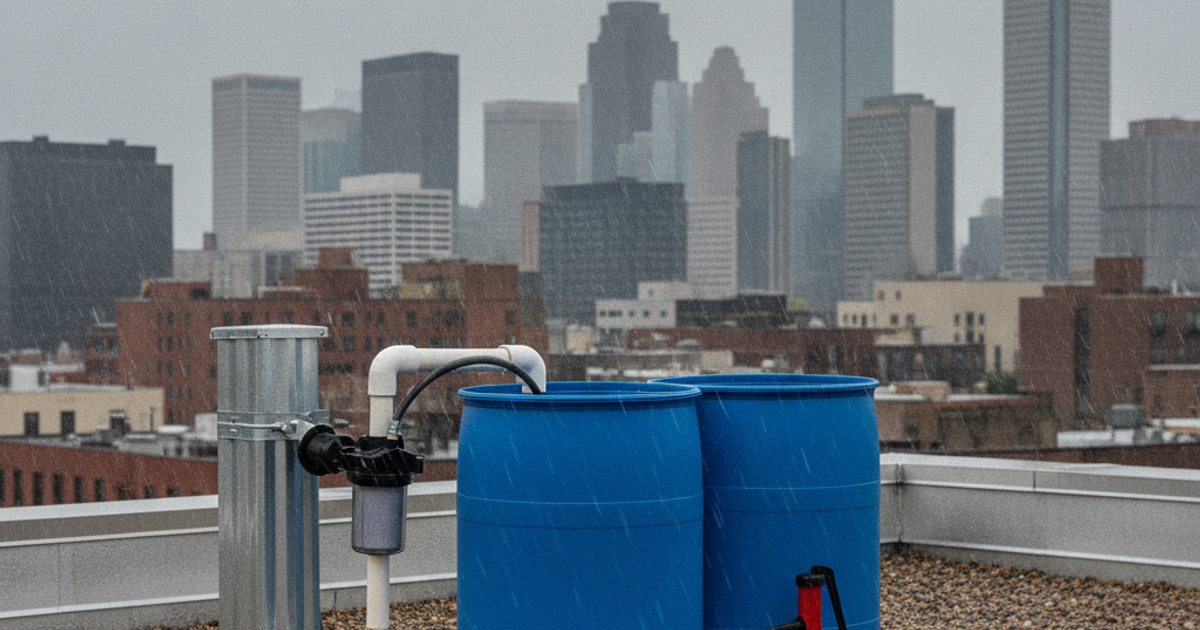
Water is the one resource you absolutely cannot improvise your way around. You can forage food, improvise shelter, and navigate without GPS — but without clean drinking water, you're looking at a three-day clock before serious physiological collapse begins. For urban and suburban preppers living in apartments or homes with limited land, accessing alternative water sources during an emergency feels like a puzzle with no solution. It isn't. Rainwater harvesting is one of the most underutilized and misunderstood skills in the prepper community, and with the right setup, even a 10th-floor apartment dweller or a suburban homeowner with a small balcony can capture, store, and purify enough water to survive a prolonged grid-down scenario.
According to the U.S. Geological Survey, one inch of rainfall on a 1,000 square foot surface yields approximately 600 gallons of water. Even a modest 200 square foot rooftop terrace or balcony can realistically collect 120 gallons from a single rainstorm — enough to sustain one adult for two months at the FEMA-recommended minimum of one gallon per day. The math is on your side. What you need is the system to capture it.
This guide is built for apartment renters with balconies, condo owners with rooftop access, suburban homeowners, and rural preppers who want to supplement or replace traditional water infrastructure. Whether you're building your first emergency preparedness system or hardening an existing setup, rainwater harvesting belongs in your survival toolkit right alongside your emergency water storage plan and your water purification protocols.
What You'll Need
Tools
- Utility knife or box cutter
- Drill with hole saw attachment
- Tape measure
- Level
- Adjustable wrench
Supplies
- WISY vortex rainwater filter downspout
- First Flush Diverter rainwater harvesting kit
- RomoTech poly storage tank
- Aquatabs water purification tablets
- Berkey gravity water filter system
- Food-grade silicone sealant
Understanding Rooftop and Balcony Collection: Urban Survival Water Basics
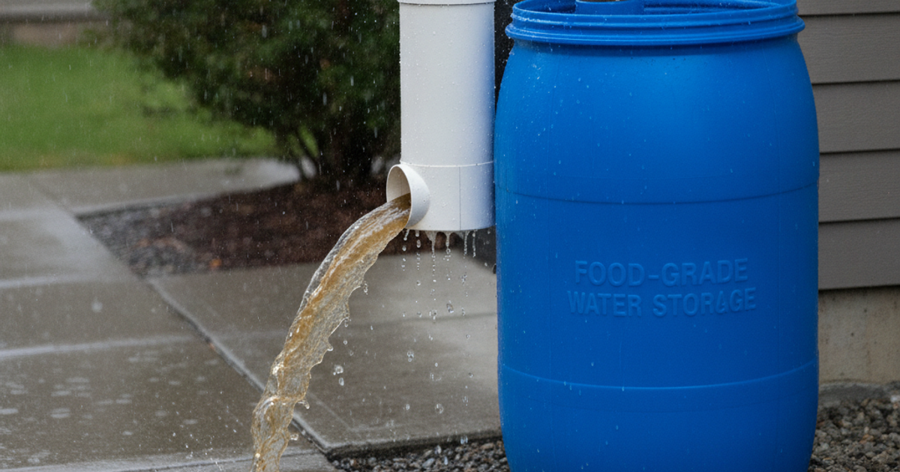
Before you start drilling holes and connecting hoses, you need to understand what you're working with. Urban rooftops and balconies present unique challenges compared to traditional rural rainwater harvesting setups. First, urban surfaces — tar roofing, painted concrete, coated membranes — can leach chemicals into collected water. This doesn't make the water unusable; it makes filtration and purification mandatory, not optional. Second, you may face legal restrictions. As of 2024, most U.S. states permit residential rainwater harvesting, but some states have restrictions on collection volume or require permits. Check your local ordinances before building a permanent system.
For apartment dwellers, the approach differs from homeowners. You're not tapping into a traditional gutter system — you're working with smaller collection surfaces like balcony floors, portable tarps rigged between railings, or purpose-built collection frames. The principles remain the same: intercept rainfall before it hits the drain, filter debris, divert the first flush of contaminated runoff, and store the clean water in sealed, food-safe containers.
Choosing the Right Collection Surface for Maximum Water Yield
The collection surface is the foundation of your entire system. A larger, cleaner surface means more water per storm. Here's how to evaluate your options:
- Sloped or flat rooftop: Ideal for homeowners. Sloped roofs channel water naturally into gutters. Flat rooftops require gravity-fed collection points or slight tilting of catchment surfaces.
- Balcony floor: Works well for apartment preppers. Most balconies have a slight drain slope built in. Redirect that drain with a diverter collar into a collection container instead of the building's drain system.
- Tarps and rigged catchment panels: The most flexible urban survival option. A 10x12 foot tarp rigged with paracord between anchor points — railings, hooks, posts — can funnel water into a central collection point using a simple center depression or a ridgeline-and-gutter design. For help with rigging techniques, see our guide on essential knot-tying skills for every survival scenario.
- Window boxes and shallow pans: Lower yield, but useful for supplemental collection during sustained rain events in apartment settings where balcony space is limited.
Regardless of which surface you use, cleanliness matters. Sweep or rinse your collection surface before a predicted rain event, and always use a first flush diverter to discard the initial flow of water that carries the heaviest load of bird droppings, particulates, and surface contaminants.
Filtration: The First Line of Defense Before Purification
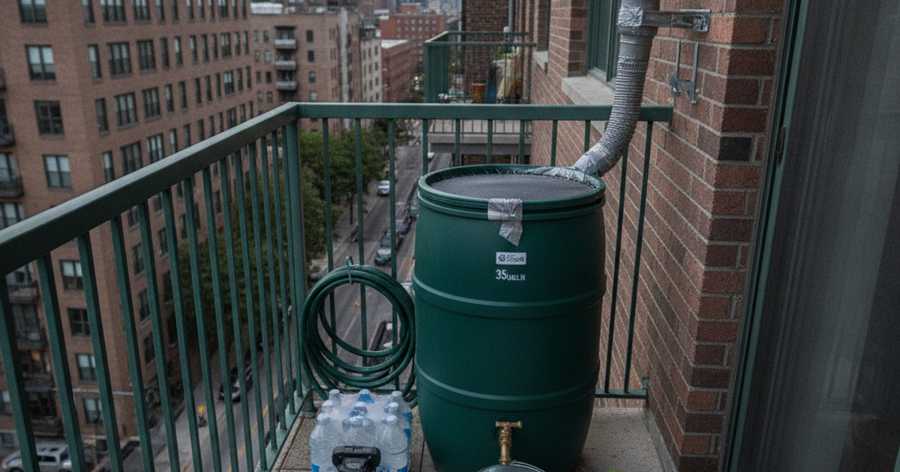
Collected rainwater is not automatically safe to drink. It passes through air, over surfaces, and through collection hardware before it reaches your container — picking up biological and chemical contaminants at every stage. Your filtration chain should include at least three stages: debris screening, first flush diversion, and particle filtration.
For debris screening, a fine mesh screen (200 microns or smaller) stretched over your collection inlet prevents leaves, insects, and large particulates from entering your storage tank. Replace or clean this screen after every rain event.
The first flush diverter is one of the most critical and most overlooked components of any rainwater system. The first gallons of any rain event carry the highest concentration of contaminants washed from your collection surface. A First Flush Diverter rainwater harvesting kit automatically redirects this initial dirty flow away from your storage tank and into a separate chamber or drain, then switches to the storage tank once the worst contamination has passed. This single component can dramatically improve the quality of your stored water.
For inline filtration at the downspout or inlet point, the WISY vortex rainwater filter is an outstanding solution. It uses centrifugal action to separate fine particles from incoming water with no moving parts and self-cleaning capability. It's widely used in professional rainwater harvesting installations across Europe and increasingly available for residential use in North America.
Storage Solutions for Every Urban Environment
Once you've filtered the water, you need to store it correctly. The wrong container can leach chemicals, allow algae growth, or collapse under the weight of water — all of which turn your survival resource into a liability.
Key rules for rainwater storage containers:
- Use only food-grade, BPA-free containers rated for potable water storage
- Choose opaque or dark-colored containers to inhibit algae growth
- Ensure containers are fully sealable with threaded or gasketed lids
- Calculate weight carefully — water weighs 8.34 lbs per gallon; a 55-gallon tank weighs over 460 lbs when full
- Store tanks on structural load-bearing surfaces, not cantilevered balcony sections or unsupported shelving
For urban rooftop installations with moderate space, the RomoTech poly storage tank offers a durable, food-safe polyethylene construction that resists UV degradation and holds up in both hot and cold conditions. These tanks come in a range of sizes suitable for rooftop use.
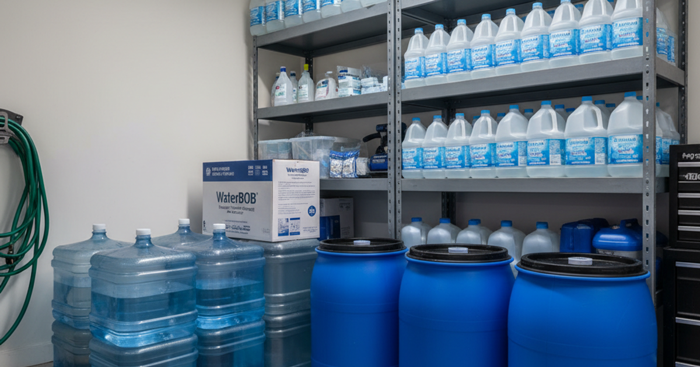
For apartment preppers who lack rooftop access entirely, emergency water storage inside the unit is your fallback. The WaterBOB bathtub emergency water storage bladder is one of the most practical urban survival tools available. It stores up to 100 gallons of tap water using your existing bathtub, creates a sealed food-grade environment, and fills in less than 20 minutes when you receive advance warning of an emergency. This is not a rainwater collection device — it's your insurance policy for situations where collection isn't possible and tap water is about to be cut off. Keep one in every bathroom.
For scalable storage with maximum flexibility, consider a collapsible IBC tote rainwater container. These fold flat when empty for storage, then expand to hold several hundred gallons. They're popular with rural preppers who need large-volume storage without permanent infrastructure, but the collapsible variants work well for urban and suburban preppers who need a solution that doesn't dominate their available space when not in use.
Purification: Turning Collected Rainwater Into Drinkable Water
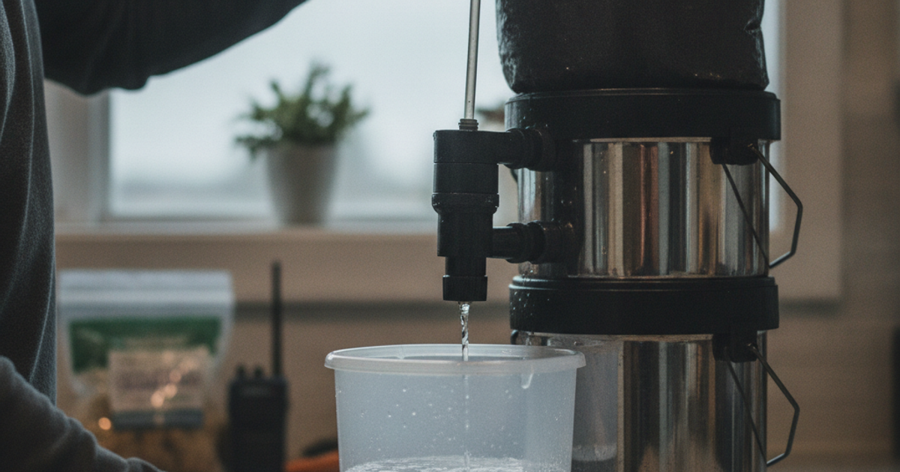
Filtration removes particles. Purification kills pathogens. Both steps are required before drinking any collected rainwater. Your purification chain should include at least two independent methods.
Chemical treatment: Aquatabs water purification tablets are the gold standard in emergency water purification. Each tablet treats a specific volume of water, neutralizing bacteria, viruses, and most protozoa in 30 minutes. They're compact, lightweight, shelf-stable for years, and inexpensive enough to stockpile in quantity. Keep them in your bug out bag, your apartment emergency kit, and your vehicle emergency kit.
Gravity filtration: The Berkey gravity water filter system is arguably the most trusted name in off-grid and emergency water purification. It removes bacteria, viruses, heavy metals, chlorine, pharmaceuticals, and a wide range of chemical contaminants using gravity alone — no power, no plumbing required. For urban preppers, the countertop Berkey units fit neatly on a kitchen counter and require no installation. For a grid-down scenario where power is unavailable and tap water is compromised, the Berkey is the cornerstone of a serious home water purification system.
For moving water from storage containers to your filtration system or point of use, a Tera Pump manual hand pump eliminates the need to tip or drag heavy containers. It works with standard containers and IBC totes, transfers water cleanly, and requires no electricity. At a few dollars per container-load, gravity or gravity-plus-pump setups outperform powered pumps in a SHTF scenario where power availability is uncertain.
Step-by-Step Instructions
Step 1: Assess Your Collection Surface and Calculate Potential Yield
Measure the square footage of your available collection area — balcony, rooftop, or tarp installation footprint. Multiply that square footage by 0.623 to get the gallons of water collectable per inch of rainfall. Cross-reference with your local average rainfall data (available at weather.gov) to estimate your realistic monthly collection volume. This calculation determines how large your storage system needs to be and how frequently you can expect to refill it.
Step 2: Clean and Prepare the Collection Surface
Before your first collection event, sweep or rinse all surfaces that will channel water into your system. Remove bird droppings, debris, and any chemical residue from roofing materials. If your surface has been recently painted or sealed, allow the full manufacturer-recommended cure time before using it for water collection. This initial cleaning dramatically reduces your first-event contamination load.
Step 3: Install Your Debris Screen and First Flush Diverter
Attach a 200-micron mesh screen at every inlet point to prevent leaves, insects, and large debris from entering your collection line. Connect your First Flush Diverter rainwater harvesting kit downstream of the screen but upstream of your storage tank. Follow the manufacturer's guidelines for sizing the diverter chamber — generally, one gallon of diversion capacity per 100 square feet of collection surface is the standard benchmark.
Step 4: Install Inline Vortex or Particle Filter at the Downspout
Mount your WISY vortex rainwater filter at the downspout or primary collection channel where water transitions from your collection surface to your storage tank. Ensure the filter is oriented correctly per the manufacturer's instructions and that the outlet connects directly to your storage tank inlet. Test the connection with a hose before the first rain event to confirm no leaks at any junction.
Step 5: Position and Secure Your Storage Containers
Place your storage tanks on a structurally sound, level surface. Verify with a level and consult your building's load capacity specifications if you're placing containers on a rooftop or elevated balcony — a full 50-gallon tank exerts over 400 lbs of concentrated weight. Secure tanks against tipping with straps or brackets anchored to fixed structural elements. Connect your filtered outlet line to the tank inlet and seal all connections with food-grade silicone.
Step 6: Treat Stored Water with a Primary Purification Method
Once water has entered your storage tank, treat it immediately with an appropriate dose of Aquatabs water purification tablets based on your tank volume. This provides immediate chemical treatment against biological contamination and creates a residual disinfectant that inhibits bacterial regrowth during storage. Mark the treatment date on each container and retreat according to the manufacturer's schedule for long-term storage.
Step 7: Filter at the Point of Use Before Drinking
Before consuming any stored rainwater, pass it through your Berkey gravity water filter system or equivalent point-of-use filter. This second-stage treatment removes any contaminants that survived chemical treatment, including heavy metals and chemical runoff from roofing materials. Never skip this step — even chemically treated water benefits from physical filtration before consumption.
Step 8: Inspect, Rotate, and Maintain the System Regularly
Check all screens, filters, seals, and connections monthly. Clean debris screens after every rain event. Inspect storage tanks for algae growth, sediment accumulation, and structural integrity quarterly. Rotate stored water every six months by draining, cleaning, and refilling tanks with freshly collected and treated water. Log all maintenance dates to ensure your system remains functional when you need it most.
Legal and Safety Considerations for Urban Rainwater Collection
Most U.S. states now permit residential rainwater harvesting, but regulations vary significantly. Texas, for example, actively encourages it and exempts rainwater harvesting equipment from sales tax. Colorado previously restricted collection but now allows residents to collect up to 110 gallons. California permits residential collection with certain exemptions. Always verify your local and state regulations before building a permanent system. For renters, get written permission from your landlord before modifying any drainage infrastructure — even temporary modifications to existing drain lines.
From a safety standpoint, never drink unfiltered and untreated rainwater, regardless of how clean it appears. A study published in Environmental Science & Technology found PFAS (per- and polyfluoroalkyl substances) in rainwater samples globally, including in remote regions far from industrial sources. Urban rainwater presents additional contamination risks from air pollution, roofing materials, and biological sources. Treat every drop as contaminated until proven otherwise through proper filtration and purification.
Also consider what happens during a declared emergency or SHTF scenario when situational awareness becomes critical. Maintaining a low profile with your water collection system — not broadcasting to neighbors that you have a significant water reserve — aligns with the same gray man principles that apply to your broader preparedness strategy. For more on staying under the radar, see our guide on gray man principles for everyday carry.
Scaling Your System: From Balcony Bucket to Serious Urban Water Independence
A beginner balcony system might capture 10-20 gallons per rain event using a single downspout, a basic first flush diverter, and a 30-gallon storage drum. That's meaningful in an emergency. A more developed system using multiple tarps or a full rooftop installation, cascading storage tanks, and a proper filtration train can capture hundreds of gallons per storm — enough to supply a family for weeks without any municipal water input.
The key to scaling is redundancy. Don't rely on a single storage tank or a single filtration method. Build your system in layers: multiple collection points, staged filtration, chemical backup treatment, and at least one gravity-fed point-of-use filter that works without electricity. This layered approach mirrors the broader philosophy behind comprehensive emergency preparedness — no single point of failure should take down your entire survival infrastructure. For related guidance on building a comprehensive water supply, check out our detailed article on DIY rainwater harvesting for off-grid water security.
Frequently Asked Questions
Is rainwater safe to drink after collecting it from a rooftop or balcony?
Collected rainwater is not safe to drink without filtration and purification. Urban rooftops and balconies harbor bird droppings, chemical residue from roofing materials, air pollution particulates, and other biological and chemical contaminants. Rainwater must pass through at minimum a debris screen and first flush diverter before storage, and then through chemical treatment and a quality gravity filter like the Berkey before consumption. Treated correctly, rooftop rainwater is a reliable and safe drinking water source in an emergency.
How much rainwater can I realistically collect from an apartment balcony?
A standard apartment balcony of approximately 60-100 square feet can collect 37-62 gallons per inch of rainfall. In regions that receive 30-50 inches of rain annually, a well-designed balcony collection system can theoretically capture 1,100-3,100 gallons per year — though practical yield will be lower due to evaporation, overflow, and the timing of rain events. Even capturing a fraction of this during an emergency provides a significant survival advantage over neighbors with no collection capability whatsoever.
Can I set up a rainwater collection system if I rent my apartment?
Yes, with limitations. Renters should focus on non-permanent, non-invasive collection systems. Portable tarps rigged with paracord, freestanding collection barrels placed on balconies, and collapsible IBC tote containers require no modifications to building infrastructure and can be removed easily. Always get written permission from your landlord before redirecting any existing drain lines, even temporarily. The WaterBOB bathtub bladder is the ideal indoor supplement for renters — it requires zero installation, stores 100 gallons using existing bathroom infrastructure, and can be deployed in minutes when an emergency is incoming.
Affiliate Disclosure: SHTFPlan.net participates in the Amazon Services LLC Associates Program. Some links are affiliate links — we may earn a small commission at no extra cost to you.