Dental Emergencies in a Disaster: How to Handle Tooth Pain and Infections When There's No Dentist
When the grid goes down, dental emergencies can turn life-threatening fast. Here's how to manage tooth pain, infections, and extractions without a dentist.
Most preppers have meticulously planned for water shortages, power outages, and food scarcity. But ask yourself: when did you last think about your teeth? Dental emergencies are one of the most commonly overlooked categories in emergency preparedness — and one of the most debilitating when they strike. A severe toothache can render an otherwise capable person nearly non-functional, and an untreated dental infection can escalate into a life-threatening systemic crisis within days.
According to the American Dental Association, dental emergencies account for over 2 million emergency room visits annually in the United States — and that's during normal times when dental clinics are open. In a true SHTF scenario, grid-down event, or prolonged disaster, professional dental care may be completely unavailable for weeks, months, or longer. Whether you're sheltering in a city apartment, a suburban home, or a rural homestead, knowing how to manage dental pain and infections could be the difference between staying operational and becoming a liability.
This guide is not a substitute for professional dental care. It is, however, a practical framework for managing dental emergencies when professional care simply isn't accessible.
Why Dental Emergencies Should Be Part of Every Emergency Preparedness Plan
Dental problems don't pause during disasters. In fact, stress, dehydration, changes in diet, and disrupted hygiene routines — all hallmarks of a disaster scenario — accelerate dental deterioration. A cracked filling, an exposed nerve, or an abscess that you've been putting off can turn into a screaming crisis at the worst possible moment.
More critically, dental infections are not just painful — they're dangerous. An untreated abscess can spread bacteria into the jaw, neck, and bloodstream. Ludwig's angina, a rapidly spreading infection of the floor of the mouth, can obstruct the airway and kill within hours. Sepsis originating from a dental infection is a documented cause of death even in modern medical settings with antibiotics available. In a grid-down or SHTF environment, these outcomes become far more likely.
For preppers who are already thinking about medication stockpiling and building a drug reserve for long-term emergencies, dental preparedness fits naturally into that same mindset. You plan for what you can't predict — and dental emergencies fall squarely in that category.
Building a Dental Emergency Kit for Your Survival Gear Supply
Just as you wouldn't build a trauma kit for long-term emergencies without proper supplies, your dental emergency kit needs to be deliberate and well-stocked. The goal is to address pain, protect exposed tissue, temporarily restore lost fillings or crowns, and manage infection until professional care becomes available.
Here are the core components of a solid dental emergency kit:
- Temporary filling material: Lost fillings and broken teeth leave nerve endings exposed and vulnerable to infection. Dentemp dental repair kit is a consumer-grade temporary cement that can fill cavities, reattach loose crowns, and cover broken teeth. It won't replace a dentist, but it can buy you critical time and significantly reduce pain.
- Topical anesthetic: Orajel maximum strength toothache gel contains benzocaine, a local anesthetic that numbs the affected tissue quickly. It provides short-term but meaningful relief during flare-ups.
- Clove oil: One of the most effective natural dental analgesics available, eugenol — the active compound in clove oil — has been used in dentistry for over a century. Clove oil NOW Foods essential oil is a high-quality option that belongs in every prepper's medical and dental kit. Apply a small amount directly to the affected tooth and surrounding gum using a cotton ball. Do not swallow large quantities — clove oil is potent and can irritate soft tissue if overused.
- Dental cement for crowns: DenTek temporary dental cement is specifically designed for re-cementing loose caps and crowns at home. A dislodged crown exposes the prepared tooth underneath, which is extremely sensitive and prone to fracture — getting it back in place temporarily is a priority.
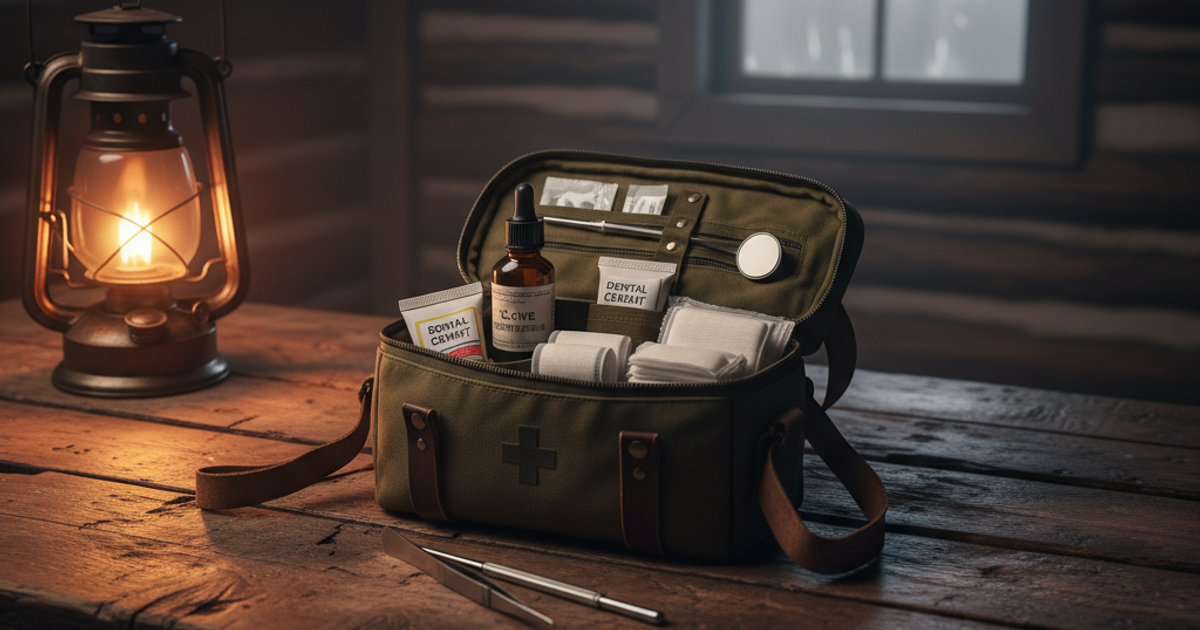
- Comprehensive dental kit: For a more complete solution, a Red Cross dental first aid kit includes multiple components for managing common dental emergencies and is a compact, purpose-built option worth keeping in your bug out bag or home emergency supply cache.
- Dental mirror and picks: Small, inexpensive, and invaluable for inspecting your own mouth or assisting someone else.
- Irrigation syringe: Critical for flushing debris and bacteria from tooth sockets, around infections, and after any improvised procedure.
- Over-the-counter pain relievers: Ibuprofen is particularly effective for dental pain because it addresses both pain and the inflammation driving that pain. Stock it in significant quantities.
- Antibiotics: This requires forethought. In a true long-term emergency, having access to amoxicillin or metronidazole (for penicillin-allergic individuals) can prevent a dental infection from becoming fatal. Talk to your physician now about obtaining a prescription for emergency use.
How to Manage Tooth Pain in a Survival Situation
Pain management is your first priority. A person incapacitated by tooth pain cannot maintain situational awareness, perform physical tasks, or make sound decisions — all of which are essential in a survival scenario.
Immediate pain relief options include:
- Ibuprofen + acetaminophen combination: Studies published in the Journal of the American Dental Association have shown that alternating ibuprofen (400-600mg) and acetaminophen (500-1000mg) every three hours is as effective as prescription opioids for moderate-to-severe dental pain, without the risks. This is your first line of defense.
- Clove oil application: As noted above, apply with a cotton ball directly to the tooth. Allow it to sit for 1-2 minutes. Relief is often rapid and can last 30-60 minutes.
- Salt water rinse: Dissolve one teaspoon of salt in eight ounces of warm water and rinse thoroughly. This reduces bacterial load, reduces swelling, and provides mild relief.
- Cold compress: Apply to the outside of the cheek to reduce inflammation. Do not apply ice directly to the tooth — extreme temperature changes can intensify nerve pain.
- Garlic: Raw garlic contains allicin, which has documented antimicrobial properties. Crush a clove and apply the paste to the affected area. It's not pleasant, but it's widely available and genuinely effective as a supplemental measure.
Recognizing and Managing Dental Infections When SHTF
This is the section that could save your life — or the life of someone in your group. A dental abscess is a bacterial infection that forms a pocket of pus at the root of a tooth or in the gum tissue. Left untreated, it will not resolve on its own. It will spread.
Warning signs of a dental abscess or spreading infection:
- Severe, throbbing pain that may radiate to the jaw, ear, or neck
- Swelling in the cheek, jaw, or neck
- Fever above 101°F
- Difficulty swallowing or opening the mouth
- A bad taste in the mouth (indicating the abscess may be draining)
- Swollen lymph nodes under the jaw
Any swelling extending toward the neck or causing difficulty breathing is a life-threatening emergency requiring immediate evacuation to medical care if at all possible.
For infections caught early, warm salt water rinses every 2-3 hours help encourage drainage. If antibiotics are available, begin the appropriate course immediately. Amoxicillin 500mg three times daily for 7-10 days is the standard first-line treatment for dental infections. Metronidazole (500mg twice daily) is an alternative for penicillin-allergic individuals. Never use antibiotics casually — but in a true SHTF scenario, using them appropriately for a documented infection may be life-saving.
Improvised Tooth Extraction: A Last Resort
Let's be direct: improvised tooth extraction should only be considered when an infection is life-threatening, the patient is deteriorating, evacuation to medical care is genuinely impossible, and all other options have been exhausted. This is not a DIY project for minor pain.
If you are in a true survival situation and must act, the general approach involves numbing the area as thoroughly as possible with topical anesthetics (benzocaine gel applied repeatedly), loosening the tooth by gently working it back and forth over many minutes, and extracting with clean, sterilized dental pliers or forceps — never standard household pliers, which can crush bone and introduce additional trauma. Post-extraction care includes controlling bleeding with clean gauze (bite down firmly for 30+ minutes), salt water rinses after the first 24 hours, and continued antibiotics if available.
This procedure without proper local anesthesia is extraordinarily painful and carries significant risks including broken tooth roots, dry socket, and worsening infection. It is a measure of last resort — emphasis on last resort.
Prevention: Your Most Powerful Survival Dental Tool
The best dental emergency in a SHTF scenario is the one that never happens. Before any disaster occurs, address known dental problems. Get that cracked tooth fixed. Have that borderline root canal evaluated. Replace that loose crown. Don't wait until the grid goes down.
Build dental hygiene supplies into your emergency food storage and supply cache just as you would water purification tablets or emergency rations. Stock extra toothbrushes, toothpaste (fluoride toothpaste significantly reduces cavity risk), dental floss, and antiseptic mouthwash. These take up minimal space in a survival kit or bug out bag and provide enormous long-term value.
For preppers interested in natural alternatives, medicinal herbs grown at home can supplement dental care — plants like calendula, chamomile, and yarrow have anti-inflammatory and antimicrobial properties useful for oral health support.
Dental Preparedness for Urban and Apartment Preppers
You don't need a homestead to be prepared for dental emergencies. Urban and suburban preppers can maintain a compact dental emergency kit in an apartment with minimal space. A small zippered pouch containing temporary filling material, clove oil, topical anesthetic, an irrigation syringe, and pain relievers takes up less space than a paperback book. Include one in your home kit, your vehicle emergency kit, and your bug out bag.
Urban preppers should also research and identify the nearest dental school clinic in their area — these typically offer lower-cost emergency services and may be more likely to remain operational during regional disruptions than private practices.
Recommended Dental Survival Gear Summary
To summarize the essential products for your dental emergency preparedness kit: the Dentemp dental repair kit handles lost fillings and broken teeth, while DenTek temporary dental cement addresses loose crowns and caps. For pain, keep both Orajel maximum strength toothache gel and clove oil NOW Foods essential oil on hand for short-term relief. Round out your kit with a Red Cross dental first aid kit for a comprehensive, ready-to-go solution. All of these are affordable, compact, and available now — before you need them.
What You'll Need
- Over-the-counter pain relievers (ibuprofen, acetaminophen)
- Clove oil or eugenol
- Oral antibiotics (amoxicillin or fish antibiotics if prescribed unavailable)
- Temporary dental filling material (Dentemp or zinc oxide powder)
- Dental floss and toothpicks
- Saltwater solution (1 tsp salt per 8 oz warm water)
- Sterile gauze and cotton balls
- Hydrogen peroxide (3% solution)
- Dental mirror and flashlight
- Ice packs or cold compress
Step-by-Step Instructions
Step 1: Assess the Dental Emergency and Identify the Source
Examine the mouth carefully using a flashlight and dental mirror to locate the problem tooth or area. Look for visible signs such as swelling, broken teeth, loose fillings, abscesses, or inflamed gums. Take note of which specific tooth hurts and whether the pain is constant, throbbing, or triggered by temperature or pressure. Document the severity and symptoms, as this will guide your treatment approach.
Step 2: Clean the Affected Area Thoroughly
Rinse your mouth vigorously with warm saltwater solution for 30 seconds, focusing on the problem area. Use dental floss to carefully remove any food particles or debris trapped between teeth or around the painful tooth. If an abscess or infection is present, gently rinse with a diluted hydrogen peroxide solution (equal parts 3% peroxide and water) to help reduce bacteria. Repeat this cleaning process every 2-3 hours to maintain oral hygiene and prevent infection from spreading.
Step 3: Manage Pain with Medication and Topical Treatments
Take ibuprofen (400-600mg) and acetaminophen (500-1000mg) together for maximum pain relief, following package directions and not exceeding recommended doses. Apply clove oil directly to the affected tooth using a cotton ball, as eugenol is a natural anesthetic and antibacterial agent. Keep the oil in contact with the tooth for several minutes, and reapply every few hours as needed. Use ice packs on the outside of your cheek for 15-minute intervals to reduce swelling and numb the area.
Step 4: Apply Temporary Filling Material for Broken or Damaged Teeth
If a tooth is broken, cracked, or has lost a filling, dry the area thoroughly with gauze before treatment. Mix and apply temporary dental filling material according to package instructions, pressing it firmly into the cavity or over the damaged area. Smooth the surface and have the patient bite down gently to ensure proper alignment. Avoid chewing on that side of the mouth and understand this is only a temporary solution lasting days to weeks.
Step 5: Treat Infections with Antibiotics and Drainage if Necessary
If signs of infection are present (fever, severe swelling, pus, or spreading redness), begin antibiotic treatment immediately with amoxicillin 500mg three times daily for 7-10 days. For visible abscesses with a white or yellow head, you may need to encourage drainage by rinsing frequently with warm saltwater to draw out infection—never lance an abscess yourself unless trained. Monitor for worsening symptoms such as difficulty breathing or swallowing, facial swelling, or high fever, which require emergency medical attention even in disaster conditions.
Step 6: Maintain Strict Oral Hygiene During Recovery
Continue brushing teeth gently twice daily, being careful around the affected area but not avoiding it completely. Rinse with saltwater solution after every meal and before bed to keep bacteria levels low and promote healing. Avoid sugary foods, alcohol, and tobacco, which can worsen infections and delay healing. Stick to soft foods that don't require heavy chewing and avoid extreme temperatures that might trigger pain.
Step 7: Monitor for Complications and Plan for Professional Care
Check the affected area daily for signs of improvement or deterioration, including reduced swelling, less pain, and normal coloration returning to gums. Watch carefully for red flags such as increasing pain despite treatment, fever above 101°F, difficulty opening your mouth, or swelling spreading to the neck or under the jaw. Document all symptoms, treatments, and responses so you can provide complete information to a dentist once professional care becomes available. Remember that these emergency measures are temporary solutions—seek professional dental care as soon as circumstances allow.
Frequently Asked Questions
What should I put in a dental emergency kit for my bug out bag?
A compact dental emergency kit for your bug out bag should include temporary filling material (like Dentemp), topical anesthetic gel (benzocaine-based, such as Orajel), clove oil for natural pain relief, temporary dental cement for loose crowns, a small dental mirror, an irrigation syringe, and a supply of ibuprofen and acetaminophen. A pre-assembled kit like the Red Cross dental first aid kit is a convenient starting point that takes up minimal space. If you have a physician or dentist willing to work with you on preparedness, a small antibiotic supply is worth discussing for true long-term emergency scenarios.
How do you treat a tooth infection at home when there's no dentist available?
In a grid-down or disaster situation with no access to professional dental care, managing a tooth infection involves several simultaneous approaches: rinse with warm salt water every 2-3 hours to reduce bacterial load and encourage drainage; apply clove oil or benzocaine gel for pain management; take ibuprofen to reduce inflammation; apply warm compresses to the outside of the jaw (not ice — warmth encourages drainage); and if antibiotics are available, begin an appropriate course such as amoxicillin 500mg three times daily. Monitor closely for signs of spreading infection — swelling toward the neck, difficulty swallowing or breathing, or high fever are signals to seek emergency medical evacuation immediately, as a spreading dental infection can become life-threatening within hours.
How long can you survive a tooth infection without treatment?
A tooth infection that remains localized — confined to the tooth and immediate surrounding tissue — may persist for weeks or even months without becoming acutely life-threatening, though it will be extremely painful and gradually worsen. However, if the infection spreads to the jaw, neck, or bloodstream, it can become fatal within days. There is no reliable way to predict when a localized abscess will spread. Historical cases of fatal dental infections in otherwise healthy adults have occurred within 2-5 days of initial spread. This is why dental infections in a SHTF or off-grid scenario must be treated aggressively from the moment they're identified — not monitored and hoped away.
Affiliate Disclosure: SHTF Plan participates in the Amazon Services LLC Associates Program. Some links are affiliate links — we may earn a small commission at no extra cost to you.