DIY Biogas Digester: Generate Free Cooking Fuel from Kitchen Waste Off-Grid
Turn food scraps and organic waste into free cooking gas with a DIY biogas digester — a powerful off-grid fuel solution for long-term self-reliance.
When the grid goes down and your propane tanks run dry, cooking becomes one of the most pressing survival challenges you'll face. Most preppers focus on building a 6-month food storage system and stocking emergency food storage, but far fewer think about the energy needed to actually cook that food. A DIY biogas digester solves this problem elegantly — turning your kitchen scraps, animal manure, and organic waste into a continuous, renewable supply of methane gas for cooking, completely off-grid.
This isn't fringe science. Biogas technology has been used successfully in rural India, China, and Africa for decades. According to the International Energy Agency, over 50 million household biogas systems are operating worldwide. The chemistry is simple, the materials are affordable, and the payoff is enormous for any serious prepper looking to achieve true energy independence.
What Is Biogas and How Does It Work for Off-Grid Survival?
Biogas is primarily methane (CH₄), typically comprising 50–70% of the output, with the remainder being carbon dioxide and trace gases. It's produced through anaerobic digestion — a natural process where bacteria break down organic matter in the absence of oxygen. The same process happens in swamps, landfills, and animal digestive systems. A biogas digester simply captures and channels that gas for practical use.
For the off-grid prepper, this means you can feed kitchen scraps — vegetable peels, fruit waste, coffee grounds, cooked food leftovers, and even animal manure — into a sealed vessel and collect burnable fuel from the other end. A medium-sized household digester processing 2–4 kg of food waste daily can generate enough gas for 1–2 hours of cooking per day. That's a game-changer in a long-term SHTF scenario.
If you're also raising backyard animals for food security — something we cover in our guide on DIY rabbit hutch and backyard livestock — the manure from those animals becomes a premium feedstock for your digester, creating a powerful closed-loop survival system.
How to Build a Simple DIY Biogas Digester from Scratch
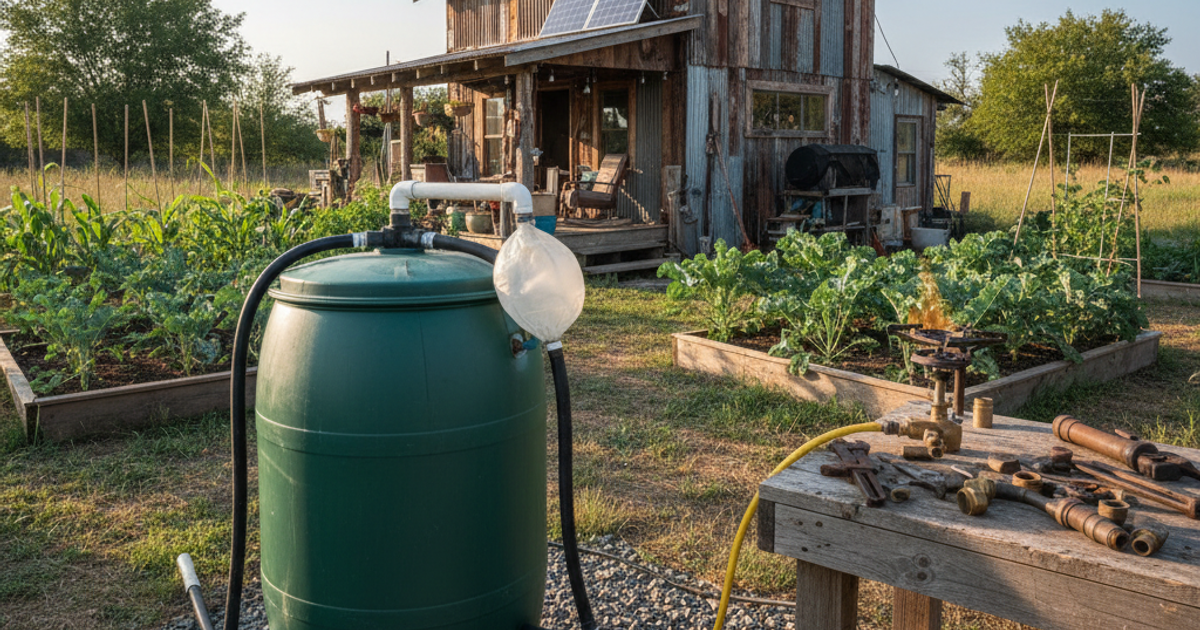
There are several digester designs suitable for home builders, but the most practical for individual preppers is the fixed-dome or floating-drum design built from readily available materials. Here's a straightforward approach using IBC totes or large plastic drums:
Materials You'll Need
- One 275-gallon IBC tote (or two 55-gallon drums for a smaller system)
- PVC pipe fittings (inlet, outlet, and gas collection port)
- A secondary collection container or inner bladder for gas storage
- Camco flexible gas hose tubing to safely route gas from the digester to your stove — this propane-rated tubing is rated for low-pressure gas applications and handles the flexible routing you'll need across an outdoor setup
- A biogas-compatible stove burner
- Basic hand tools, drill bits, and waterproof sealant
Step-by-Step Construction
- Prepare the digester vessel. Clean your IBC tote thoroughly. Cut an inlet port near the top on one side and an outlet slurry port near the bottom on the opposite side. The height difference creates natural flow.
- Install the inlet pipe. A 4-inch PVC pipe angled downward into the vessel allows you to pour in feedstock mixed with water (roughly a 1:1 ratio by weight). Seal all connections with waterproof epoxy or plumber's putty.
- Create the gas collection port. At the very top of the sealed vessel, install a ¾-inch fitting. This is where your gas line exits. Make absolutely certain this fitting is airtight — any leaks will waste gas and create safety hazards.
- Add pressure regulation. Before the gas reaches your burner, install a Marsh Bellofram low-pressure gas regulator in the line. Biogas exits digesters at very low pressure, and a quality regulator ensures steady, controllable flow to your burner — inconsistent pressure is the number one cause of poor flame performance in DIY systems.
- Install a check valve. For safety, place a Marshall Excelsior check valve in your gas line between the digester and the stove. This critical component prevents any backflow of air or flame into your digester — a potential explosion hazard that every builder must guard against.
- Inoculate the digester. Fill the vessel roughly two-thirds with water. Add a starter culture — fresh cow or pig manure works best, or you can use active septic tank sludge. This introduces the bacterial colonies needed to begin digestion. Some builders add a shovelful of soil from a swampy area.
- Seal and wait. Seal the top completely. In warm weather (above 68°F/20°C), you should begin producing usable gas within 2–4 weeks as bacterial colonies establish. Purge the first few batches of gas, as they'll contain too much CO₂ to burn well.
Temperature, Feeding, and Maintaining Your Digester Year-Round
Biogas production is highly temperature-dependent. The bacteria responsible for methane production thrive between 95–104°F (35–40°C) for thermophilic digestion, or 68–95°F (20–35°C) for the more common mesophilic process. In cold climates, you'll need to insulate your digester heavily or bury it underground below the frost line to maintain temperatures. Burying the vessel also leverages stable ground temperature and protects the system from UV degradation.
Feed your digester daily if possible. Ideal feedstocks include:
- Fruit and vegetable scraps
- Cooked food waste (avoid large bones)
- Livestock and poultry manure
- Grass clippings and plant trimmings
- Coffee grounds and tea leaves
Avoid adding citrus in large quantities, onions, meat in large amounts, oily foods, or any antibiotics — these inhibit bacterial activity. Maintain a carbon-to-nitrogen ratio of roughly 25–30:1 for optimal gas production.
The liquid effluent that drains from the outlet is a nutrient-rich biofertilizer — excellent for garden use. This connects your digester to your broader food production system in a powerful way, reducing waste to near zero.
Connecting Your Digester to a Biogas Stove
A standard propane or natural gas stove will not work well with raw biogas without modification. Biogas burns at a lower pressure and slightly different air-to-fuel ratio than propane. For a turnkey solution, the HomeBiogas biogas digester system is an excellent commercially engineered option that handles feedstock processing, gas storage, and safe delivery in one integrated unit — ideal for preppers who want proven performance without extensive DIY fabrication.
For the burner itself, the HomeBiogas biogas stove burner is specifically designed to operate on the lower pressure and methane content of homemade biogas, giving you a clean, consistent flame purpose-built for this application — a major upgrade over improvised burner solutions.
Position your stove in a well-ventilated area. Although biogas combustion is relatively clean, it does produce carbon dioxide and should never be used in an enclosed space without adequate airflow.
Safety Considerations Every Prepper Must Know
Methane is flammable and, in concentrations of 5–15% in air, explosive. Take these precautions seriously:
- Never smoke or use open flames near the digester during construction or maintenance
- Install your check valve and pressure regulator on every system, without exception
- Vent and purge the system before any repairs
- Keep the digester away from your home structure — a minimum of 10 feet is recommended
- Check all fittings and connections monthly for leaks using soapy water
Biogas also integrates naturally with other off-grid sanitation systems. If you've built a DIY composting toilet, the humanure from a well-managed system can eventually be incorporated into your digester feedstock after proper processing — a zero-waste approach to complete resource recovery.
Realistic Output Expectations for Emergency Preparedness
A 275-gallon digester fed consistently should produce approximately 100–150 liters of biogas per day under good conditions — enough for about 45–90 minutes of cooking. That's realistic for one to two cooked meals daily. Larger systems or systems fed with manure can produce substantially more. For a fully self-sufficient homestead, multiple digesters or a larger vessel (500+ gallons) would provide cooking fuel, potential water heating, and even fuel for a generator with additional modifications.
Combined with your emergency food storage and other preparedness systems, a working biogas digester means you'll never be scrambling for cooking fuel — even years into a grid-down scenario. That's the kind of resilience that separates truly prepared families from those who simply have a survival kit and a bug out bag.
What You'll Need
- Large plastic drum or barrel (55-gallon capacity)
- Smaller plastic drum that fits inside the larger one
- PVC pipes (1-2 inch diameter) and fittings
- Gas valve and pressure gauge
- Rubber inner tube or flexible gas hose
- Silicone sealant or epoxy putty
- Water displacement tank or bucket
- Fresh animal manure (cow or pig) for startup culture
- Drill with hole saw bits
Step-by-Step Instructions
Step 1: Prepare the Digester Tank
Clean your large 55-gallon drum thoroughly and drill two holes in the lid: one for the inlet pipe where you'll add organic waste, and one for the gas outlet pipe. The inlet hole should be 2 inches in diameter on one side, while the outlet hole should be 1 inch on the opposite side. Seal all connections with silicone sealant to ensure the system is airtight, as any leaks will prevent proper gas collection.
Step 2: Install the Gas Collection System
Fit the smaller drum inside the larger one, inverting it so it floats upside-down in the slurry to collect rising biogas. Attach a PVC pipe to the top (now bottom) of the inverted drum with waterproof sealant, running it through the lid of the outer drum. Install your gas valve and pressure gauge on this outlet pipe to control and monitor gas production.
Step 3: Create the Feeding and Drainage Ports
Install an inlet PVC pipe at a 45-degree angle into the side of the main drum, about 6 inches from the top, where you'll add your daily kitchen waste slurry. Drill another hole near the bottom of the drum and install a drainage valve or spigot for removing spent slurry (which makes excellent fertilizer). Ensure both ports are sealed completely to maintain anaerobic conditions inside the digester.
Step 4: Establish the Bacterial Culture
Fill the digester about halfway with water, then add 20-30 pounds of fresh cow or pig manure to introduce the anaerobic bacteria needed for decomposition. Mix thoroughly and let this starter culture sit for 5-7 days at temperatures above 60°F to allow the bacteria to multiply. You'll know the culture is active when you start seeing small bubbles and smell the characteristic odor of decomposition.
Step 5: Begin Feeding Kitchen Waste
Start adding blended kitchen scraps mixed with water in a 1:1 ratio through the inlet pipe daily, beginning with small amounts (1-2 pounds per day). Avoid adding meat, bones, oils, or citrus peels in large quantities as these can disrupt the bacterial balance. Maintain a consistent feeding schedule, as the bacteria work best with regular input, and gradually increase the amount as your system matures over 2-3 weeks.
Step 6: Monitor and Maintain Optimal Conditions
Check your digester daily to ensure temperatures stay between 68-95°F for optimal gas production, insulating the tank or using passive solar heating in colder climates. Stir the slurry gently once every few days to prevent solid buildup and ensure even decomposition. Watch your pressure gauge and maintain pH levels between 6.5-7.5 by adding small amounts of wood ash if the mixture becomes too acidic.
Step 7: Harvest and Use Your Biogas
After 15-25 days, your digester should produce usable biogas that can be piped directly to a modified gas stove or stored in a gas bag system. Always burn off the first batch of gas in an open area, as initial production contains high levels of carbon dioxide. One 55-gallon digester processing 5 pounds of waste daily can produce enough gas for 1-2 hours of cooking, with production increasing as your system matures.
Frequently Asked Questions
How long does it take for a homemade biogas digester to start producing gas?
Under warm conditions (above 68°F), most DIY digesters begin producing combustible biogas within 2–4 weeks of initial inoculation. The first week or two of gas production will be mostly carbon dioxide and won't burn well — this is normal. Continue feeding the system and purge that initial gas. Once the bacterial population matures, you'll see consistent methane-rich gas. Cold weather significantly slows this process, so starting your digester in late spring or early summer gives you the best results.
Can I use a regular propane stove with biogas from a DIY digester?
Not without modification. Standard propane stoves are designed for higher-pressure, higher-BTU propane and will produce a weak, unstable flame on raw biogas at low pressure. You'll need a dedicated biogas burner with a larger jet orifice and a properly sized low-pressure regulator. Commercially made biogas stove burners designed specifically for this fuel are the most reliable solution and are strongly recommended for safety and performance.
What organic waste works best for generating the most methane off-grid?
Animal manure — particularly from pigs, cows, and poultry — produces the most reliable and gas-rich digestion because it already contains active methanogenic bacteria. Food waste is also highly effective, especially carbohydrate-rich scraps like rice, bread, and cooked vegetables. A blend of manure and food waste typically outperforms either feedstock alone. Avoid adding large quantities of oily, salty, or acidic materials, as these inhibit bacterial activity and reduce gas output significantly.
Affiliate Disclosure: SHTF Plan participates in the Amazon Services LLC Associates Program. Some links are affiliate links — we may earn a small commission at no extra cost to you.