Off-Grid Cabin Construction: How to Build a Primitive Shelter That Lasts Through Any Crisis
Learn how to plan, build, and fortify a primitive off-grid cabin using low-cost materials and bushcraft techniques that hold up when society doesn't.
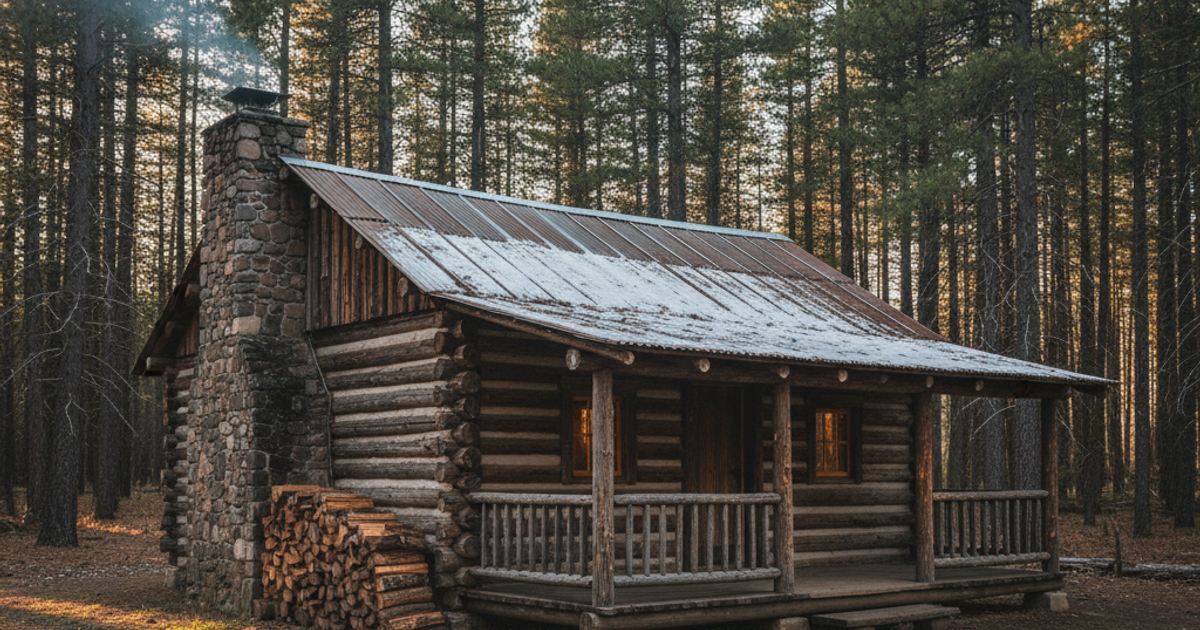
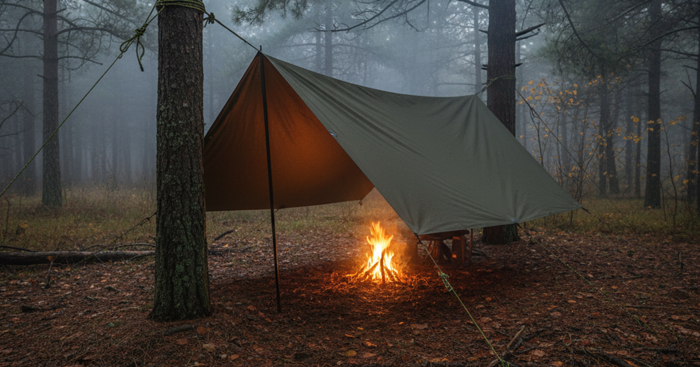
When the grid goes down and society fractures, your single most critical asset isn't your bug out bag, your emergency food storage, or even your firearm — it's a solid roof over your head. Shelter is the first priority in any long-term survival scenario, and for serious preppers, a purpose-built off-grid cabin represents the gold standard of emergency preparedness. Unlike a tent or an improvised tarp lean-to, a well-constructed primitive cabin can shelter your family through brutal winters, extended grid-down scenarios, and multi-year SHTF events.
According to FEMA's own emergency preparedness data, the vast majority of Americans have fewer than 72 hours of supplies on hand and no secondary shelter plan. That's a dangerous gamble when you're betting your family's survival on infrastructure that can collapse overnight. Whether you own rural acreage, a small suburban lot, or you're an apartment dweller planning a bug-out location with a trusted group, understanding primitive cabin construction is a skill set that could literally save your life.
This guide covers everything from site selection and log harvesting to roofing and weatherproofing — practical construction knowledge that applies whether you're building a full-time off-grid homestead or a minimal bug-out location tucked into the woods.
Why a Primitive Cabin Outperforms Every Other Long-Term Shelter Option
Tents fail. Tarps degrade. Even modern RVs become maintenance nightmares without a supply chain. A hand-built primitive cabin, by contrast, can stand for decades with minimal upkeep because it uses locally sourced materials and requires no manufactured replacement parts. Historically, frontier log cabins survived 50 to 100 years or more with basic maintenance — a track record no synthetic shelter can match.
For urban and suburban preppers who don't currently own rural land, the path forward involves two options: purchasing a small rural parcel now (even an acre or two can support a small cabin), or joining a prepper group that collectively owns land. Either way, learning construction fundamentals before a crisis hits is essential. You don't want to be figuring out log notching techniques while you're cold, hungry, and under stress.
If you're still in the planning stages of establishing a bug-out location, our guide on Bugging Out: Essential Guide for Disaster Preparedness covers the strategic decisions you'll need to make before you ever pick up a tool.
What You'll Need
Tools
- Fiskars X27 splitting axe heavy duty
- Stanley FatMax hand saw woodcutting
- Estwing framing hammer construction
- Gerber Gator machete brush clearing
- Leatherman Signal multi-tool survival
Supplies
- Paracord Planet 550 paracord 1000 feet
- Coghlans emergency tarp heavy duty waterproof
- Sashco Log Builder chinking sealant
How to Choose the Right Site for an Off-Grid Survival Cabin
Site selection determines whether your cabin becomes a long-term refuge or a failed experiment. The three non-negotiables are water access, natural defense, and drainage. You need a reliable water source within reasonable distance — a spring, creek, or viable well site — but you should never build directly on a flood plain or at the bottom of a drainage valley. Elevation matters both for security and for keeping your foundation dry through freeze-thaw cycles.
Orient your cabin with its longest wall facing south in the northern hemisphere. This passive solar principle alone can reduce your heating requirements significantly during winter months. Dense tree cover to the north and northwest provides a natural windbreak, while southern exposure allows maximum daylight and winter sun. Before you break ground, spend time on the property at different times of day, observing wind patterns, sun angles, and where water naturally pools after rain.
For urban preppers who are scouting a bug-out property remotely, use topographic maps and satellite imagery to identify elevated clearings near water sources. Situational awareness doesn't stop at street level — it applies to land assessment as much as it does to reading a crowd. Our guide on Situational Awareness: How to Detect Threats Before They Become Dangerous offers principles that translate directly into effective land evaluation.
Foundation Options for Primitive Off-Grid Construction
A primitive cabin doesn't require a poured concrete foundation, but it does require something solid. The three most practical off-grid foundation approaches are: corner pier foundations using large flat stones or concrete blocks, a continuous stone perimeter foundation, or wooden sill logs resting on grade-level stone pads. For most small survival cabins in the 12x16 to 16x20 foot range, corner piers work exceptionally well and require no specialized equipment.
Dig down below your local frost line — typically 18 to 36 inches depending on your region — and set large flat stones or concrete deck blocks at each corner and at intervals no greater than 6 feet along each wall. Level each pier carefully; a cabin built on an uneven foundation will fight you at every subsequent step. The Estwing framing hammer is an ideal choice for this phase of construction — its all-steel construction and superior balance make it a workhorse for everything from staking batter boards to nailing sill logs in place, and it's built to last decades of hard use.
Log Harvesting and Preparation: Working With What the Land Provides
If you're building on forested land, you have your primary building material standing right in front of you. The ideal cabin logs are straight-grained softwoods like pine, fir, spruce, or cedar — or hardwoods like oak and ash if softwoods aren't available. Target trees with a minimum 8-inch diameter at the small end, and harvest them in late fall or winter when sap content is lowest, which speeds drying and reduces checking (cracking).
Clearing the building site and harvesting logs requires serious cutting tools. The Gerber Gator machete is an excellent tool for clearing brush, limbing felled trees, and working around your build site. Its aggressive tooth pattern handles both green wood and dry vegetation efficiently. For bucking logs to length and cutting notches, a quality hand saw is essential — the Stanley FatMax hand saw delivers fast, accurate cuts through green timber without relying on electricity or fuel, making it ideal for truly off-grid construction work.
Once harvested, peel the bark from every log immediately using a drawknife or spud. Bark traps moisture and harbors insects — leaving it on is one of the most common mistakes novice cabin builders make. Allow peeled logs to season for at least 60 to 90 days before use, elevated off the ground and stacked with spacers for airflow.
Log Splitting, Shaping, and the Role of a Heavy Axe
Not all cabin components require round logs. Floor joists, roof rafters, and interior elements often benefit from split or hewn timber, which provides flat bearing surfaces and reduces settling. For splitting large-diameter logs, the Fiskars X27 splitting axe is genuinely exceptional — its 36-inch handle and optimized blade geometry generate far more splitting force than a traditional axe, reducing fatigue significantly during the multi-day wood processing phase of cabin construction. This is the kind of tool that earns its place in any serious prepper's survival gear inventory.
For fine shaping work and on-the-spot problem solving during construction, a quality multi-tool is indispensable. The Leatherman Signal multi-tool is purpose-built for survival situations, featuring a fire-starting ferro rod, emergency whistle, and a full suite of construction-relevant tools including a saw, knife, and screwdrivers — all in a package you can carry on your belt all day.
Notching Methods: The Joints That Hold Everything Together
Log notching is what separates a cabin from a pile of lumber. The notch locks each log into its neighbor, providing structural integrity without nails or mechanical fasteners. For primitive construction, the four most practical notching methods are the saddle notch, the round notch, the V-notch, and the square notch. The saddle notch is the most beginner-friendly — it's essentially a curved scoop cut into the underside of each log where it crosses the one below, allowing the logs to nest tightly.
Cut your notches slightly tight, then test-fit each log and adjust incrementally. A well-fitted notch has full contact across its bearing surface and allows the logs to sit within 1 to 2 inches of each other. The gaps between logs — called chinking spaces — are filled in a later step. Precise notching reduces the amount of chinking required and produces a structurally stronger wall.
Roofing a Primitive Cabin for Long-Term Weather Resistance
The roof is your cabin's most critical system. A failing roof destroys everything below it within a single wet season. For primitive construction, a simple gable roof with a steep pitch — at least 8:12, meaning 8 inches of rise for every 12 inches of horizontal run — sheds snow and rain effectively and provides headroom for a sleeping loft.
Ridge poles and rafters are set first, then covered with purlins (horizontal poles running parallel to the ridge) spaced 18 to 24 inches apart. Over the purlins, apply a layer of split shakes, bark slabs, or milled boards if available. As a temporary or supplemental weatherproofing layer while your permanent roofing materializes, a heavy-duty waterproof tarp is invaluable. The Coghlans emergency tarp is a proven choice — its reinforced grommets and waterproof polyethylene construction make it suitable for extended outdoor exposure, and it can serve double-duty during construction before transitioning to a backup weatherproofing role. For more creative ways to use tarps in survival construction, check out our guide on Improvised Tarp Shelter: How to Build 10 Emergency Shelters from a Single Tarp.
Chinking and Sealing: Making Your Cabin Weathertight
Even perfectly notched logs leave gaps that allow wind, rain, and cold air infiltration. Historically, pioneer builders filled these gaps — chinking — with a mixture of mud, moss, lime mortar, or animal hair and clay. These traditional materials work, but they require significant maintenance and can fail during freeze-thaw cycles.
For a long-lasting modern solution that requires minimal tools and expertise, Sashco Log Builder chinking sealant is the professional standard. It's a flexible, latex-based chinking compound that bonds to wood, expands and contracts with seasonal movement, and resists water intrusion far better than traditional mud chinking. If you're stocking a bug-out property for long-term SHTF scenarios, having several tubes or pails of this product in your emergency preparedness supplies represents genuine insurance against structural failure. Apply it in temperatures above 40°F for best adhesion, and tool the surface smooth with a wet finger or brush.
For natural chinking if you're building in a true grid-down scenario with no access to commercial products, combine clay-rich soil, dry moss or animal hair as fiber binder, and a small amount of wood ash. Pack this mixture firmly into gaps and allow it to dry slowly out of direct sun. Expect to reapply annually.
Cordage, Lashing, and the Role of 550 Paracord in Primitive Construction
Before nails and screws, builders relied on lashing to secure structural elements together. In primitive cabin construction, cordage remains essential for temporary bracing during log placement, securing roof elements while permanent fastening is completed, and binding pole bundles for auxiliary structures like outbuildings and food caches. Having a substantial supply of Paracord Planet 550 paracord on hand is a smart move for any prepper involved in construction — 1,000 feet of military-spec 550 paracord handles everything from structural lashing to clotheslines and perimeter trip-wire systems around your property. If you want to expand your cordage skills using materials the land itself provides, our article on Bushcraft Rope and Cordage: How to Make and Use Natural Cordage When You Run Out of Paracord is essential reading.
Step-by-Step Instructions
Step 1: Select and Survey Your Build Site Carefully
Walk the property at multiple times of day and in different weather conditions, noting sun angle, prevailing winds, natural water drainage, and proximity to water sources. Mark a level, south-facing area with good drainage and natural windbreak features to the north. Use stakes and string to lay out your cabin footprint before breaking ground.
Step 2: Clear Vegetation and Establish Your Foundation Piers
Use your machete and axe to clear the building area of brush, stumps, and surface roots. Dig foundation pier holes below your local frost line at each corner and at 6-foot intervals along each wall. Set large flat stones or concrete deck blocks, checking for level across all piers using a long straight board and a bubble level.
Step 3: Harvest, Peel, and Season Your Building Logs
Select straight-grained trees with a minimum 8-inch diameter at the small end and fell them safely using proper axe and saw technique. Peel bark immediately using a drawknife or spud, then stack logs elevated off the ground with spacers to allow airflow on all sides. Allow a minimum of 60 days of drying before incorporating logs into the wall structure.
Step 4: Lay Sill Logs and Begin Notched Wall Construction
Place your largest, straightest logs as sill logs directly on the foundation piers — these carry the entire load of the structure above. Begin stacking and notching successive log courses, alternating butt and tip ends to maintain a level wall height. Cut saddle notches on the underside of each crossing log using your hand saw and axe, test-fitting and adjusting until each log seats firmly with less than 2 inches of gap.
Step 5: Frame and Install the Roof Structure
Set gable-end log courses to your desired wall height, then lay a strong ridge pole spanning the full length of the cabin, supported by notched gable posts. Install rafters at 24-inch intervals, running from the ridge pole to the top wall logs, using a consistent pitch of at least 8:12. Secure rafter feet with wooden pegs or heavy galvanized spikes.
Step 6: Apply Roofing Material and Weatherproof the Structure
Cover rafters with purlins spaced 18 to 24 inches apart, then apply split wood shakes, bark slabs, or board-and-batten roofing from eave to ridge, overlapping each course by at least one-third. Temporarily cover the entire roof with a heavy-duty waterproof tarp while you complete the walls and chinking, protecting interior progress from weather damage.
Step 7: Chink All Wall Gaps and Install Door and Window Openings
Fill all gaps between log courses with your chosen chinking material, pressing it firmly into place and smoothing the surface for a weather-tight seal. Frame rough openings for your door and windows using vertical posts — called splines or deadmen — set into saw kerfs cut into the log ends, which allows the wall to settle vertically without transferring load to the frame.
Step 8: Install a Safe Heating System and Secure Your Perimeter
A wood-burning stove or primitive stone fireplace is essential for year-round habitation — install it on a non-combustible stone or brick base with proper clearances from all wall surfaces. Once the structure is complete, establish a security perimeter using natural features, fencing, and early-warning systems. Review our guide on Perimeter Security: Protecting Your Retreat Property for strategies that translate directly to a remote cabin setting.
Heating, Insulation, and Making Your Cabin Livable Long-Term
A well-built log cabin has significant natural thermal mass — the logs absorb heat during the day and release it slowly at night. Supplementing this with proper roof insulation (packed dry moss, wood shavings, or salvaged fiberglass batts) dramatically improves your heating efficiency. The principles covered in our article on Thermal Mass and Insulation: How to Keep Your Home Warm Without a Furnace When Fuel Runs Out apply directly to log cabin construction and can help you design a structure that stays warm with minimal fuel input.
For your wood-burning stove installation, prioritize a model with a cooktop surface that allows cooking — your heating system should double as your cooking system in a true SHTF scenario. Stock at least a season's worth of split firewood before winter arrives, and maintain a continuous wood-cutting and splitting practice throughout warmer months.
Frequently Asked Questions
How long does it take to build a primitive survival cabin by hand?
A small primitive cabin in the 12x16 foot range typically requires 3 to 6 months of consistent part-time work for a two-person team, or 4 to 8 weeks of intensive full-time construction. The longest variable is log seasoning time — green logs can be used immediately in a true emergency, but they will check and settle significantly in the first year. Pre-building before a crisis hits and using seasoned timber produces a far more stable structure. Experienced builders working with pre-cut timber can frame and roof a small cabin in as little as two weeks.
Can I build an off-grid survival cabin without owning land?
Yes, through several pathways. The most practical options include purchasing a small rural parcel (prices for raw land in many states start under $5,000 per acre), joining a prepper group or mutual aid network that collectively owns property, or leasing private land from a rural landowner in exchange for improvements. Some National Forest land allows primitive camping structures under special use permits. If you're apartment-based and building toward a bug-out scenario, the best first step is connecting with like-minded preppers — our guide on Neighborhood Mutual Aid Networks: How to Build a Community Survival Team Before SHTF can help you build those relationships.
What is the most important thing to get right when building an off-grid cabin for survival?
Waterproofing — specifically the roof. More primitive cabins fail due to moisture intrusion than any other single cause. A leaking roof destroys floors, promotes mold, compromises structural wood, and makes the interior uninhabitable within one to two wet seasons. Invest disproportionate time, materials, and effort into getting your roof pitch, overhang, and weatherproofing right before focusing on aesthetics or interior improvements. A dry cabin with a dirt floor and no windows is infinitely more survivable than a finished interior under a failing roof.
Affiliate Disclosure: SHTFPlan.net participates in the Amazon Services LLC Associates Program. Some links are affiliate links — we may earn a small commission at no extra cost to you.