The Prepper's Guide to Wildfire Defensible Space: How to Harden Your Property Before Flames Arrive
When wildfire threatens, your property's survival depends on decisions made weeks before the flames arrive. Here's how to create defensible space that works.
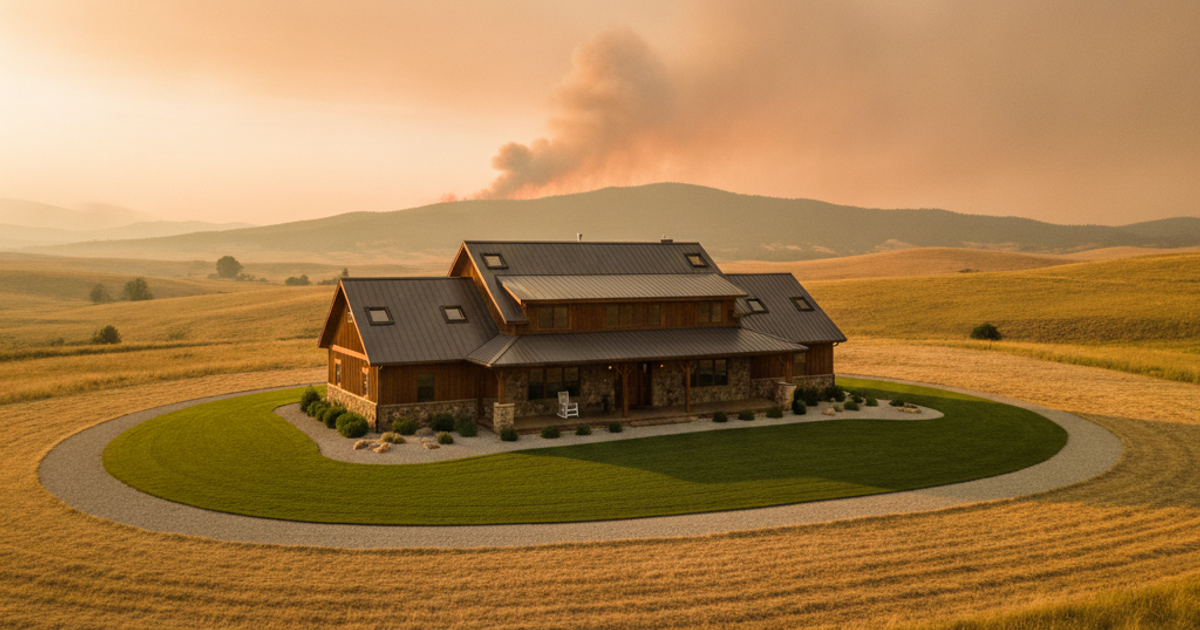
Wildfire doesn't knock before it arrives. In California's 2018 Camp Fire, the town of Paradise was effectively destroyed in under four hours. Entire neighborhoods vanished while residents were still trying to decide whether to leave. The 2023 Maui fires killed more than 100 people and destroyed over 2,000 structures in a matter of hours. The common thread in nearly every catastrophic wildfire is this: homes that weren't prepared to survive ember attack and radiant heat didn't stand a chance.
The good news is that research from the Insurance Institute for Business & Home Safety (IBHS) and the USDA Forest Service consistently shows that home hardening and defensible space dramatically improve survival odds — not just for your structure, but for the firefighters who may one day try to defend it. A study published in the International Journal of Wildland Fire found that homes with proper defensible space were up to 40% more likely to survive a wildfire than those without it. This guide will walk you through what that actually looks like in practice — whether you're on a rural homestead, a suburban lot, or managing the perimeter of a small property with limited control over your surroundings.
For renters and apartment dwellers, full defensible space isn't an option — but you still have a role to play. Advocating to your building manager about exterior combustibles, keeping balconies clear of furniture and debris, and having a ready wildfire evacuation bag packed are all meaningful actions. The concepts in this guide scale to your level of control over your environment.
Understanding the Three Zones of Wildfire Defensible Space
Fire agencies, including CAL FIRE and the National Fire Protection Association (NFPA), divide defensible space into concentric zones around a structure. Understanding these zones is the foundation of every decision you'll make about your property.
Zone 0 — The Home Itself (0–5 feet): This is the most critical and most overlooked zone. Embers can travel up to a mile ahead of a wildfire front and land on or near your home well before flames arrive. Zone 0 focuses on removing or replacing any combustible materials directly adjacent to the structure — mulch, wood decking, propane tanks, doormats, patio furniture, firewood stacks, and dead plant material. Research from the IBHS shows that over 90% of home ignitions during wildfires begin with ember intrusion or ignition of materials within this zone.
Zone 1 — The Lean, Clean, and Green Zone (5–30 feet): Within this zone, the goal is to dramatically reduce fuel load and create spacing between plants and trees. Grasses should be mowed to under four inches. Shrubs should be separated from tree canopies. Dead material, leaf litter, and fallen branches must be removed regularly. Plants in this zone should be low-growing, well-irrigated, and ideally fire-resistant species.
Zone 2 — The Reduced Fuel Zone (30–100 feet, or to the property line): Here the goal isn't elimination of vegetation but reduction of continuity. Remove ladder fuels — the low branches and shrubs that allow ground fire to climb into tree canopies. Space trees so canopies don't touch. Mow grasses. Stack firewood uphill and away from structures.
What You'll Need
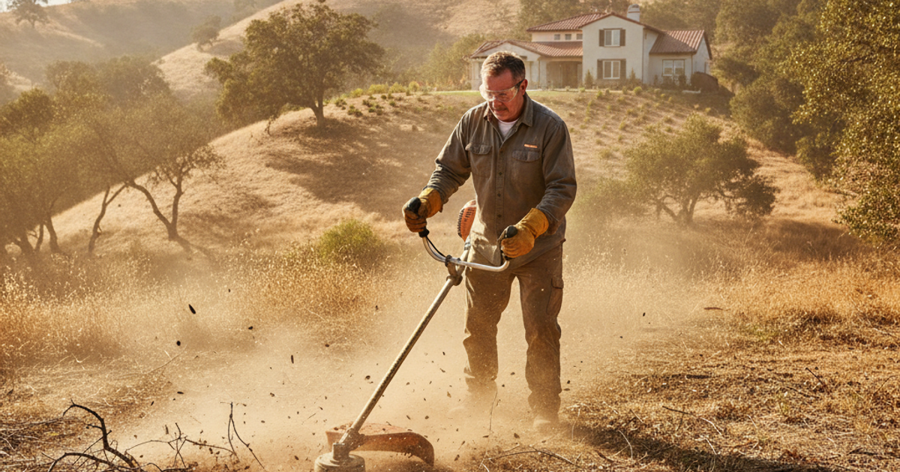
Tools
- Husqvarna battery pole saw for brush clearing
- Stihl cordless hedge trimmer for vegetation management
- Flat-head rake and garden spade
- Pressure washer (for roof and gutter cleaning)
Supplies
- Amerimax ember and spark arrestor vent covers
- Fiberglass fire-resistant door threshold seal kit
- DripWorks drip irrigation kit for fire-resistant landscaping
- 3M P100 respirator for wildfire smoke and ash protection
How to Harden Your Home Against Ember Attack and Radiant Heat
Defensible space buys time. Home hardening buys survival. Even with perfect Zone 1 and Zone 2 management, a structurally vulnerable home can ignite from a single ember that finds its way through an unscreened attic vent. The following are the highest-priority hardening measures you can take.
Vents, Soffits, and Attic Openings
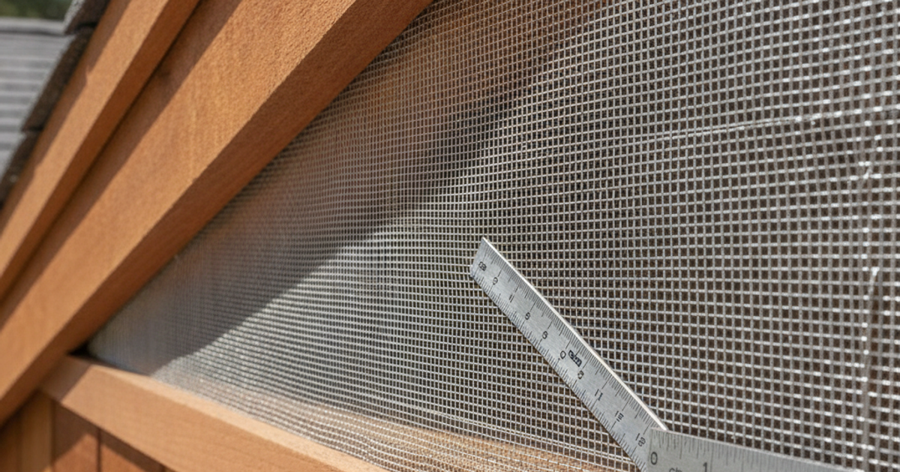
Attic vents are one of the single most dangerous vulnerabilities on any home in a wildfire-prone area. Standard mesh screening (1/4 inch) is not fine enough to block embers. The NFPA 1144 standard recommends 1/16-inch mesh metal screening for all vent openings. Installing ember-resistant vent covers like those from Amerimax is one of the most cost-effective upgrades you can make — and it's a job most homeowners can complete in a weekend. Check soffits, foundation vents, and any roof penetrations as well.
Doors, Windows, and Gaps
Standard exterior doors have significant gaps at the threshold that allow ember-carrying air and heat to infiltrate during a fire event. Installing a fiberglass fire-resistant door threshold seal is a low-cost measure that dramatically reduces infiltration. Multi-pane tempered glass windows are more resistant to radiant heat failure than single-pane glass. If you can't replace windows immediately, keep exterior shutters or fire-rated panels as an option for the highest-risk areas of your home.
Decks, Fences, and the Combustible Pathway Problem
Wood fences and decks act as direct pathways that conduct fire from the surrounding landscape straight to your home. If replacement with non-combustible materials isn't immediately feasible, at minimum ensure that deck boards have no accumulated debris beneath them and that the area under and around the deck is entirely free of combustible material. Composite decking and metal fencing are the gold standard upgrades. Even a short section of non-combustible fencing or a concrete pad between a wooden fence and the house can interrupt the fire pathway significantly.
Gutters and Roofs
A clogged gutter full of dry leaf litter is an ember catcher that preheats before your structure does. Clean gutters at minimum twice per year — more often if you have overhanging trees. Metal or tile roofing with a Class A fire rating significantly outperforms wood shake or asphalt shingles in ember resistance. If you cannot replace your roof, keep it clean and consider temporary fire-resistant coatings available at home improvement stores during red-flag conditions.
Irrigation and Water Systems That Can Save Your Home
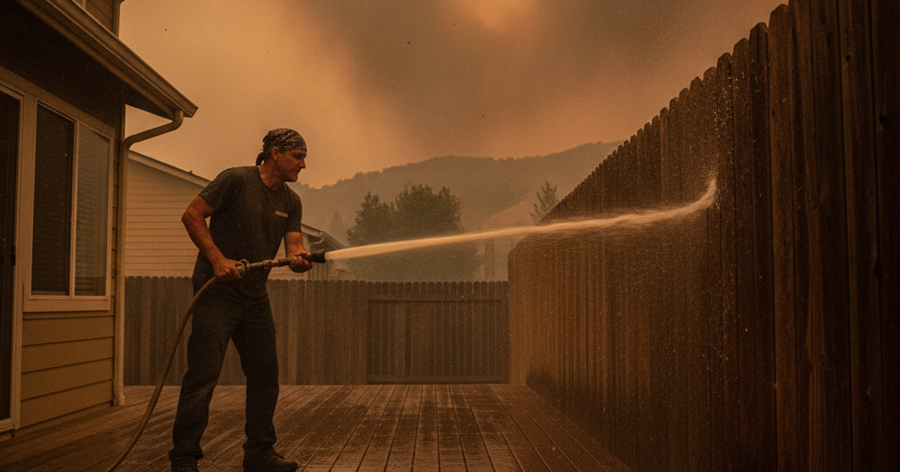
Water is your most powerful ally when fire approaches. Installing a dedicated exterior sprinkler system that can wet down your roof, decking, and surrounding vegetation is one of the highest-return investments a homeowner in fire country can make. The Orbit B-hyve smart sprinkler controller allows you to activate your irrigation system remotely via smartphone — meaning you can begin wetting down your property even after you've evacuated. Pair it with Orbit impact sprinkler heads designed for roof wetting to achieve maximum coverage across vulnerable surfaces.
For your landscaping, a DripWorks drip irrigation system keeps fire-resistant plants hydrated throughout dry seasons, maintaining the moisture content that makes them genuinely resistant rather than just theoretically so. Well-irrigated plants in Zone 1 and Zone 2 create a green barrier that slows and weakens fire spread. Drip systems are also water-efficient, making them compatible with drought restrictions common in fire-prone regions.
If you rely on a well, ensure your pump has backup power capability. A fire that knocks out grid power during approach renders an electric well pump useless precisely when you need it most. Consider a generator-ready or solar-capable pump system as part of your broader emergency preparedness planning.
Also, be aware of air quality during any wildfire event in your region. Even if your home survives, toxic smoke can pose serious health risks. Read our companion guide on wildfire smoke and toxic air filtration to understand how to protect your lungs when SHTF — and keep a 3M P100 respirator on hand for any work you do outdoors during brush clearing or active fire events. P100-rated respirators filter out at least 99.97% of airborne particles, including fine ash and smoke particulates.
Fire-Resistant Landscaping: What to Plant and What to Remove
Not all plants are equal in fire behavior. High-resin plants like junipers, arborvitae, eucalyptus, and most ornamental grasses are extremely flammable and have no place in Zone 0 or Zone 1. Fire-resistant alternatives for Zone 1 include succulents, ice plant, rockrose, lavender, and California lilac — all of which maintain moisture content and burn slowly even when dry.
Spacing is as important as species selection. Even fire-resistant plants become hazardous when planted densely. Follow the NFPA recommendation to space shrubs so there's a minimum gap of three times the height of the plant between groupings. For trees, prune the lowest branches to a minimum of six to ten feet above ground to eliminate ladder fuels. The Husqvarna battery pole saw makes this work significantly easier on larger properties, allowing you to reach and remove high branches without ladders. For hedge and shrub shaping in Zone 1, the Stihl cordless hedge trimmer offers professional-grade performance without the noise and fume exposure of gas-powered equipment.
Mulch deserves special attention. Organic mulch — wood chips, bark — is combustible and should not be used within five feet of any structure. In Zone 0, use non-combustible alternatives: gravel, decomposed granite, or bare soil. From five to thirty feet, low-moisture organic mulch applied thinly (two inches or less) is acceptable but must be kept away from plant stems and any structure contact points.
Step-by-Step Instructions
Step 1: Walk Your Property and Map Every Combustible Hazard
Start with a complete perimeter walk of your home and property, working outward from the structure. Note every combustible item within 100 feet — wood piles, propane tanks, combustible fencing, dense plantings, dry grass, accumulated debris, and mulch touching the foundation. Photograph each hazard and create a priority list ranked by proximity to the structure. Items within five feet are the highest priority and must be addressed first.
Step 2: Clear Zone 0 — Remove All Combustibles Within Five Feet
Remove or relocate all combustible materials from the five-foot perimeter around your structure. This includes wood mulch, dead plants, patio furniture, doormats, firewood, propane tanks, and combustible decorative items. Replace wood or bark mulch with gravel or decomposed granite. Screen or cap any gaps where the structure meets the ground to prevent ember accumulation. This single step, according to IBHS research, is the most impactful action a homeowner can take.
Step 3: Install Ember-Resistant Vent Covers on All Openings
Inspect every attic vent, soffit vent, foundation vent, and roof penetration on your home. Replace any standard mesh with 1/16-inch metal mesh ember-resistant covers. Amerimax and similar products are widely available and straightforward to install. Seal any gaps around pipes, cables, or AC units entering the structure with fire-resistant caulk or intumescent foam — these are direct ember entry points that are frequently overlooked.
Step 4: Prune Trees and Shrubs to Eliminate Ladder Fuels
Using a pole saw, remove all branches from trees within 100 feet of your structure up to a height of six to ten feet from the ground. This eliminates the ladder fuel pathway that allows ground-level grass fires to climb into the tree canopy and create the intense crown fire behavior that overwhelms defensible space. For shrubs in Zone 1, ensure spacing between groupings equals at least three times the shrub's height.
Step 5: Install or Upgrade Your Exterior Irrigation System
If you don't have an exterior sprinkler system capable of wetting your roof and surrounding vegetation, install one. Use a smart controller that allows remote activation, and include rooftop-capable impact heads at key positions. For your landscaping, install drip irrigation to keep fire-resistant plants well-hydrated throughout fire season. Test the system before fire season each year and ensure your water pressure is sufficient to run all zones simultaneously.
Step 6: Seal Doors and Windows Against Ember Intrusion
Install fire-resistant threshold seals on all exterior doors and inspect weatherstripping around every door and window frame. Replace single-pane glass with dual-pane tempered glass where budget allows, starting with windows most exposed to surrounding vegetation. Close and seal attic hatches and any interior access points that could allow ember-heated air to infiltrate living spaces during a fire event.
Step 7: Clean Gutters and Roof Surfaces Thoroughly
Debris-filled gutters are ember catchers. Clean them at least twice yearly — after spring growth and again before fire season ends. Use a leaf blower or pressure washer to clear the roof surface of accumulated organic material. Consider gutter guards designed for ember protection, which use fine mesh to keep debris out while allowing water flow. If your roof is wood shake, explore Class A fire-rated alternatives — this is a long-term priority investment.
Step 8: Prepare Your Evacuation Trigger and Go-Bag in Parallel
Defensible space is not a reason to delay evacuation. Establish a clear personal trigger — a specific watch level, fire distance, or wind condition — at which you will leave without hesitation, regardless of how confident you are in your home hardening. Ensure your wildfire evacuation bag is packed, your vehicle is fueled, and your family knows the plan. For deeper guidance on decision-making under extreme stress during a wildfire event, read our article on wildfire evacuation psychology.
Recommended Gear for Wildfire Home Defense
Every prepper focused on wildfire protection should have the right equipment in place before fire season arrives. The tools and supplies listed throughout this article represent a core kit for property hardening. To recap the essentials: a battery-powered pole saw handles tree limbing and ladder fuel removal efficiently; a cordless hedge trimmer keeps Zone 1 vegetation managed throughout the season; ember-resistant vent covers are a non-negotiable structural upgrade; and fire-resistant door threshold seals close the gap that most homeowners never think about. For irrigation, the Orbit B-hyve smart controller, impact sprinkler heads, and a DripWorks drip irrigation kit form a complete water defense system. Finally, keep a 3M P100 respirator accessible any time you're working in the field during fire conditions or cleaning up after a fire event.
For additional property security considerations beyond wildfire, our home security assessment and hardening guide covers structural vulnerabilities from multiple threat angles.
Frequently Asked Questions
How much defensible space do I actually need around my house to survive a wildfire?
The standard recommendation from fire agencies is a minimum of 100 feet of managed defensible space on flat ground — divided into the 0–30 foot zone (lean, clean, and green) and the 30–100 foot zone (reduced fuel). However, on slopes, this distance must increase significantly because fire travels faster uphill. A fire on a 30% slope can move up to four times faster than on flat terrain, which means your effective defensible space must be deeper on the uphill side of your property. Check with your local fire authority for slope-specific recommendations, and prioritize the five-foot Zone 0 above everything else if resources are limited — it has the highest documented impact on survival outcomes.
Can renters or apartment dwellers do anything meaningful to protect themselves from wildfires?
Absolutely. While you can't manage defensible space without land, you can take several high-impact actions. Keep balconies and patios free of combustible materials — furniture, doormats, and dried plants are all ignition hazards. Close all windows and doors if wildfire smoke or fire is approaching. Keep a well-stocked bug out bag or evacuation kit ready to go at all times. Advocate to your building management to remove combustible materials from common areas and ensure exterior vents are screened. Know your building's evacuation routes and have a personal go-bag with copies of critical documents, medications, and emergency food storage for at least 72 hours. Most importantly, leave early — renters in multi-unit buildings face compounded evacuation challenges and should treat any evacuation order as immediate.
What are the most cost-effective wildfire home hardening upgrades if I have a limited budget?
If budget is a constraint, prioritize in this order: First, clear Zone 0 completely — this costs nothing but labor and time. Second, install ember-resistant vent covers on attic and foundation vents (typically $5–$20 per vent). Third, install fire-resistant door threshold seals and check weatherstripping on all exterior doors. Fourth, clean gutters and remove all debris from the roof surface. Fifth, remove or relocate combustible fencing sections that connect directly to the structure. These five measures address the most statistically common causes of home ignition during wildfire events and can be accomplished for a few hundred dollars on most properties. Save larger investments — roof replacement, window upgrades, sprinkler systems — for subsequent seasons as budget allows.
Affiliate Disclosure: SHTFPlan.net participates in the Amazon Services LLC Associates Program. Some links are affiliate links — we may earn a small commission at no extra cost to you.