Cold Weather Trapping: How to Set Snares and Deadfalls for Small Game When Food Runs Out
When hunting fails and store shelves are empty, trapping small game could keep your family fed. Here's how to do it right in cold weather.
When the grocery stores are empty, supply chains have collapsed, and your emergency food storage is running low, the ability to trap small game could mean the difference between feeding your family and going hungry. Trapping is one of the most calorie-efficient survival skills you can master — it works while you sleep, requires minimal energy expenditure, and can be practiced with improvised materials in almost any environment. Whether you're in a rural woodland, a suburban greenbelt, or an urban park system, small game like rabbits, squirrels, and even raccoons are far more accessible than most preppers realize.
Cold weather actually works in the trapper's favor. Animals are hungrier, less cautious, and their tracks in snow make locating game trails dramatically easier. According to the U.S. Fish and Wildlife Service, over 3.5 million Americans trap recreationally or for subsistence — but in a true SHTF scenario, that knowledge becomes a core survival competency, not a hobby. This guide will walk you through the fundamentals of cold weather snaring and deadfall trapping so you have a plan before you need one.
What You'll Need
Tools
- Victorinox Swiss Army Knife Fieldmaster — for cutting, notching, and field prep
- Gerber Bear Grylls Ultimate Pro Fixed Blade Survival Knife — for heavier cutting and processing game
Supplies
- Snare Master Wire Snare Trap Kit — pre-formed wire snares for rabbits and squirrels
- Coghlan's Survival Snare Wire (stainless steel) — for crafting your own custom snares
- Paracord Planet 550 Paracord, 100 feet — for lashing, cordage snares, and deadfall triggers
- UST Survival Kit with Wilderness Trapping Field Guide — compact reference for field identification of techniques
Why Cold Weather Trapping Is a Critical Survival Skill for Every Prepper
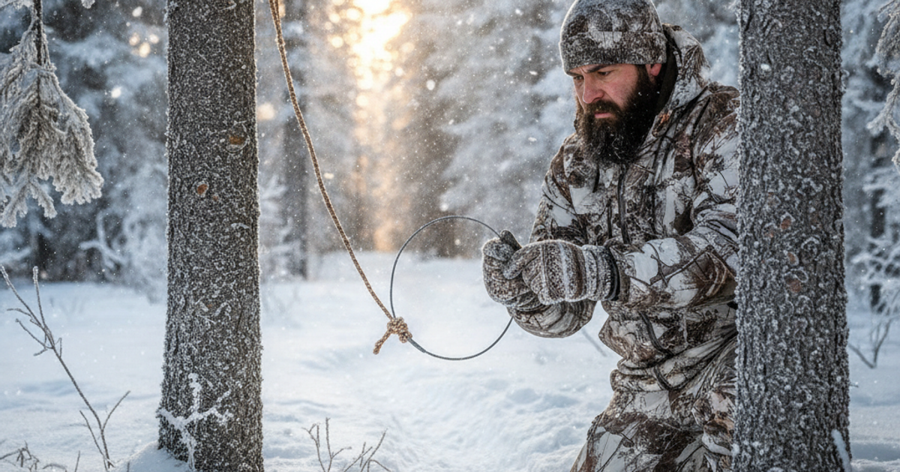
Most emergency preparedness plans focus heavily on stored food — freeze-dried meals, canned goods, and calorie-dense rations. That's smart. But even the most disciplined preppers will eventually run out of stockpiled food. When that happens, the ability to harvest protein from the wild becomes essential to long-term survival. Trapping provides a passive, low-energy method of acquiring that protein, making it a force multiplier in any survival scenario.
Small game is abundant almost everywhere in North America. Cottontail rabbits are found in nearly every U.S. state, including in suburban greenbelts, city parks, and overgrown lots. Gray squirrels thrive in urban tree lines. Raccoons, opossums, and even muskrats inhabit drainage ditches and riparian corridors that cut through cities and suburbs alike. If you know what signs to look for and how to place a trap effectively, you don't need a homestead or rural property to put meat on the table.
Before diving into technique, one critical note: trapping regulations vary by state and county, and many require licenses even for survival trapping. In a genuine SHTF scenario, rule of law may break down — but in normal times, know your local laws. Practice your skills on private land with permission, or wait until a declared emergency gives you legal latitude. For apartment dwellers and suburban preppers, this is a skill best learned and rehearsed before you need it, not improvised under pressure. Pair this knowledge with a solid long-term food stockpile so trapping supplements rather than replaces your emergency food strategy.
Reading the Landscape: Finding Game Trails in Snow and Cold
The single most important trapping skill isn't knot-tying or wire work — it's situational awareness applied to animal behavior. Animals, like humans, are creatures of habit. They follow the same trails to the same food sources and water every day. In snow, those trails become visible to anyone paying attention.
Look for these signs:
- Runs and trails: Compressed channels in snow or grass where animals travel repeatedly. Rabbit runs are typically 3–4 inches wide at ground level.
- Scat: Rabbit droppings are round, dark pellets. Squirrel scat is smaller and tapered. Fresh scat means recent activity.
- Chew marks: Rabbits strip bark from low branches and shrubs during winter when ground food is scarce. Look for clean-cut gnawing at the snowline.
- Tracks: In fresh snow, you can distinguish rabbit hops (paired rear feet ahead of paired front feet) from squirrel bounds. Follow tracks backward to find dens and burrows — these are anchor points for trap placement.
- Pinch points: Natural funnels where terrain, brush, or fallen logs force animals through a narrow corridor. These are prime snare locations.
In urban and suburban environments, look for these signs near drainage culverts, overgrown fence lines, the edges of retention ponds, and brush piles in parks or vacant lots. Animals don't know they're in a city — they follow food, water, and cover just like their rural counterparts.
How to Set a Wire Snare for Rabbits and Small Game
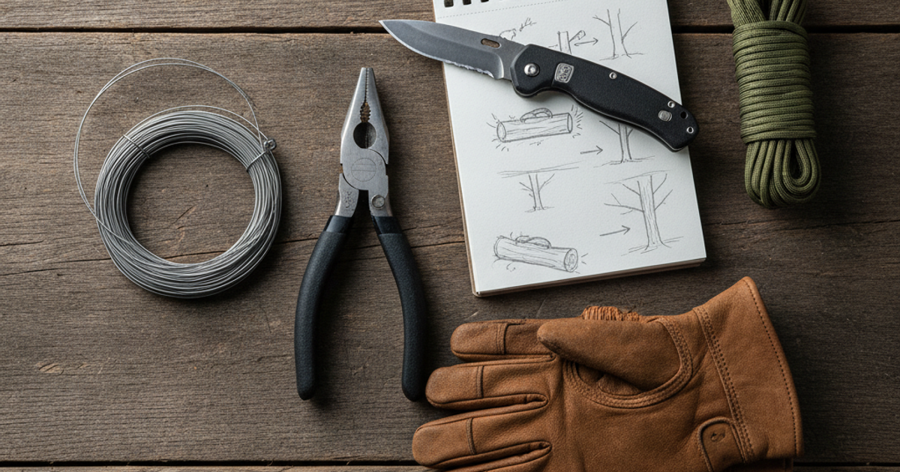
The wire snare is the most practical and widely applicable trap in a survival context. It requires minimal materials, sets quickly, and is highly effective on rabbits, squirrels, and similar-sized animals. A quality pre-formed snare kit like the Snare Master wire snare trap kit gives you professionally tensioned loops that are far more reliable than improvised cordage alone.
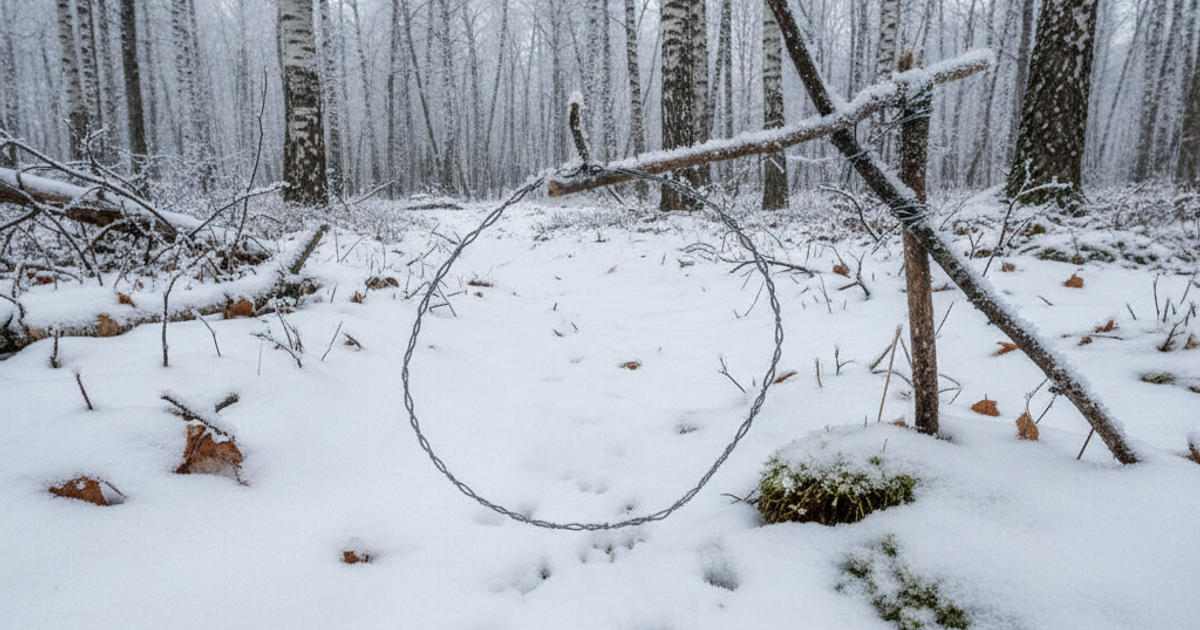
The basic principle is simple: a loop of wire is suspended at the animal's head height across a known travel corridor. As the animal moves through, its head enters the loop, and its forward motion tightens the snare around its neck. For rabbits, the loop should be approximately 3–4 inches in diameter and positioned 3–4 inches above the ground. For squirrels placed on a leaning log or tree trunk, the loop should be about 2 inches in diameter.
Anchor the snare to a sturdy stake, root, or sapling. The anchor needs to hold against panicked struggling — a pulling force of 20–30 lbs in a survival situation. Use Coghlan's stainless steel snare wire when building your own — it resists rust, holds its shape in cold temperatures, and won't snap under tension the way cheap galvanized wire can. Stainless steel also holds a loop shape better than cordage alternatives in freezing conditions where natural fibers can stiffen and fail.
Cold weather tip: wear gloves when setting snares. Human scent on wire is detectable to prey animals and will reduce your catch rate significantly. In winter, you can rub your gloved hands and the wire with snow or pine needles to mask your scent before setting.
Body Grip Traps: Faster and More Reliable in Cold Conditions
For serious survival trapping, the body grip trap — commonly called a Conibear-style trap — is more efficient than a simple wire snare. The Wisconsin Snares 110 body grip trap is a workhorse for small game. The "110" refers to the frame size — a 110 is ideal for squirrels and mink, while a 120 handles rabbits and similar-sized game.
These traps work by clamping around the animal's body as it passes through the frame, causing rapid, humane kills. They're more effective in cold weather than snares because they don't rely on the animal panicking and struggling — the kill is nearly instantaneous, which also prevents the carcass from being damaged or frozen to the ground before you check it.
Set body grip traps directly in established runs and burrow entrances. In winter, look for den entrances in brush piles, under fallen logs, or at the base of hollow trees. Place the trap over the entrance, trigger facing the interior, and secure it with a stake or heavy stick so the animal can't drag it away.
Building a Deadfall Trap from Natural Materials
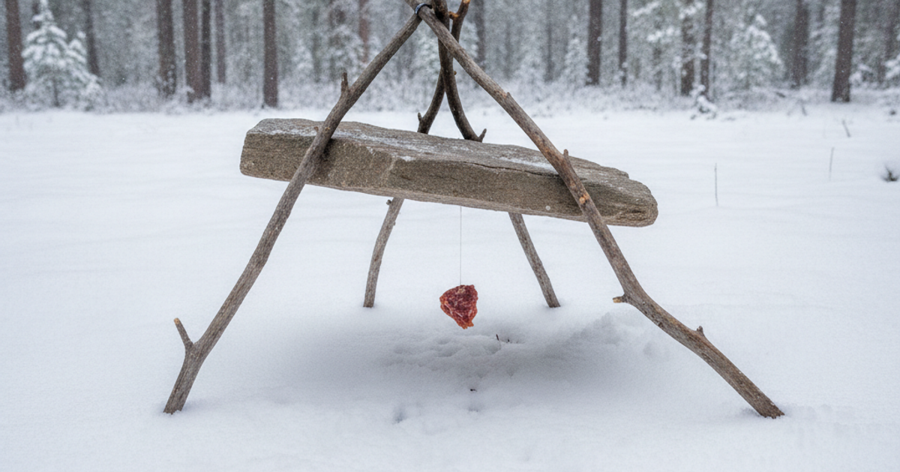
When wire and manufactured traps aren't available, the deadfall trap becomes your primary option. A deadfall uses a heavy rock, log, or board suspended on a notched trigger stick. When an animal disturbs the bait or trigger, the weight drops and kills it instantly. The two most practical designs for survival are:
- The Figure-4 Deadfall: Three sticks notched together in a figure-4 configuration supporting a heavy flat rock. Bait is placed on the diagonal trigger stick. When disturbed, the structure collapses and the rock falls. Effective for squirrels, mice, and rats.
- The Paiute Deadfall: A more sensitive variation using a toggle stick and cordage, triggering at even slight contact with bait. Better for shy or cautious animals.
The key to a functional deadfall in cold weather is dry wood for the trigger sticks. Frozen or wet wood compresses unevenly and may cause the trap to collapse prematurely or fail to trigger at all. Collect your trigger material from sheltered spots — under overhangs, inside hollow logs, or from dead standing wood that hasn't been in contact with snow. A good fixed blade like the Gerber Bear Grylls Ultimate Pro fixed blade survival knife is essential for cutting precise notches in trigger sticks — the cleaner the notch, the more reliably the trap fires.
The weight of your deadfall rock should be at least five times the weight of your target animal. For a squirrel, a 5–8 lb flat rock is appropriate. For rabbits, aim for 10–15 lbs or more. Flat rocks are ideal; round ones roll and reduce killing efficiency.
Urban and Suburban Trapping: Special Considerations
Apartment and suburban preppers face unique challenges. You may not have land of your own, and you may be operating in densely populated areas where game trapping isn't normal behavior. Here's how to think through urban trapping in a genuine SHTF scenario:
- Raccoons and opossums are abundant in almost every U.S. city. The Duke dog proof raccoon trap is designed specifically for urban environments — it uses a cylinder-style design that prevents dogs and cats from triggering it, making it safer to deploy in areas with domestic animals. Raccoon fat and meat are high in calories and historically prized by Native American communities as a winter food source.
- Pigeons and rats are technically trappable but require different methods and should be considered last-resort options. If you go that route, cook all meat thoroughly to 165°F internal temperature.
- Know your egress: In urban areas, set traps where you can reach them quickly and discretely. Traps left unattended in public spaces attract attention and may be removed or tampered with.
- Check traps every 12–24 hours in cold weather. Carcasses freeze quickly and can be damaged by scavengers. In below-freezing temperatures, a frozen carcass is actually preserved, but it becomes harder to process.
For apartment preppers who want to develop this skill, check out our guide on apartment prepping strategies for building complementary food reserves alongside practical skills like trapping. And if you're thinking about what goes in your bug out bag for a scenario where you'd be trapping to survive, include snare wire and a compact reference guide as part of your core survival gear.
Processing Game in Cold Weather: Basic Field Dressing
Catching the animal is only half the equation. In a survival context, you need to process it quickly and safely. Cold weather is actually your friend here — below-freezing temperatures slow bacterial growth significantly, giving you a reasonable processing window even if you can't cook immediately.
For rabbits and squirrels, the basic process is:
- Humanely dispatch any still-living animals immediately using a sharp blow to the back of the skull.
- Hang the carcass by the hind legs from a branch or cord.
- Make a shallow skin incision from the base of the tail up the back legs and peel the hide off like a sock — it releases cleanly in cold weather.
- Remove the entrails, being careful not to puncture the bladder or intestines, which will contaminate the meat.
- Rinse the carcass with clean water if available, or pack it in clean snow temporarily.
- Cook all wild game meat thoroughly — wild rabbits can carry tularemia, a bacterial infection transmissible to humans through undercooked meat or open cuts during processing. Always wear gloves when field dressing.
A quality multi-blade knife like the Victorinox Swiss Army Knife Fieldmaster is surprisingly capable for small game processing — the main blade handles skinning, while the saw and smaller blade clean up detail work on joints and rib cages.
Step-by-Step Instructions
Step 1: Scout Your Area for Active Game Trails and Sign
Walk your intended trapping area during daylight, looking for tracks, scat, chew marks, and compressed runs in snow or grass. Focus especially on natural pinch points — gaps in brush, culvert entrances, log crossings over ditches — where animals are funneled into predictable paths. Record or photograph locations so you can plan your trap line efficiently.
Step 2: Gather and Prepare Your Snare Materials
Cut snare wire to 18–24 inch lengths and pre-form your loops before heading into the field. For a rabbit snare, form a loop 3–4 inches in diameter using a small stick as a form tool, twisting the tag end tightly around the standing wire at least five full rotations to prevent slippage. Pre-making snares at home in warm conditions saves time and reduces scent contamination in the field. Use Paracord Planet 550 paracord as backup cordage for anchor lines and lashing trigger sticks on deadfall sets.
Step 3: Select and Prepare Your Trap Locations
Choose spots with confirmed animal sign — don't guess. Clear any sticks or debris that could interfere with the snare loop or deadfall trigger within a 6-inch radius of your set. In deep snow, compress the snow beneath the snare loop to prevent it from sinking and triggering incorrectly as temperatures fluctuate. Avoid disturbing the surrounding area more than necessary.
Step 4: Set and Position Your Snare at Correct Height
Drive a sturdy stake or use a natural anchor point at least 12 inches from the center of the trail. Attach the snare wire to the anchor and position the loop directly over the center of the animal run, suspended 3–4 inches above the ground for rabbits or 2 inches for squirrels. Support the loop with a small forked stick or twist of grass so it holds its position against wind. The loop should be oriented perpendicular to the direction of animal travel.
Step 5: Build and Set a Figure-4 Deadfall as Backup
Cut three dry sticks: a vertical post (8–10 inches), a diagonal brace (10–12 inches), and a horizontal trigger (6–8 inches). Carve interlocking notches so they support each other in the figure-4 configuration under the weight of your deadfall rock. Place your bait — peanut butter, dried fruit, or even animal entrails from a previous catch — on the horizontal trigger stick. Position the flat rock at a slight forward lean so it falls cleanly when triggered.
Step 6: Check Your Trap Line Every 12–24 Hours
Check traps on a consistent schedule — in cold weather, frozen carcasses can be preserved, but animals left too long will attract scavengers that can damage your traps or steal your catch. Reset any traps that have been triggered without a catch, refreshing bait and adjusting height or placement based on what you observe. Move traps that show no activity after 48 hours — if the game isn't using that run, find one they are using.
Step 7: Field Dress and Process Harvested Animals Safely
Wearing gloves, dispatch any living animals quickly and humanely. Hang by the hind legs, make your initial skin cut, and peel the hide cleanly before removing entrails. Inspect the carcass for abnormalities — spotted liver, unusual discharge, or extreme emaciation can indicate disease. When in doubt, do not eat it. Cook all wild game to an internal temperature of at least 165°F before consuming. Refer to a comprehensive reference like the UST Survival Kit with wilderness trapping field guide for species-specific processing guidance in the field.
Step 8: Maintain and Rotate Your Trap Line for Continued Success
Avoid over-trapping any single area — if you're catching consistently in one spot, animals in that area will eventually wise up or the local population will decline. Rotate your trap line by relocating 30–40% of your sets every 3–4 days. Clean your snare wire periodically by boiling it in plain water to remove human scent. This practice, combined with scent-masking techniques like rubbing wire with pine needles or wood ash, will keep your catch rates high over time.
Recommended Gear for Your Survival Trapping Kit
Beyond what's listed above, building a dedicated trapping kit for your bug out bag or survival gear cache is straightforward and inexpensive. The Wisconsin Snares 110 body grip trap is a professional-grade option that sets fast and works reliably in freezing conditions — experienced trappers often consider these traps more dependable than wire snares alone, especially for squirrels and mink along creek beds. For urban environments where domestic animals are a concern, the Duke dog proof raccoon trap is a smart addition — it's specifically engineered to prevent accidental catches of pets while targeting raccoons, which are one of the most calorie-dense small game animals available in urban North America. If you're building out a broader off grid food acquisition system, pair your trapping skills with knowledge from our guide to hunting and fishing for survival, and keep your blades sharp with insights from our article on hunting knives and field processing tools.
Cold weather trapping is a skill that compounds over time. Every animal you catch teaches you more about reading terrain, understanding animal behavior, and improving your set placement. Start practicing now — before SHTF — so when food runs out and the stores are empty, you're not learning from scratch in the snow.
Frequently Asked Questions
What is the easiest survival trap to make for catching rabbits in cold weather?
The wire loop snare is the easiest and most effective survival trap for rabbits. Using pre-formed stainless steel snare wire, you can set a functional trap in under five minutes once you've located an active rabbit run. Position the loop 3–4 inches in diameter and 3–4 inches above the snow surface across a confirmed trail. A manufactured snare kit is more reliable than improvised cordage, especially in freezing temperatures where natural fibers can stiffen and fail to tighten properly.
Is trapping for survival legal, and can I practice in a suburban or urban area?
Trapping laws vary significantly by state, county, and municipality. In most jurisdictions,