Prepper's Guide to Vehicle Recovery: How to Get Unstuck and Keep Moving When SHTF
When your bug-out vehicle gets stuck in mud, sand, or snow, you need more than luck. Here's how to recover it fast and keep moving.
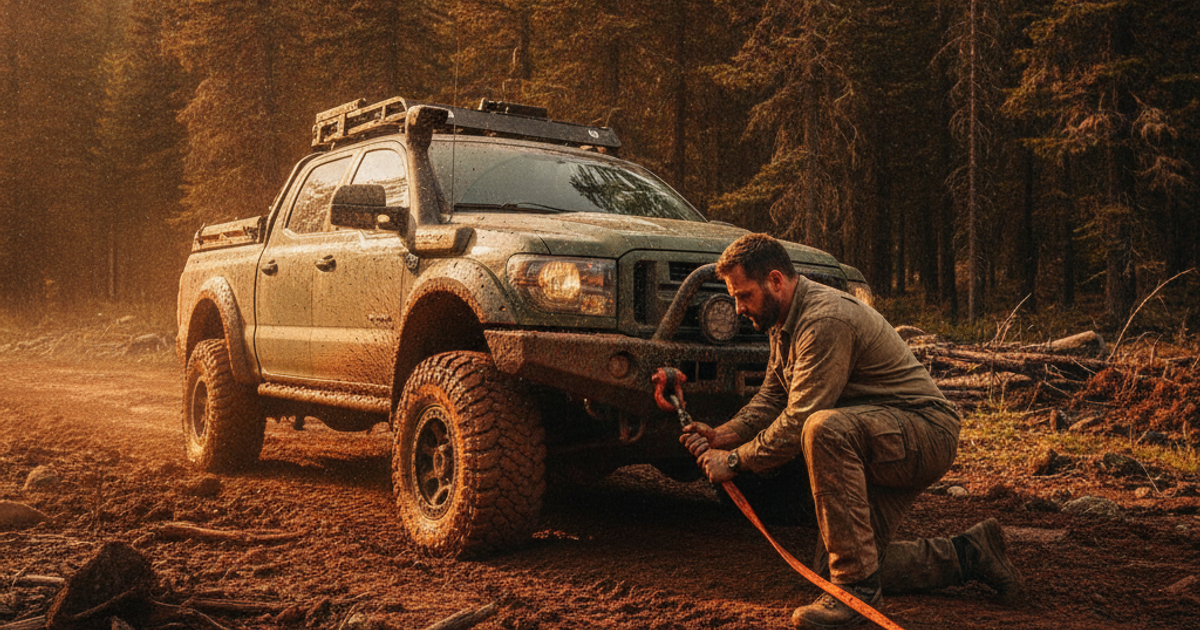
When the grid goes down, roads flood, or society fractures, your bug-out vehicle is only as good as your ability to keep it moving. A stuck vehicle isn't just an inconvenience — it can be a death sentence. Whether you're navigating a flooded suburban road, bogged down in a rural mud field, or high-centered on debris in an urban collapse scenario, knowing how to recover your vehicle solo could be the difference between making it to your destination and becoming a stationary target.
According to AAA, approximately 69 million Americans require roadside assistance every year — and that's under normal conditions with functional infrastructure and cell service. When SHTF and those services disappear, you're on your own. Every prepper who relies on a vehicle for bugging out needs to treat vehicle recovery as a core survival skill, not an afterthought. For more on keeping your vehicle operational during a crisis, see our guide on Vehicle Bug-Out Mechanic: How to Keep Your Bug-Out Vehicle Running When There Are No Repair Shops.
This guide covers the essential techniques, gear, and solo extraction methods you need to get unstuck and keep rolling when no help is coming.
What You'll Need
Tools
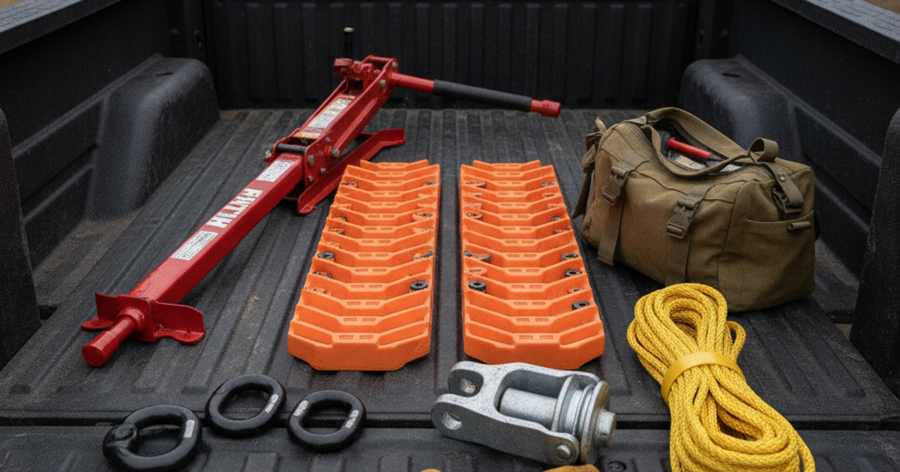
- Hi-Lift Jack off-road farm jack
- WARN VR EVO electric winch 9500 lb
- Smittybilt X2O portable air compressor tire inflator
- Tow points and recovery anchors
Supplies
- WARN Epic Series recovery strap
- ARB MaxTrax vehicle recovery boards
- Rhino USA heavy duty D-ring shackles recovery kit
- Bubba Rope kinetic energy recovery rope
- Smittybilt recovery gear bag trail kit
Understanding the Four Most Common Vehicle Recovery Scenarios
Before reaching for your recovery gear, you need to correctly identify your situation. Applying the wrong technique wastes time and can make things dramatically worse. The four most common scenarios preppers encounter are: getting mired in mud or sand, high-centering on an obstacle, sinking into a ditch or soft shoulder, and getting wedged on debris or ice. Each requires a different primary approach.
Mud and sand entrapment is the most common off-road recovery situation. Your tires lose traction because the ground can't support the vehicle's weight. High-centering occurs when your vehicle's frame or undercarriage rests on an object while the wheels hang with little or no traction. Ditch recovery involves getting your vehicle back onto a stable surface from a lower position, which typically requires lifting or winching. Debris and ice situations are more common in urban and suburban bug-out scenarios than most preppers plan for.
Tire Deflation: The Most Underused Solo Recovery Technique
Before you break out any hardware, check your tire pressure. Lowering your tire PSI dramatically increases the tire's contact patch with the ground, often providing enough traction to drive out of a soft-ground entrapment without any additional gear. In sand, dropping from 35 PSI to 15–18 PSI can transform an immovable vehicle into one that rolls freely. In mud, 18–22 PSI is typically effective depending on tire size.
The critical rule: you must re-inflate your tires before returning to hard surfaces or highway speeds. Driving on severely underinflated tires at speed causes rapid heat buildup and can destroy a tire in minutes — leaving you worse off than before. This is why a quality onboard air compressor is non-negotiable survival gear. The Smittybilt X2O portable air compressor tire inflator is a robust dual-cylinder unit capable of airing up a 35-inch tire from 15 PSI back to 35 PSI in under 5 minutes, and it runs directly from your vehicle's battery — no outlet required.
Recovery Boards: Instant Traction for Solo Extraction
Recovery boards — also called traction boards — are among the best investments a prepper can make for vehicle self-rescue. They work by giving your spinning tires a solid ramp surface to bite into, allowing you to drive forward or backward out of soft ground, snow, or sand. They're lightweight, require no anchor points, and can be deployed and retrieved by one person in under two minutes.
Place the boards in front of (or behind) your drive wheels, pointed in the direction you want to travel. Engage 4WD low if available, select the lowest gear, and accelerate slowly and consistently — do not spin the tires aggressively. The ARB MaxTrax vehicle recovery boards are the gold standard in this category, engineered from reinforced nylon with aggressive cleats that grip both tires and ground simultaneously. They're rated to support full-size truck weights and have a military-grade reputation. If you're building a grey man bug-out vehicle, these boards store flat under cargo and raise zero attention — also see our guide on the Gray Man Vehicle: How to Make Your Bug-Out Vehicle Blend In When SHTF.
Winching: The Gold Standard for Serious Entrapments
A properly installed electric winch is the single most powerful solo recovery tool available. It allows you to pull your vehicle toward any sufficiently solid anchor point — a tree, a boulder, a concrete barrier, even another stuck vehicle — using mechanical force rather than engine power. This means you can extract yourself from situations where traction-based methods simply won't work.
For most full-size trucks and SUVs used as bug-out vehicles, a winch rated between 8,000 and 12,000 lbs is appropriate. The WARN VR EVO electric winch 9500 lb represents one of the most reliable options in this range — featuring a series-wound motor, three-stage planetary gear train, and a sealed solenoid pack designed to handle the kind of harsh, sustained use a real SHTF scenario would demand. WARN has been the benchmark in the recovery winch industry for decades, and for good reason.
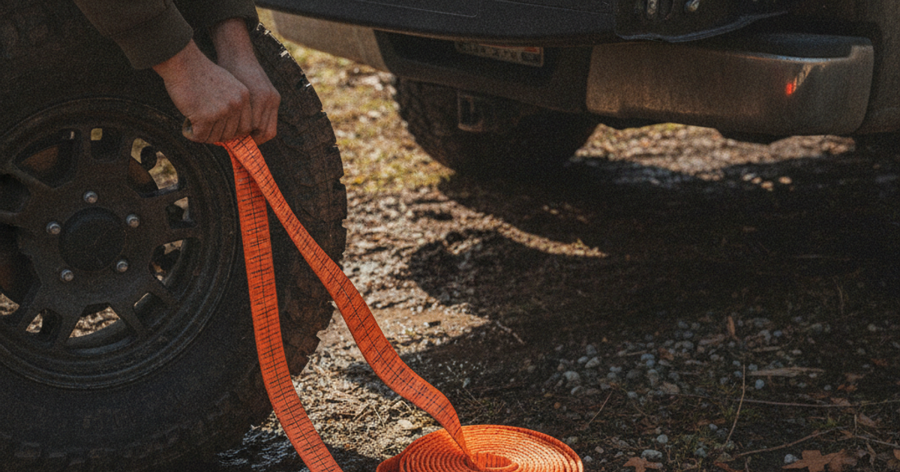
Critical winching safety: never stand in line with a tensioned winch cable or strap. Store energy in a stressed cable or synthetic rope is enough to cause lethal injury if it fails. Always drape a heavy recovery damper (a jacket, sandbag, or purpose-built weight) over the cable midspan to arrest a snap. When using a winch, connect to dedicated recovery points — never to a ball hitch, bumper skin, or frame components not designed for recovery loads.
Kinetic Recovery Ropes vs. Static Straps: Know the Difference
Not all recovery straps are the same, and using the wrong type can cause equipment failure or injury. Static recovery straps have minimal stretch and are designed for controlled pulling — ideal for winching or slow towing. Kinetic energy recovery ropes (KERRs) are designed to stretch 20–30% under load, storing and then releasing energy like a slingshot. This kinetic snatch effect allows a moving vehicle to generate far more extraction force than its engine alone could produce.
When another vehicle is available, the Bubba Rope kinetic energy recovery rope is a premium KERR option with double-braided nylon construction and a 30,000+ lb break strength in full-size versions. For situations where you have another vehicle in your convoy — always the preferred scenario — KERRs can extract even deeply mired full-size trucks with a single controlled run. For static situations or winch rigging, a quality static strap like the WARN Epic Series recovery strap is the go-to choice — constructed with industrial-grade polyester webbing rated for extreme loads without the dangerous rebound energy of a kinetic rope.
The Hi-Lift Jack: The Most Versatile Manual Recovery Tool
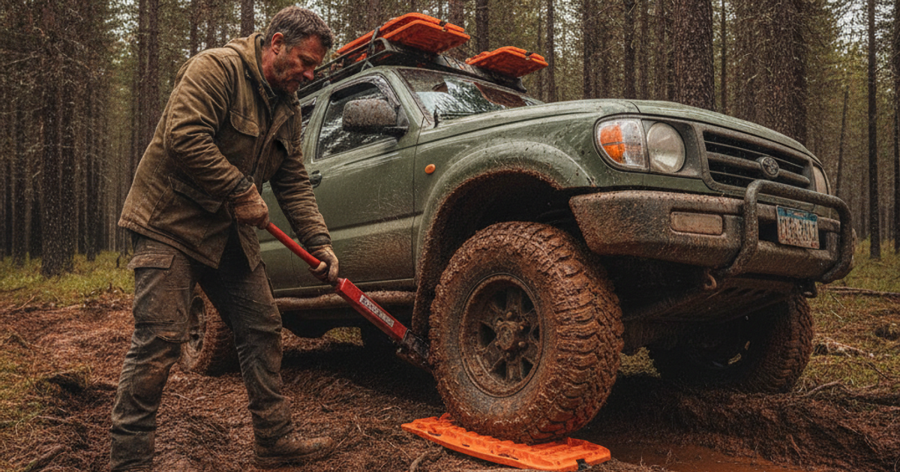
The Hi-Lift Jack deserves its own section because it does things no other tool in your kit can do. Yes, it lifts — but in a recovery context, it also acts as a hand winch, spreader, and high-clearance vehicle lift for repositioning wheels onto recovery boards when you can't drive out. For high-centering situations, the Hi-Lift lets you raise one corner of the vehicle at a time to pack material underneath the tires or reposition them onto solid ground.
The Hi-Lift Jack off-road farm jack is the original and still-definitive version — available in 48-inch and 60-inch lift heights, with an all-cast construction rated to 7,000 lbs. If your vehicle lacks proper lift points, purchase a Hi-Lift Jack receiver adapter or off-road base plate before you need it. The base plate is critical in soft ground — without it, the jack foot will simply sink into mud before lifting the vehicle.
Anchor Points and Shackles: The Hardware That Holds It All Together
Every recovery setup depends on connection points. Cheap shackles crack under recovery loads — especially kinetic snatch loads that briefly exceed static ratings by significant margins. Your D-ring shackles need to be forged steel, properly rated, and correctly moused (secured so the pin cannot back out under load). The Rhino USA heavy duty D-ring shackles recovery kit provides mil-spec rated, drop-forged shackles tested beyond their rated loads — and the kit includes multiple sizes for versatility in different rigging configurations.
When no natural anchor exists, a ground anchor (also called a deadman anchor) can be improvised. Bury your spare tire, a spare wheel, or your Hi-Lift jack horizontally 18–24 inches deep and attach your winch line to it using a shackle. This technique works in soft sand and loose soil where no trees or solid structures are available.
Step-by-Step Instructions
Step 1: Assess the Situation Before Making Any Moves
Get out of the vehicle and visually inspect all four corners before touching the gas or applying any recovery force. Determine which wheels have lost traction, whether the frame is in contact with the ground, and whether the vehicle is still on stable ground at the contact points. Applying power before assessing the situation is the number one cause of making a minor entrapment dramatically worse.
Step 2: Attempt Tire Deflation and Controlled Drive-Out First
If the entrapment is mud, sand, or snow, deflate drive tires to 15–20 PSI before using any hardware. Select 4WD low, choose the lowest gear available, and attempt a slow, steady exit in the direction of easiest escape — which is often backward the way you came in. Avoid spinning the tires, as this digs the vehicle deeper. If the vehicle moves even slightly, keep consistent gentle pressure on the throttle until you're on firm ground.
Step 3: Deploy Recovery Boards Under Drive Wheels
If tire deflation alone doesn't free the vehicle, place your recovery boards (such as the ARB MaxTrax) directly in front of the drive wheels in the direction of travel. Dig out material in front of the tires if needed to position boards flat against the tire face. Engage 4WD low, and drive forward slowly with steady throttle — do not floor it. Retrieve boards immediately after extraction and re-inflate tires before returning to hard road surfaces.
Step 4: Use the Hi-Lift Jack to Lift and Reposition
For high-centering or situations where wheels are completely off the ground, use the Hi-Lift Jack to raise one drive axle at a time. Place the jack base on a flat board or base plate to prevent sinking in soft ground. Lift the wheel clear, pack rocks, logs, or recovery boards underneath for a solid surface, then lower and repeat on the opposite side if necessary before attempting to drive out.
Step 5: Set Up a Winch Anchor and Rig the Recovery Line
Identify a solid anchor — a tree at least 8 inches in diameter, a large boulder, or a buried deadman anchor. Attach your tree saver strap around the anchor (never winch cable directly around a tree), connect with properly rated D-ring shackles, and run your winch line out fully before engaging. Keep all bystanders clear of the line and place a recovery damper over the cable midspan before winching.
Step 6: Execute the Winch Pull with Vehicle Power Assist
Engage the winch and simultaneously apply light throttle in the direction of travel to reduce the load on the winch motor. Winching under your own power assist dramatically reduces heat buildup in the motor and extends recovery capability. Stop periodically to let the winch motor cool if the extraction is a long pull — sustained full-load winching can overheat even quality motors in under two minutes.
Step 7: Re-Inflate Tires and Inspect the Vehicle Before Continuing
After any successful recovery, re-inflate all tires to highway pressure using your onboard compressor. Walk around the vehicle and inspect for damage to recovery points, undercarriage, tires, and drivetrain before proceeding. Check for fluid leaks that might indicate suspension or differential damage from the entrapment. Log the recovery in your mental situational awareness — note what caused it and how to avoid the same terrain in the future.
Step 8: Pack and Secure All Recovery Gear Properly
Rinse or shake mud off straps and ropes before packing — dirt and grit embedded in webbing fibers accelerates degradation and weakens straps over time. Store all recovery equipment in a designated bag like the Smittybilt recovery gear bag trail kit, which keeps all your recovery hardware organized, protected, and immediately accessible the next time you need it. Never stuff recovery gear into random corners of your cargo area — in a real SHTF scenario, you need to find it fast.
Urban and Suburban Vehicle Recovery Considerations
Most vehicle recovery content focuses exclusively on off-road environments, but urban and suburban preppers face their own unique entrapment scenarios: flooded underpasses, debris-covered roads after a tornado or earthquake, ice-covered urban streets, and crash-blocked intersections. The techniques are largely the same, but the anchoring options and terrain differ significantly.
In urban environments, lamp posts, concrete barriers, and large structural columns can serve as winch anchors. Always evaluate whether an urban anchor is structurally sound before loading it — a decorative post is not the same as a structural one. Debris removal before attempting extraction is often the priority in urban scenarios, making a full-size pry bar and folding saw valuable additions to your urban bug-out vehicle kit. Also consult our article on Urban Evacuation Routes: How to Escape the City When SHTF for route planning that minimizes entrapment risks before you're on the road.
For apartment dwellers and suburban preppers without a dedicated 4WD truck: the same recovery principles apply even to sedans and crossovers. Recovery boards work on any driven wheel. A compact Hi-Lift adapter allows use on vehicles with minimal ground clearance. The key is matching your gear to your actual vehicle — don't build a recovery kit designed for a Jeep Wrangler if you drive a Honda CR-V.
Convoy Recovery Protocols and Situational Awareness
If you're bugging out in a group or with a partner vehicle, always designate a recovery lead before departure. Establish hand signals and radio protocols for stuck vehicle calls — shouting across a noisy, chaotic evacuation scenario is ineffective. The recovering vehicle should always position itself on the firmest available ground before rigging, and the stuck vehicle should have its engine running and drivetrain in the appropriate gear to assist the pull.
Maintain situational awareness throughout any vehicle recovery. A stuck vehicle is a vulnerable vehicle — you're stationary, potentially in an exposed location, focused on mechanical tasks. Assign a security watch if your group has the personnel. If you're solo, position yourself where you can see approaching threats while working. For more on maintaining awareness in high-stress scenarios, see Situational Awareness: How to Detect Threats Before They Become Dangerous.
Frequently Asked Questions
What is the best solo vehicle recovery method when you have no winch and no other vehicles?
The most effective solo recovery method without a winch is the combination of tire deflation and recovery boards. Dropping tire pressure to 15–20 PSI significantly increases traction in soft terrain, while recovery boards provide a rigid surface for your drive wheels to grip. A Hi-Lift Jack can lift the vehicle for repositioning when traction methods alone aren't enough. Always carry all three tools together — they're complementary, lightweight, and require no external anchor or assistance to use.
How do I get my vehicle unstuck from deep mud when I'm alone with no anchor points?
In deep mud with no natural anchors, your best options in order are: (1) recovery boards placed under all drive wheels, (2) a Hi-Lift Jack used to lift the vehicle and pack solid material under the tires, and (3) a buried deadman anchor using your spare tire or jack placed 18–24 inches deep in firmer ground ahead of your vehicle. In extreme cases, partially disassembling cargo load from the vehicle to reduce weight before attempting extraction can make the difference between success and failure.
What recovery gear should every prepper carry in their bug-out vehicle at minimum?
At minimum, every bug-out vehicle should carry a set of recovery boards (like MaxTrax), a kinetic recovery rope and static strap, two rated D-ring shackles, a quality Hi-Lift Jack with base plate, and a portable air compressor. If budget allows, an electric winch is the single highest-value upgrade you can make to a bug-out vehicle. All of this gear should be stored in an organized recovery bag so you can deploy it quickly under stress, regardless of whether you're dealing with a suburban flood scenario or a rural off-road entrapment.
Affiliate Disclosure: SHTFPlan.net participates in the Amazon Services LLC Associates Program. Some links are affiliate links — we may earn a small commission at no extra cost to you.