Chem, Bio, and Radiological Threats: How to Build a CBRN Preparedness Plan for Your Family
Chemical spills, biological outbreaks, and radiological events can strike without warning. Here's how to build a real CBRN defense plan before it's too late.
Most preppers have a solid handle on natural disasters, power outages, and even civil unrest. But when the conversation shifts to chemical, biological, radiological, and nuclear — CBRN — threats, even experienced preppers often find themselves without a plan. That's a dangerous gap. According to the U.S. Department of Homeland Security, CBRN incidents represent some of the highest-consequence threats facing civilian populations, and the window between exposure and serious harm can be measured in minutes. Whether you live in a high-rise apartment, a suburban neighborhood, or a rural homestead, understanding how to protect your family from CBRN threats is no longer optional — it's a core component of any serious emergency preparedness strategy.
This guide will walk you through the fundamentals of CBRN preparedness: what the threats look like, how to shelter in place effectively, what protective equipment you actually need, how to decontaminate yourself and your family, and how to build a comprehensive CBRN response plan that works for your specific living situation. You don't need military training or a government budget. You need knowledge, the right supplies, and a plan executed before the threat arrives.
Understanding CBRN Threats: What You're Actually Preparing For
CBRN is not a single threat — it's a category of four distinct hazard types, each with different exposure pathways, timelines, and protective measures.
Chemical threats include industrial accidents involving toxic industrial chemicals (TICs), deliberate attacks using nerve agents like sarin or VX, and blister agents like mustard gas. The 2017 sarin attack in Khan Shaykhun, Syria, and the 1984 Bhopal gas disaster — which killed an estimated 15,000 people — demonstrate that chemical incidents can originate from both warfare and industrial failure. Chemical agents act fast, often within seconds to minutes of exposure.
Biological threats include naturally occurring outbreaks (like COVID-19 or Ebola) as well as weaponized pathogens such as anthrax, smallpox, or plague. Unlike chemical agents, biological threats often have an incubation period, meaning you may not know you've been exposed until symptoms appear days later. Situational awareness is critical — early warning signs of a biological event include unusual illness patterns in your community or unexplained animal deaths.
Radiological threats involve the dispersal of radioactive material, most commonly through a radiological dispersal device (RDD), also called a "dirty bomb." While a dirty bomb is unlikely to cause mass casualties from radiation alone, the panic and contamination of an urban area could be catastrophic. Industrial radiological sources — used in hospitals, research facilities, and construction sites — are also at risk of theft or accident.
Nuclear threats represent the most extreme end of the spectrum: an improvised nuclear device (IND) or nuclear weapon detonation. While statistically unlikely, the consequences of even a low-yield nuclear detonation in an urban area are severe enough that basic preparedness can save lives. FEMA's "Planning Guidance for Response to a Nuclear Detonation" specifically states that shelter-in-place, even for 12-24 hours, can dramatically reduce radiation exposure.
For apartment dwellers and urban preppers, the threat landscape differs from rural areas. Industrial facilities, transportation corridors, and population density all increase exposure risk in cities. That said, rural communities are not immune — agricultural chemical spills, nearby nuclear power plants, and the simple fact that fallout travels with the wind mean that rural preppers must also have a CBRN plan. If you're working on your broader family emergency plan, CBRN response needs to be integrated — not treated as a separate, exotic concern.
What You'll Need
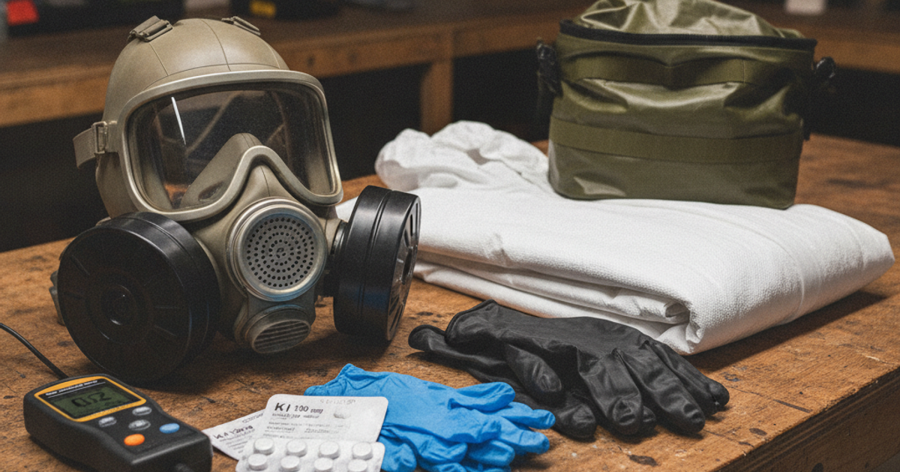
Tools
- 3M 6800 full face respirator mask (CBRN-rated)
- RADEX RD1503 Geiger counter radiation detector
- MIRA Safety CM-6M tactical gas mask with NBC filter
Supplies
- 3M 4515 plastic sheeting and window seal shelter-in-place kit
- KI4U potassium iodide tablets (radiation/nuclear protection)
- Ready America 72-hour emergency kit
How to Build a Shelter-in-Place System for Chemical and Radiological Threats
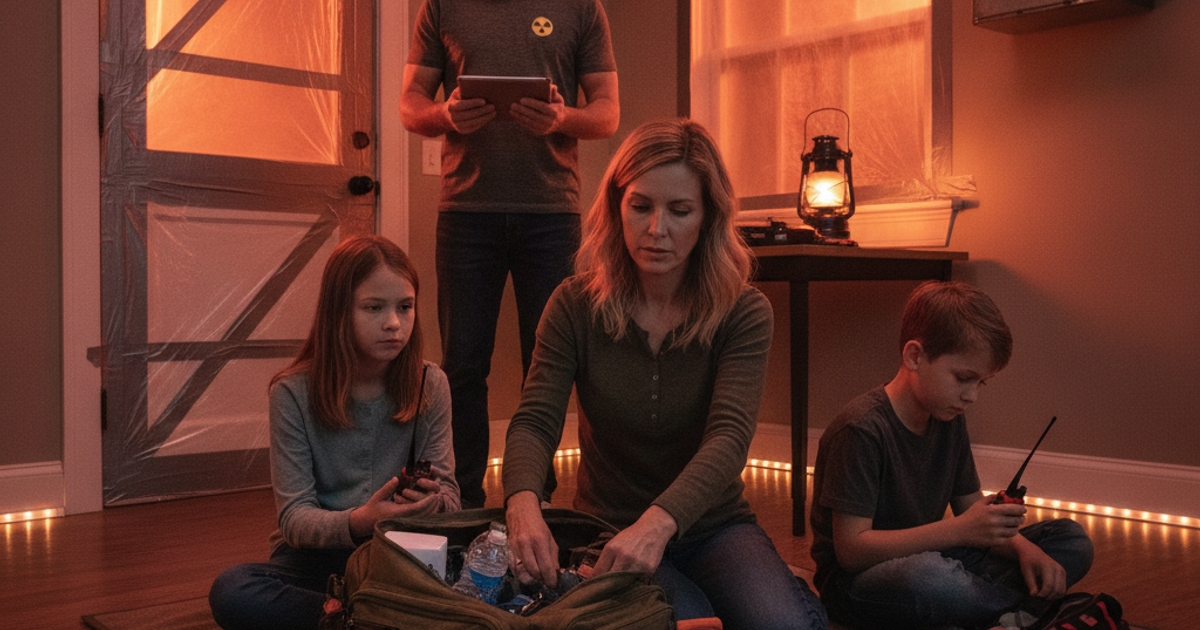
Shelter-in-place is your first and most powerful defensive tool against most CBRN threats. The concept is simple: seal yourself inside a building and create a barrier between you and the contaminated environment. The execution requires preparation done well in advance.
The key is selecting the right room. Choose an interior room on an upper floor for chemical threats, since many toxic gases are heavier than air and settle low. For radiological and nuclear threats, an interior room in the middle of a building — with maximum mass between you and the outside — provides the best protection. A basement or center room in a multi-story building can reduce radiation exposure by a factor of 10 or more compared to being outside, according to FEMA guidance.
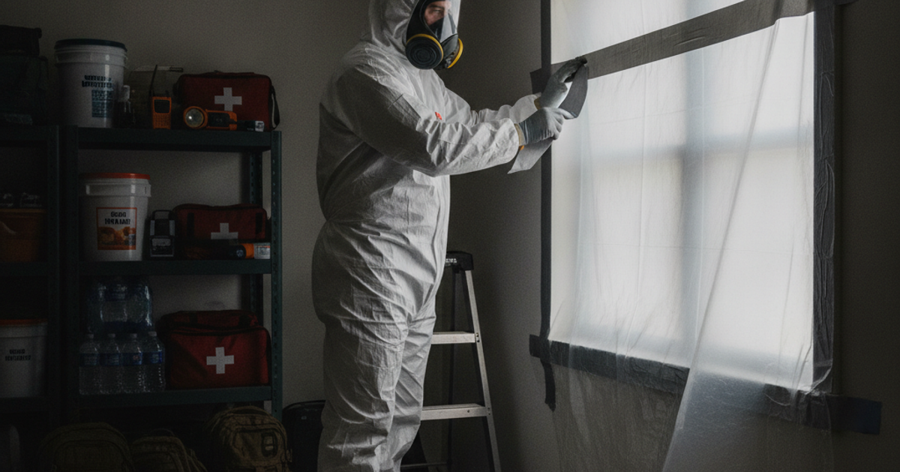
Pre-cut plastic sheeting to fit every window, door, and vent in your designated shelter room. Store the pre-cut pieces rolled up and labeled with the location they cover. Keep a roll of duct tape with them. The goal is to be able to seal your room in under two minutes — practice this with your family. A shelter-in-place kit containing pre-cut plastic sheeting, like the 3M 4515 plastic sheeting and window seal kit, provides purpose-built materials designed specifically for this application, with adhesive strips that are faster to deploy than standard duct tape on bare plastic.
Apartment dwellers should note that sealing a single interior room is entirely feasible, even in a small unit. Rural preppers in older homes with greater air infiltration may need to seal more aggressively. The general recommendation from FEMA and the CDC is to seal one room only — trying to seal an entire house is rarely effective and wastes critical time.
Keep a minimum 72-hour supply of water and food inside your designated shelter room. You should not leave the room to retrieve supplies once you've sealed it. A solid starting point is a pre-assembled kit like the Ready America 72-hour emergency preparedness kit, which provides calorie-dense food bars, water pouches, and basic survival gear in a ready-to-deploy package — store one inside your shelter room permanently. For a deeper look at the psychological and logistical aspects of extended home confinement, see our guide on how to survive weeks of home confinement when SHTF.
Protective Equipment: What Actually Works and What Doesn't
The survival gear marketplace is flooded with products claiming CBRN protection. Understanding what's actually rated for these threats — and what's not — can be the difference between life and death.
Respiratory protection is your highest priority in any CBRN event. Standard N95 masks, while useful for biological threats involving particulates, provide zero protection against chemical vapors and inadequate protection against many radiological particles. For serious CBRN preparedness, you need a full-face respirator with appropriate filter cartridges.
The 3M 6800 full face respirator is a widely respected option that, when paired with appropriate CBRN-rated filter cartridges, provides both eye protection and respiratory protection against a broad spectrum of chemical and particulate threats. It's reusable, NIOSH-approved, and available in multiple sizes — critical for fit, since a loose seal renders any mask nearly useless.
For preppers who want a purpose-built tactical solution, the MIRA Safety CM-6M tactical gas mask with NBC filter is designed explicitly for nuclear, biological, and chemical threats. It features a wide panoramic visor, a drinking tube for hydration during extended use, and compatibility with NATO-standard filter cartridges rated for CBRN agents. This is a serious piece of survival gear designed for real-world NBC threats.
If budget or storage constraints are a concern, the North by Honeywell 7700 half-mask respirator with NBC filter cartridges provides a more compact alternative. While a half-mask doesn't protect the eyes, it's significantly more portable and easier to store in a bug out bag or vehicle emergency kit. When paired with chemical splash goggles, it provides meaningful protection for many threat scenarios.
Body protection in a full CBRN event ideally involves a Tyvek suit or chemical protective coveralls, nitrile gloves (minimum 8 mil thickness), and rubber boots. For most civilian preppers, having one or two disposable Tyvek suits per family member stored with your shelter-in-place kit is a practical starting point.
Radiation detection is a category that many preppers overlook entirely. You cannot see, smell, or feel radiation — and without a detector, you have no way of knowing when it's safe to leave shelter or whether your environment is contaminated. The RADEX RD1503 Geiger counter is a reliable, civilian-grade radiation detector that measures gamma and beta radiation. It's compact, battery-operated, and simple enough for non-technical users to operate effectively. Every serious prepper household should have at least one. For more on nuclear and radiological threat response, our complete nuclear and radiological emergency survival guide covers fallout timelines, dose rates, and evacuation decision-making in depth.
Potassium Iodide: Understanding When and How to Use It
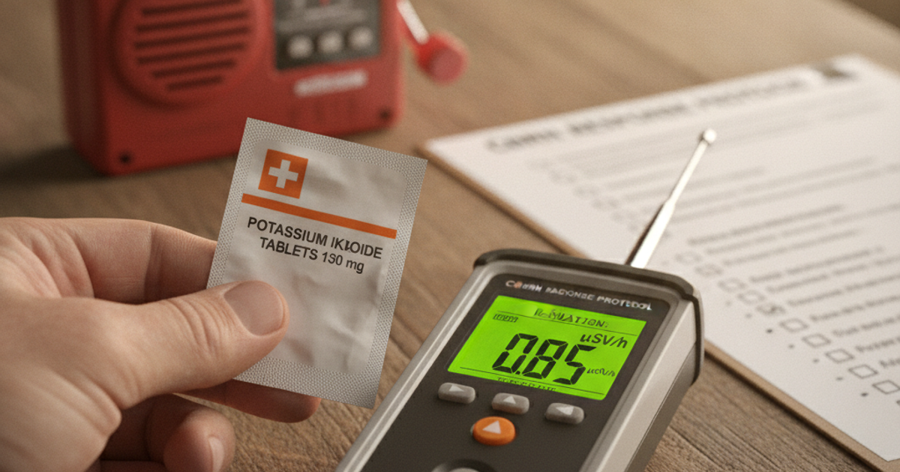
Potassium iodide (KI) is one of the most misunderstood items in the prepper's medicine cabinet. KI protects the thyroid gland from absorbing radioactive iodine (I-131) — a specific type of fallout released in nuclear reactor accidents and nuclear detonations. It does not protect against whole-body radiation exposure, dirty bombs using other isotopes, or chemical threats.
The FDA recommends KI only when specifically directed by public health authorities, because its use is time-sensitive and context-dependent. However, many preppers and emergency planners — including those living within 100 miles of nuclear power plants — keep KI tablets on hand as a precautionary measure. The KI4U potassium iodide tablets are an FDA-approved formulation available to civilians. Store them with your shelter-in-place kit, understand the dosing guidelines by age (available from the FDA and CDC), and know that they should only be taken when directed by emergency management authorities or when a nuclear event is confirmed.
Decontamination Procedures for Families
Decontamination — "decon" in CBRN parlance — is the process of removing or neutralizing hazardous material from a person, clothing, or equipment. For civilians, the most important decon principle is this: 80% of contamination can be removed simply by removing your outer clothing and rinsing with water. This finding, documented by the CDC and multiple military studies, means that improvised decontamination is within reach of any family, anywhere.
The standard civilian decon sequence for chemical or radiological exposure is:
- Remove yourself from the contaminated area immediately.
- Strip off outer clothing — this alone removes the majority of contamination. Place clothing in a plastic bag and seal it.
- Flush exposed skin and eyes with large amounts of clean water for a minimum of 10-15 minutes. Do not scrub — this can drive contaminants deeper into skin.
- Wash hair with shampoo or soap (do not use conditioner, which can bind some chemical agents to hair).
- Change into clean clothes stored in a sealed bag.
For more thorough decontamination, especially in a biological or heavy chemical exposure scenario, a dedicated decon kit provides a structured solution. A Safecastle decontamination shower kit includes portable shower infrastructure, neutralizing agents, and containment supplies designed for field decon without access to conventional plumbing — highly relevant for rural preppers and for situations where municipal water may itself be compromised.
Establish a decon area outside your primary shelter space — preferably at the threshold of your home or in a garage. This prevents cross-contamination of your clean interior space. Anyone entering from a potentially contaminated environment should decon before entering. This protocol applies equally to apartment dwellers (use the building hallway or a bathroom as your decon threshold) and rural homesteaders.
For guidance on treating toxic exposures when professional medical help is unavailable, the article on poison control and toxic exposure treatment when SHTF is an essential companion read.
Step-by-Step Instructions
Step 1: Identify Your Highest-Probability CBRN Threats by Location
Research your local risk environment before you buy a single piece of equipment. Check FEMA's hazmat planning maps, identify industrial facilities and transportation corridors within 10 miles of your home, and locate the nearest nuclear power plant using the NRC's online reactor map. Rural preppers should also identify agricultural chemical storage facilities and rail lines carrying hazardous materials. This threat assessment determines which threats to prioritize and shapes every other decision in your plan.
Step 2: Designate and Pre-Equip Your Shelter-in-Place Room
Select one room in your home — ideally interior, above ground level for chemical threats, below or interior for radiological threats — and pre-stage all shelter-in-place supplies there permanently. Pre-cut plastic sheeting for every opening, store 72 hours of water and food, keep a battery-powered radio for emergency alerts, and include a portable toilet option for extended shelter durations. Label all materials clearly and make sure every household member over age 10 knows how to seal the room independently.
Step 3: Acquire and Fit-Test Appropriate Respiratory Protection
Purchase respirators rated for your identified threat profile and fit-test them on every family member before a crisis occurs. A mask that doesn't seal properly provides false confidence. Conduct a simple negative-pressure fit test: put on the mask, seal the exhalation valve, and exhale gently — you should feel the mask press against your face with no air escaping around the edges. Store masks in sealed bags with their filter cartridges, check expiration dates on filters annually, and replace them on schedule.
Step 4: Stock and Learn to Use Radiation Detection Equipment
Purchase a calibrated Geiger counter and learn to interpret readings before you need to. Understand baseline background radiation levels in your area (typically 0.05-0.20 microsieverts per hour) so you can immediately recognize elevated readings. Practice using the device regularly. Store extra batteries with the unit and include a laminated reference card with radiation dose rate guidelines from FEMA or the NRC so family members can interpret readings without internet access.
Step 5: Build Your Family Decontamination Protocol and Practice It
Write a decon procedure specific to your home layout and walk every family member through it in a dry run. Designate a decon zone, stage clean clothing sets in sealed bags near the decon area, and ensure you have at least 20 gallons of stored water dedicated solely to decontamination use. For households with children, practice the sequence as a drill — children who have rehearsed a procedure are dramatically more likely to execute it correctly under stress.
Step 6: Store Potassium Iodide and Know the Dosing Protocol
Obtain FDA-approved KI tablets if you live within 100 miles of a nuclear facility or if nuclear threats are in your assessed risk profile. Store them in your shelter-in-place room, not in a medicine cabinet or bug out bag where they might not be accessible during a fast-moving nuclear event. Print and laminate the FDA's KI dosing chart by age and weight, and attach it directly to the KI storage container. Brief all adult household members on the conditions under which KI should and should not be taken.
Step 7: Integrate CBRN Protocols into Your Family Emergency Communication Plan
Establish clear trigger conditions: what will cause your family to shelter in place, what will cause immediate evacuation, and who makes that call when family members are separated. Designate an out-of-area contact who can relay information between separated family members. Assign roles — who seals the room, who monitors the radio, who manages decon at the door — so that in a high-stress event, no one is making decisions from scratch. For broader communication planning guidance, see our article on building a family emergency communication plan when cell networks fail.
Step 8: Conduct an Annual CBRN Equipment Audit and Family Drill
Schedule a yearly review of all CBRN supplies: check filter cartridge expiration dates, rotate food and water in your shelter-in-place room, inspect plastic sheeting and tape for integrity, test your Geiger counter batteries, and verify KI tablets are within their shelf life. Conduct a timed shelter-in-place drill annually — the goal is to have your room fully sealed within 2-3 minutes of a go-signal. Document what failed during the drill and fix it before the next year.
Recommended Gear Summary
To round out your CBRN preparedness kit, here's a consolidated look at the core equipment covered in this article. The 3M 6800 full face respirator and the MIRA Safety CM-6M gas mask represent the two primary full-face protection options for different budgets and use cases. The North by Honeywell 7700 half-mask respirator provides a compact backup option suitable for a bug out bag. For shelter-in-place infrastructure, the 3M 4515 plastic sheeting kit and a Safecastle decon shower kit round out your structural defenses. For radiological protection, pair the RADEX RD1503 Geiger counter with KI4U potassium iodide tablets. And ensure your baseline emergency preparedness foundation is solid with the Ready America 72-hour emergency kit pre-positioned in your shelter room. Browse our full recommended survival gear page for additional vetted equipment across all preparedness categories.
Frequently Asked Questions
What is the most important thing to do in a chemical attack or hazmat emergency near my home?
The single most important action is to immediately shelter in place and seal yourself away from the outside air. Close all windows and doors, turn off HVAC systems (which draw in outside air), and seal