Debris Huts and Snow Caves: How to Build an Emergency Survival Shelter from Nature Alone
When you have no tarp, no tent, and no time, the woods and the snowpack still hold everything you need. Here's how to build natural emergency shelters that keep you alive overnight.
Hypothermia kills faster than hunger, thirst, or almost anything else you'll face outdoors. The CDC attributes roughly 1,300 deaths per year in the United States to excessive natural cold, and the National Weather Service notes that hypothermia can set in at air temperatures as warm as 50°F when wind and moisture strip body heat faster than you can generate it. Wet clothing conducts heat away from the body roughly 25 times faster than dry air. That's why the Rule of Threes puts shelter ahead of water and food: three hours without protection from extreme weather, and your core temperature starts a downward slide you may not be able to reverse.
Most preppers obsess over the bug out bag and forget that the single most important piece of survival gear — adequate shelter — may have to be built from whatever the landscape offers. Maybe your pack got swept downstream. Maybe you were evacuating a wildfire zone and ended up on foot at 2 a.m. Maybe you live in a 700-square-foot apartment and your "wilderness" is the county park greenbelt three miles from your door. Natural shelter construction isn't a rural-only skill. It's a universal insurance policy, and it costs nothing but practice.
Why Natural Shelters Beat Improvised Tents for Hypothermia Prevention
A tarp or bivvy blocks wind and rain, but neither provides meaningful insulation. Shelter from natural materials works on a different principle: trapped dead air. A properly built debris hut packs 18 to 24 inches of leaf litter around a small internal cavity, creating an insulating envelope comparable to a 0°F sleeping bag. Snow, counterintuitively, does the same thing — compacted snow has an R-value of roughly R-1 per inch, meaning a 12-inch snow wall insulates about as well as a standard insulated house wall.
Field research from military survival schools consistently shows the same failure point: people build shelters that are too big. Your body is the furnace. Every cubic foot of empty air inside the shelter is volume you must heat. A correctly sized debris hut should feel like a sleeping bag made of sticks — you crawl in, and there's barely room to roll over.
What You'll Need
Tools
Supplies
- Waterproof tarp
- Emergency bivvy sack
- Heavy-duty survival blanket with grommets
- 50 feet of paracord or improvised natural cordage
How to Build a Debris Hut in Temperate Forest or Suburban Greenbelt
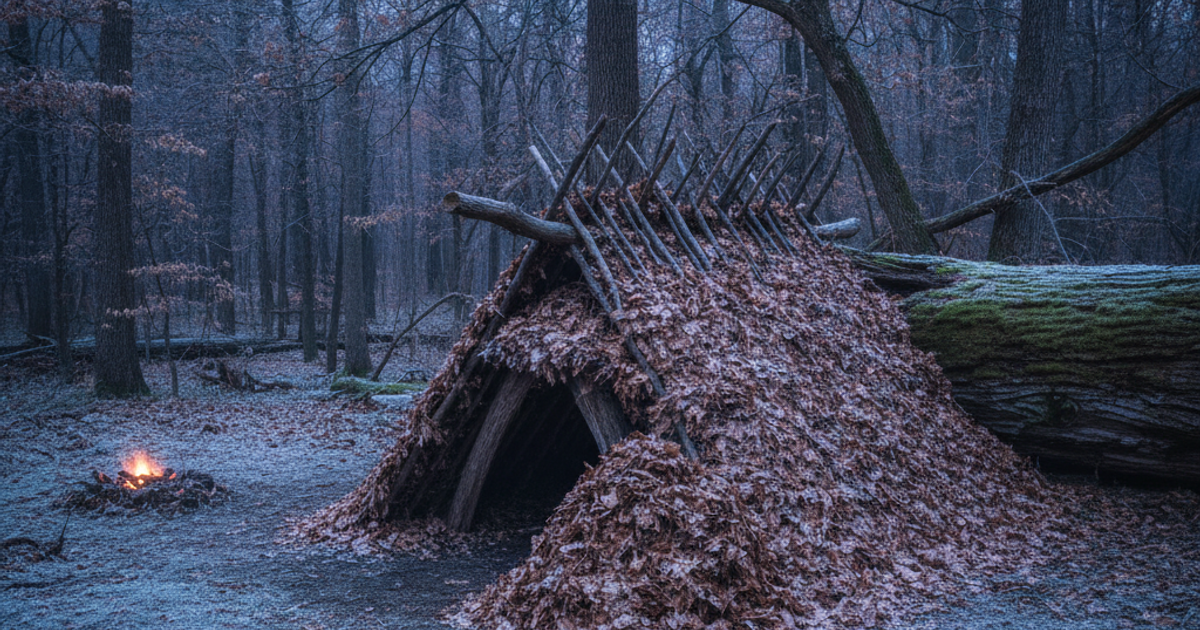
The debris hut is the workhorse of three-season survival shelter. It requires only deadfall and leaf litter, both of which exist in abundance in any deciduous woodland, suburban park, drainage corridor, or overgrown lot.
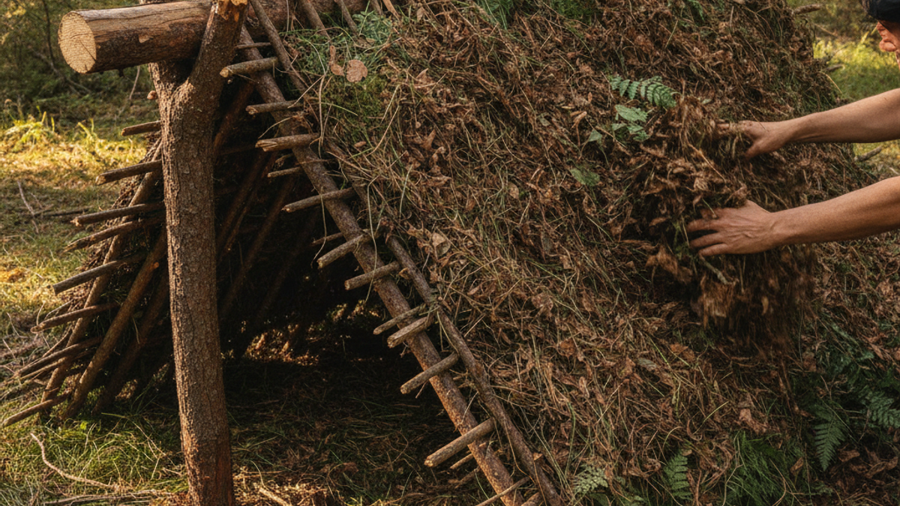
Start with a ridgepole — a sturdy branch roughly one and a half times your body length, thick enough to support a few hundred pounds of debris. Prop one end on a stump, forked sapling, or rock at hip height and let the other end rest on the ground. Lean ribbing sticks along both sides at 45-degree angles, spaced four to six inches apart, forming an A-frame. Weave smaller branches crosswise through the ribbing to create a lattice that will hold debris.
Then pile on leaves, pine needles, grass, ferns — anything light and dry. Aim for a minimum of two feet of debris over the entire structure. Here's the test most people skip: if you can see daylight through the walls from inside, it won't hold heat. Finally, stuff the interior with another armload of dry leaves. You're not sleeping on the dirt; ground conduction will drain your core temperature faster than cold air will. At least six inches of compressed insulation between you and the earth is non-negotiable. For more on this, see our guide to building a complete survival sleep system.
Building a Lean-To When You Have a Tarp or Blanket
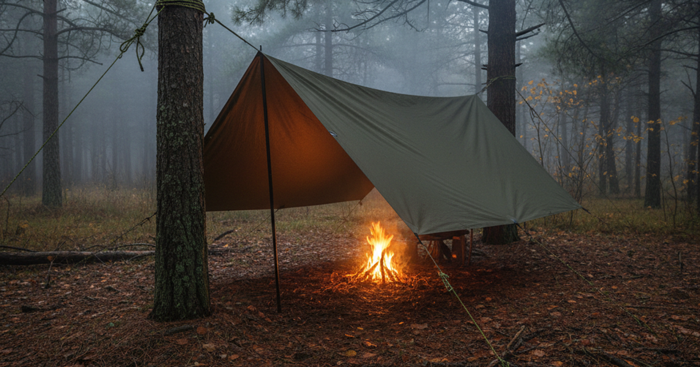
The lean-to trades insulation for speed and the ability to use a reflected fire. It's the right call when you have an ignition source, dry fuel, and daylight burning. Lash a horizontal ridgepole between two trees at chest height, lean poles against it at a 45-degree angle on the windward side, then shingle with bark slabs, boughs, or debris — always working bottom to top so each layer sheds water over the one below.
If you're carrying a tarp, the job takes ten minutes instead of two hours. An Aqua Quest Defender waterproof tarp provides a bombproof roof that natural materials can be piled on top of for added insulation. An Arcturus heavy-duty survival blanket with reinforced grommets works even better as a lean-to back wall because the reflective surface bounces radiant fire heat back onto your body. Our guide to 10 emergency shelters from a single tarp covers additional configurations.
Snow Caves and Quinzhees: Winter Shelter That Actually Works
In deep snow country, snow is the best insulation available. Inuit builders have relied on this for millennia — interior temperatures in a well-built snow shelter typically stabilize between 20°F and 32°F regardless of how cold it gets outside. At -30°F outside, that's a 60-degree swing in your favor.
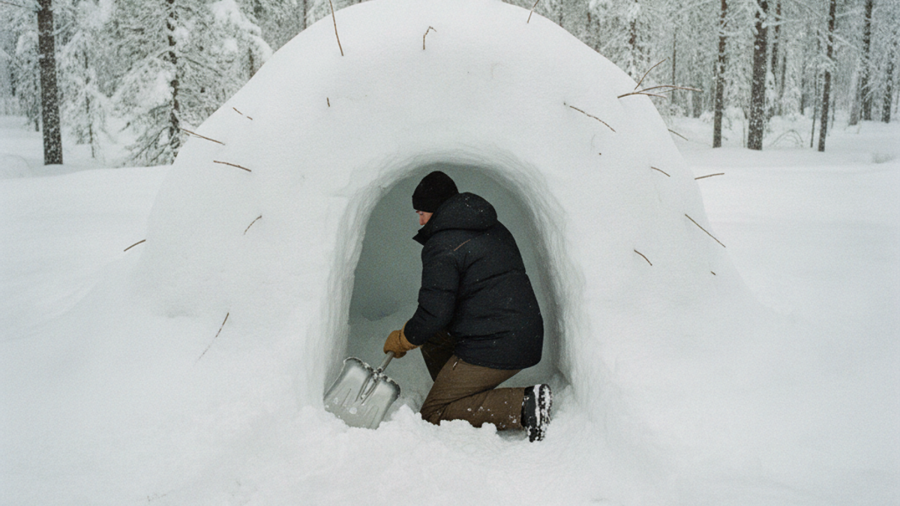
A snow cave requires a drift of at least six feet deep, ideally on a leeward slope. Tunnel in horizontally, then excavate upward so your sleeping platform sits above the entrance. Cold air sinks into the entrance trench; warm air pools around you. A quinzhee is the version you build when there's no drift: pile snow into a mound eight feet across and six feet tall, let it sinter for 90 minutes to two hours as the crystals bond, then hollow it out from the side.
Two rules save lives here. First, insert 12-inch marker sticks all over the mound before hollowing — when you hit the end of a stick from inside, stop digging. That guarantees a uniform one-foot wall thickness. Second, always poke a ventilation hole through the roof with a pole and keep it clear. Carbon monoxide from a stove, or simple CO₂ buildup from breathing, has killed people inside otherwise perfect snow shelters.
Digging a quinzhee by hand in winter guarantees soaked gloves and sleeves — the fastest route to frostbite there is. Keep a collapsible avalanche shovel in your vehicle and a lighter Black Diamond Transfer snow shovel strapped to your pack. Also see cold weather layering for hypothermia prevention.
Step-by-Step Instructions
Step 1: Assess the site before you cut anything
Spend five minutes evaluating. Avoid drainage bottoms (cold air sinks and flash floods happen), ridgelines (wind), dead standing trees (widowmakers), and avalanche runout zones. Look for natural windbreaks, a nearby debris source, and level ground. The best site is one where nature has done 60 percent of the work already.
Step 2: Gather your ground insulation first
Before building anything, pile up an armload of dry leaves, pine boughs, or grass for your bed. Do this first because it's the step people cut when they run out of daylight — and it's the step that matters most. Six to eight inches compressed under your body weight is the minimum.
Step 3: Set the ridgepole and frame
Use a ridgepole about 1.5 times your height, supported at hip height on one end. Lean ribbing sticks against both sides at tight intervals. A Bahco Laplander folding saw cuts deadfall to length far faster and safer than batoning with a knife, and it weighs under 8 ounces.
Step 4: Pile on two feet of debris
Layer leaf litter, needles, and grass over the frame until no daylight shows through from inside. Add a lattice of light branches on the outside to keep wind from stripping your insulation overnight.
Step 5: Build or dig your winter shelter if snow is deep
In deep-snow conditions, skip the debris hut and build a quinzhee or snow cave instead. Mound, sinter, mark with depth sticks, and hollow out. Keep your sleeping platform higher than the entrance.
Step 6: Cut a ventilation hole and plug the entrance
Punch a fist-sized vent through the roof of any snow shelter. Plug the doorway loosely with a pack or snow block — loose enough to breathe, tight enough to stop wind.
Step 7: Test your body heat retention before dark
Crawl in and lie still for ten minutes while there's still light to fix problems. If you feel drafts, add debris. If you feel the ground, add bedding. Deploying a SOL Emergency Bivvy survival sack inside the shelter reflects back up to 90 percent of radiant body heat and turns a marginal shelter into a survivable one.
Recommended Gear for Shelter Building
You can build all of these shelters with bare hands, but tools cut construction time by half — and time is warmth. A Morakniv Companion fixed-blade knife handles notching, cordage work, and tinder prep for under $20. For dense brush, briars, and green saplings, a Gerber Gator Machete Pro clears a site in minutes. Browse the full recommended survival gear list, and pair these skills with reliable fire-starting methods and natural cordage techniques.
Frequently Asked Questions
How long does it take to build a debris hut?
An experienced builder working alone needs 90 minutes to three hours for a hut that will hold heat through a 30°F night. First-timers should budget four to five hours. This is why practicing in your backyard, a state park, or on a weekend camping trip matters — you don't want your first attempt to be in the dark, wet, and already shivering.
Can urban preppers realistically use these skills?
Yes. Debris huts work in city parks, greenbelts, railroad corridors, and overgrown vacant lots. In an urban evacuation scenario, a low-profile debris shelter is far less likely to attract attention than a bright nylon tent — it's the grey man approach to shelter. Urban preppers should also study urban evacuation routes and maintain strong situational awareness about where usable natural cover exists along those routes.
Is it safe to build a fire inside a snow shelter?
A small candle or tea light is safe and can raise interior temperature several degrees while glazing the walls. A stove or open fire is risky — carbon monoxide poisoning and roof collapse are both real dangers. If you must run a stove, do it near the entrance with your ventilation hole open and never while sleeping.
Affiliate Disclosure: SHTFPlan.net participates in the Amazon Services LLC Associates Program. Some links are affiliate links — we may earn a small commission at no extra cost to you.