Earthquake Preparedness: How to Survive Before, During, and After the Big One
Earthquakes strike without warning. Here's exactly what you need to do before, during, and after to keep your family alive.
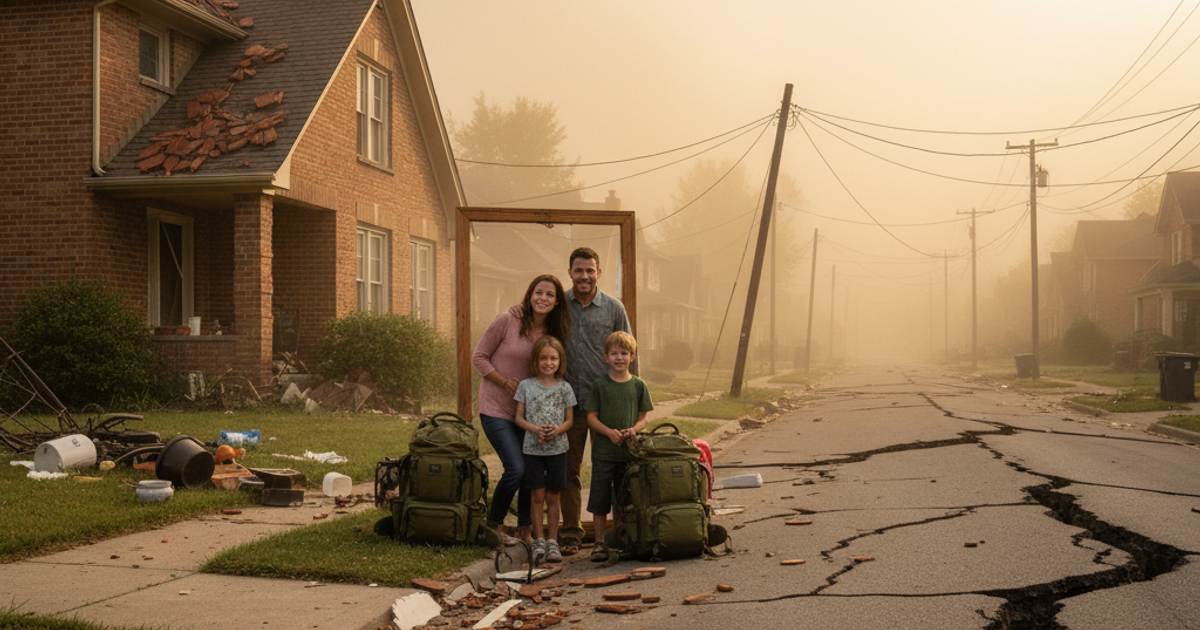
The ground shakes without warning. In seconds, everything you thought was stable — your walls, your shelves, your foundation — becomes a threat. Earthquakes don't care about your schedule, your location, or your level of preparedness. The United States Geological Survey (USGS) estimates that several million earthquakes occur worldwide each year, with roughly 20,000 strong enough to be felt. The Pacific Northwest, California, Alaska, Utah, and even the New Madrid Seismic Zone in the central U.S. are all at significant risk. But here's the hard truth: most Americans aren't ready.
Whether you're a prepper living off-grid in rural Idaho, a suburban homeowner in Oregon, or renting an apartment in Los Angeles, earthquake preparedness requires the same fundamental approach — and it starts long before the shaking begins.
How to Harden Your Home Against Earthquake Damage
The majority of earthquake injuries don't come from the ground cracking open beneath you. They come from falling objects, collapsing furniture, and structural failures inside the home. Home hardening is your first and most cost-effective line of defense.
Secure Large Furniture and Appliances
Unsecured bookshelves, water heaters, refrigerators, and televisions become lethal projectiles during strong shaking. FEMA data consistently shows that toppling furniture accounts for a significant portion of earthquake-related injuries. Start by anchoring tall bookshelves, dressers, and cabinets to wall studs. Use Quakehold furniture anchor straps — these heavy-duty straps are specifically designed for earthquake mitigation and are compatible with most furniture types, including IKEA-style units. They're inexpensive, easy to install, and could literally save a life.
In apartments, talk to your landlord about anchoring options. Many anchors can be installed without permanent wall damage using appropriate hardware. Don't assume someone else is handling this — your safety is your responsibility.
Identify and Eliminate Hazards Room by Room
- Store heavy items on lower shelves
- Use museum putty or earthquake gel to secure decorative items and electronics
- Install latches on cabinet doors to prevent contents from spilling out
- Strap water heaters to wall studs with approved seismic straps
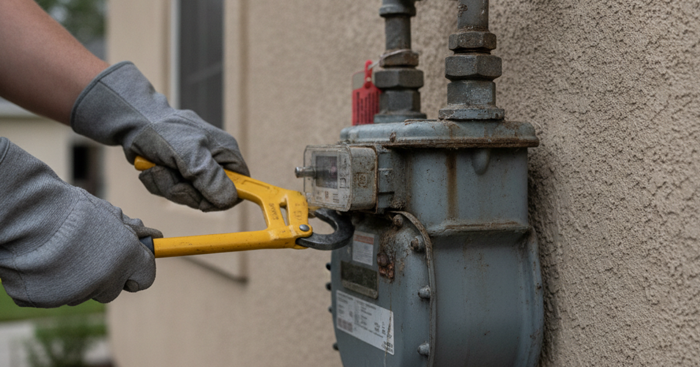
- Know the location of your gas shutoff valve and keep a wrench nearby
- Reinforce cripple walls in older homes (pre-1980 construction is especially vulnerable)
Rural homeowners should also inspect outbuildings, barns, and any structures with heavy roofs or unreinforced masonry walls. Older stone or brick structures carry significantly higher collapse risk. For more on assessing and hardening your property, see our guide to Home Security Assessment: Hardening Your Property.
Building an Earthquake Emergency Kit and Survival Gear Stash
An earthquake can sever utilities, block roads, and overwhelm emergency services simultaneously. FEMA recommends being prepared to be self-sufficient for a minimum of 72 hours — but experienced preppers know that a week or more of supplies is far more realistic in a major SHTF event.
The Core Survival Kit
A purpose-built earthquake survival kit should cover water, food, first aid, light, communication, and shelter. The Ready America 72-hour emergency kit is a solid baseline option that includes food rations, water pouches, a first aid kit, flashlight, and emergency blankets — everything packaged in a grab-and-go bag. It's a smart starting point, especially for those new to emergency preparedness who want a reliable pre-assembled kit.
Don't stop at 72 hours, though. For genuine long-term resilience, supplement your kit with a dedicated emergency food storage supply. The Prepared4X emergency food supply kit offers a longer shelf-life solution with substantial caloric coverage, making it ideal for extending your food security well beyond the first few days. Store it in a cool, dry location away from direct sunlight.
Water: Your Most Critical Resource
Municipal water systems are frequently compromised in major earthquakes — pipes crack, treatment plants lose power, and contamination becomes a real threat. Store a minimum of one gallon of water per person per day. For a family of four, that's 28 gallons for one week. Water purification capability is equally essential: stock water purification tablets, a quality filter like a Sawyer Squeeze or LifeStraw, and consider learning additional methods covered in our article on Mastering Water Harvesting and Purification.
Rural preppers may have well access, but electric pumps won't work when the grid is down. Have a manual hand pump backup or know how to access your water source without power.
Communication Gear
Cell towers go down. Internet goes dark. In the aftermath of a major earthquake, your ability to receive information and communicate with family members could determine your next decision. A dedicated Midland emergency weather alert radio gives you direct access to NOAA weather and emergency broadcasts even when all other communications are severed. Look for a model with battery, solar, and hand-crank power options for maximum resilience. Pair this with a solid communication plan — see our full guide on Family Emergency Plan: How to Prepare Your Household for Any Disaster.
What to Do During an Earthquake: Survival Actions That Save Lives
When the shaking starts, you have seconds to react. The actions you take in those moments matter enormously.
Drop, Cover, and Hold On
This is still the gold standard, endorsed by USGS, FEMA, and the American Red Cross. The old "doorway" myth has been thoroughly debunked — modern doorways offer no more protection than any other part of your home, and you risk being struck by a swinging door.
- DROP to your hands and knees immediately
- COVER your head and neck under a sturdy table or desk, or against an interior wall away from windows
- HOLD ON and stay in place until the shaking stops
Location-Specific Survival Actions
- Indoors: Stay inside. Most injuries happen when people try to run outside and are struck by falling debris.
- In a high-rise or apartment building: Do not use elevators. Expect fire alarms and sprinklers to activate. Do not rush to stairwells during shaking.
- Outdoors: Move away from buildings, streetlights, and utility wires. Drop to the ground and stay there.
- In a vehicle: Pull over away from overpasses, bridges, and buildings. Stay inside with your seatbelt on.
- Rural/off-grid settings: Watch for landslides on hillsides and be aware that aftershocks can trigger secondary hazards. Situational awareness is critical — a concept we cover in detail in our article on Situational Awareness: How to Detect Threats Before They Become Dangerous.
Post-Earthquake Safety: The Dangers That Come After the Shaking Stops
Surviving the initial quake is step one. The hours and days that follow carry their own serious threats — and this is where preparation and calm decision-making separate survivors from casualties.
Immediate Post-Quake Actions
- Check yourself and others for injuries before moving
- Smell for gas leaks — if detected, don't use switches or open flames; evacuate and leave doors open
- Inspect your home for structural damage before re-entering if you evacuated
- Expect aftershocks — sometimes for days or weeks after the main event
- Do not use taps until water safety has been confirmed
- Avoid downed power lines
Debris and Structural Hazards
If you need to move through debris or free a trapped individual, having the right tools matters. A Stanley FatMax crowbar pry bar is an essential piece of urban survival gear that belongs in every earthquake preparedness kit. It provides the leverage needed to move heavy debris, pry open jammed doors, and access trapped individuals — tasks that are nearly impossible with bare hands. Keep one accessible in your home and in your vehicle.
Bugging Out vs. Sheltering In Place
The decision to stay or go after a major earthquake depends on your structural situation, local hazard conditions, and the availability of resources. If your home is structurally sound and you have supplies, sheltering in place is often the safer choice — roads may be impassable and evacuation shelters can be overwhelmed. If your home is compromised or in a hazardous area, have a predetermined bug out plan and a bag ready. Our Complete 72-Hour Bug Out Bag Checklist for Urban Survival covers exactly what you should have ready to move at a moment's notice.
Medical Preparedness After an Earthquake
Hospitals may be overwhelmed or inaccessible. Pharmacies may be closed or destroyed. If you or a family member depends on prescription medications, your emergency preparedness plan needs to account for this. Build a reserve supply where possible, and stock a comprehensive first aid kit — see our guide on First Aid Without a Doctor: Building a Trauma Kit for Long-Term Emergencies for detailed guidance.
Long-Term Recovery Planning for Preppers
Major earthquakes — like a Cascadia Subduction Zone event or a New Madrid rupture — could mean weeks or months of disrupted infrastructure. This is where the prepper mindset transitions from emergency response to long-term survival planning.
Prioritize the following for extended resilience:
- Emergency food storage: Aim for a minimum 30-day supply, with 90 days or more as your goal
- Off-grid water access: Rainwater harvesting, filtration systems, or well access
- Alternative energy: Solar panels, battery banks, or generator capacity
- Community connections: Know your neighbors — mutual aid networks are historically one of the most effective survival tools in disaster recovery
- Documentation: Keep copies of important documents in a waterproof bag in your survival kit
The psychological toll of a major disaster is real and should not be underestimated. Maintaining mental resilience — especially during an extended recovery — is a core prepper skill. We address this directly in our article on Psychological Preparedness: How to Stay Mentally Strong When SHTF.
What You'll Need
- Emergency water supply (1 gallon per person per day for 3 days)
- Non-perishable food (3-day supply)
- First aid kit with essential medications
- Flashlight and extra batteries
- Battery-powered or hand-crank radio
- Whistle to signal for help
- Dust masks and plastic sheeting
- Wrench or pliers to turn off utilities
- Manual can opener
- Heavy-duty work gloves
- Sturdy shoes and protective clothing
Step-by-Step Instructions
Step 1: Secure Your Home Before an Earthquake Strikes
Walk through every room and identify heavy objects that could fall during shaking. Bolt tall furniture like bookcases and water heaters to wall studs using L-brackets and anchor straps. Move heavy items to lower shelves and secure hanging objects like mirrors and picture frames with closed hooks or museum putty. Install flexible gas line connections and automatic gas shut-off valves to prevent fires and explosions.
Step 2: Identify Safe Spots and Evacuation Routes
Designate safe spots in each room where you can drop, cover, and hold on—typically under sturdy desks or tables, away from windows and heavy objects. Create a family communication plan with an out-of-state contact person, since local phone lines may be overwhelmed. Map out at least two evacuation routes from your home and neighborhood, and practice earthquake drills with all household members quarterly. Ensure everyone knows how to turn off gas, water, and electricity at main valves.
Step 3: Drop, Cover, and Hold On When Shaking Begins
The moment you feel shaking, immediately drop to your hands and knees to prevent being knocked down. Crawl under a sturdy table or desk and cover your head and neck with your arms; if no shelter is available, crawl to an interior wall away from windows. Hold on to your shelter and be prepared to move with it until the shaking stops, which typically lasts 15-60 seconds but may feel much longer.
Step 4: Protect Yourself Based on Your Location
If you're in bed when an earthquake hits, stay there and cover your head with a pillow—broken glass makes moving dangerous. If you're outdoors, move away from buildings, streetlights, utility wires, and overpasses to an open area. In a vehicle, pull over to a clear location away from structures and bridges, set the parking brake, and stay inside with your seatbelt fastened until shaking stops. Never stand in doorways, which offer no more protection than other locations and limit your ability to protect your head.
Step 5: Inspect for Damage and Hazards Immediately After
Once shaking stops, carefully check yourself and others for injuries and provide first aid as needed without moving seriously injured persons unless they're in immediate danger. Inspect your home for structural damage, gas leaks (smell or hissing sound), and electrical problems; turn off utilities if you detect damage or suspect leaks. Watch for fallen power lines, broken glass, and unstable structures, and exit the building if you notice significant structural damage. Expect aftershocks and be ready to drop, cover, and hold on again.
Step 6: Communicate Your Status and Stay Informed
Send brief text messages to your emergency contacts rather than calling, as texts are more likely to go through when networks are overloaded. Monitor local emergency broadcasts on your battery-powered radio for evacuation orders, shelter locations, and safety updates. Avoid using your phone except for emergencies to preserve battery life and keep lines open for critical communications. Post your status on social media if networks allow, which helps authorities and loved ones account for survivors.
Step 7: Manage Resources and Wait for Professional Help
Begin rationing your emergency water and food supplies, avoiding running water until authorities confirm it's safe. Stay out of damaged buildings and avoid touching or approaching downed power lines or damaged infrastructure. Use flashlights rather than candles or matches to prevent fires from gas leaks. Document damage with photographs for insurance purposes, but prioritize safety over property concerns and wait for professional inspectors before reentering significantly damaged structures.
Frequently Asked Questions
What should I put in my earthquake emergency kit?
Your earthquake survival kit should include at minimum: one gallon of water per person per day for at least three days (ideally seven), emergency food rations with a long shelf life, a first aid kit, flashlight with extra batteries, a hand-crank or battery-powered weather radio, copies of important documents, cash in small bills, a multi-tool or knife, work gloves, dust masks, emergency blankets, and any prescription medications you depend on. A pry bar is also strongly recommended for debris navigation. Pre-assembled kits like the Ready America 72-hour kit provide a solid foundation that you can expand over time.
Is it safer to stay inside or run outside during an earthquake?
In almost all cases, staying inside is safer. The majority of earthquake injuries occur when people attempt to run outside and are struck by falling glass, debris, or structural elements. Drop, cover, and hold on under a sturdy table or desk until the shaking stops. The exception is if you are in a known high-risk structure such as an unreinforced masonry building — in which case your pre-earthquake mitigation plan should already account for this with preemptive action before shaking begins.
How long should my emergency food supply last?
FEMA recommends a minimum three-day supply, but most experienced preppers consider this a starting floor, not a goal. For earthquake preparedness specifically — where infrastructure damage can be extensive and recovery slow — a 30-day food supply is a more realistic minimum. A 90-day or six-month supply provides genuine long-term resilience. Focus on high-calorie, long-shelf-life foods like freeze-dried meals, rice, beans, canned proteins, and energy bars. Rotate your stock regularly and store in a cool, dry environment.
Affiliate Disclosure: SHTF Plan participates in the Amazon Services LLC Associates Program. Some links are affiliate links — we may earn a small commission at no extra cost to you.