7 Days to Fresh Food: How to Grow Sprouts and Microgreens Indoors When Grocery Shelves Are Empty
Sprouts and microgreens turn stored seeds into fresh, vitamin-rich food in under a week — no soil, sunlight, or garden required. Here's how to build an indoor survival salad system.
Every long-term food stockpile has the same blind spot. You can stack rice, beans, wheat berries, and freeze-dried entrées to the ceiling, and you'll have calories for a year. What you won't have is vitamin C, folate, or living enzymes. Heat-processed and long-stored foods lose water-soluble vitamins steadily — USDA data shows vitamin C degradation of 25–50% in canned vegetables during processing alone, with continued losses in storage. Scurvy killed more sailors than combat did, and it takes as little as 8 to 12 weeks of vitamin C deprivation for symptoms to appear in an adult.
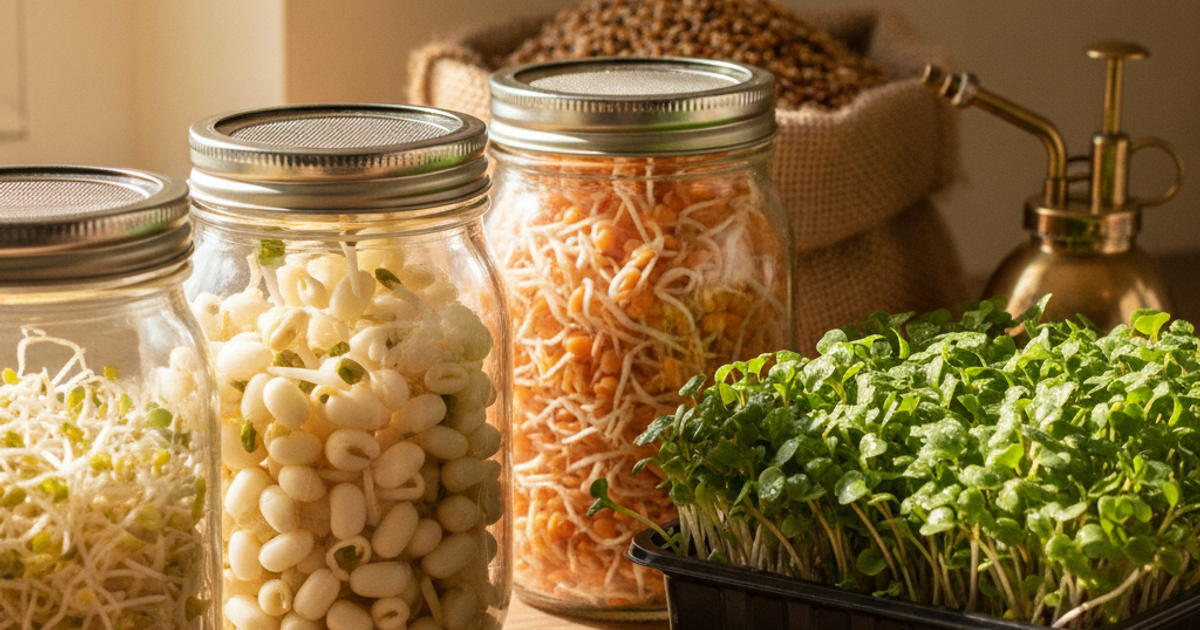
Sprouts and microgreens are the fix. They require no land, no sunlight in the case of sprouts, no soil, and no electricity. A quart jar on your kitchen counter produces a pound of fresh, living food in 5 to 7 days. Research published in the Journal of Agricultural and Food Chemistry found that broccoli sprouts contain 20 to 50 times the sulforaphane concentration of mature broccoli. Microgreens studied by the USDA and University of Maryland measured four to forty times higher nutrient density than their fully grown counterparts. For apartment dwellers, suburban families, and rural homesteaders alike, this is the single highest-return food production skill per square foot in all of emergency preparedness.
Why Sprouts Beat Every Other Survival Garden
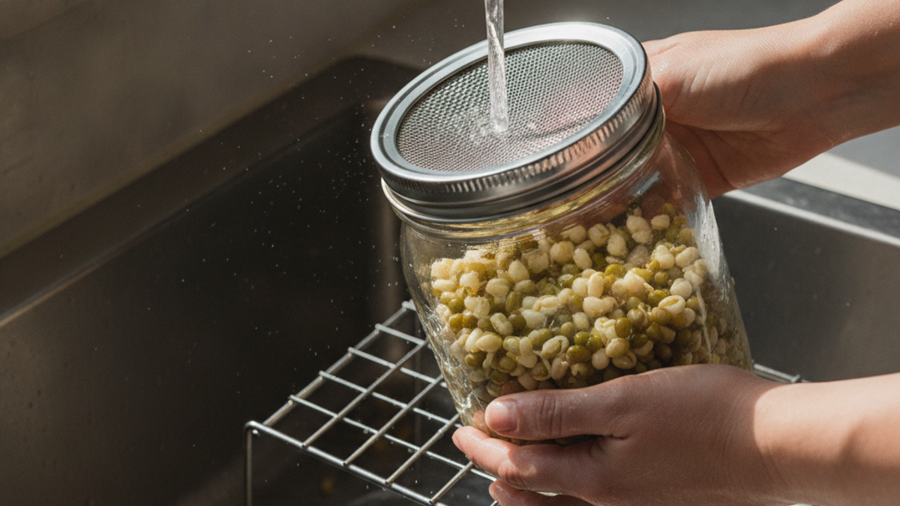
A traditional garden takes 60 to 120 days to produce, requires outdoor space, and broadcasts to the neighborhood that you have food — a serious OPSEC problem covered in our guide to defensive gardening. Sprouts produce in a week, indoors, invisibly. Twelve ounces of dry seed can yield six to eight pounds of finished sprouts. Alfalfa seed expands roughly 8:1 by weight; mung beans and lentils, 5:1 to 6:1.
That multiplication factor matters enormously for storage math. Ten pounds of sprouting seed sealed properly occupies about the space of a shoebox but represents 50 to 80 pounds of fresh vegetables — a food volume you could never store any other way in a one-bedroom apartment. If you're already working through an apartment prepping stockpile plan, sprouting seed belongs near the top of your list.
Sprouts vs. Microgreens: Know the Difference
Sprouts are germinated seeds eaten whole — root, seed, and shoot — grown in water in a jar or tray, harvested at 3 to 7 days. No soil, no light required. Best candidates: alfalfa, broccoli, radish, clover, lentil, mung bean, and green pea.
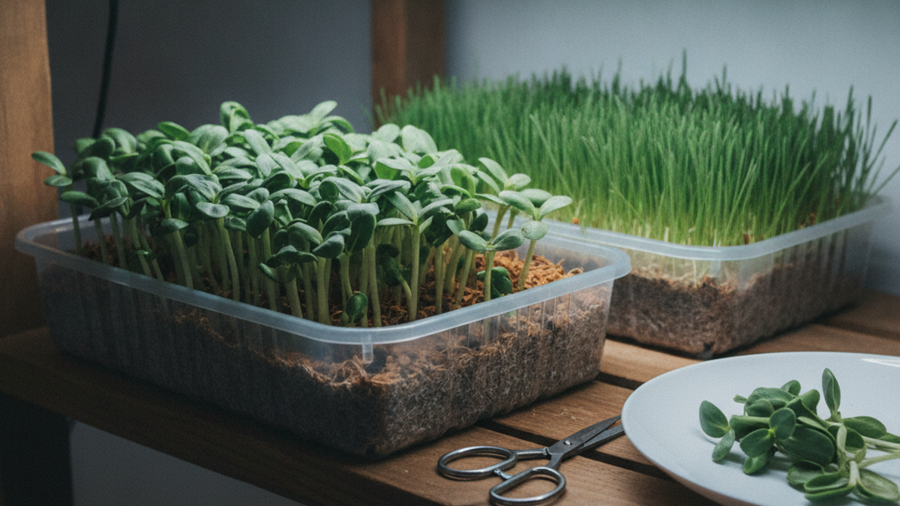
Microgreens are grown in a shallow tray of soil or coco coir, need light, and are harvested at 7 to 21 days by cutting the stem above the soil line. They deliver a stronger flavor and a higher mineral load. Best candidates: sunflower, pea shoots, radish, kale, and mustard.
In a grid-down scenario, sprouts win on simplicity — they need nothing but water and a jar. Microgreens win on yield and calories if you have a window or a small solar-powered light. Run both.
What You'll Need
Tools
- Wide-mouth quart mason jars
- Stainless steel sprouting lids with mesh screen
- 1020 microgreen trays (with and without drainage holes)
- Full-spectrum LED grow light strips
- Self-draining sprouter (Easy Sprout style)
Supplies
- Bulk sprouting seeds (alfalfa, broccoli, radish, lentil, mung bean)
- Organic seed-starting mix or coco coir
- Mylar bags with oxygen absorbers
- Food-grade hydrogen peroxide or white vinegar (seed sanitizing)
- Clean, potable water
Step-by-Step Instructions
Step 1: Select and Sanitize Your Seed
Use only seed sold explicitly for sprouting or food use — garden seed is frequently treated with fungicides. Measure 2 tablespoons of small seed (alfalfa, broccoli, radish) or 1/2 cup of large seed (lentil, mung, pea) per quart jar. Soak seed for 5 minutes in a solution of 3 tablespoons 3% hydrogen peroxide per cup of water to knock down surface bacteria, then rinse thoroughly. The FDA has linked raw sprouts to roughly 30 documented foodborne illness outbreaks since 1996, and nearly all trace back to contaminated seed — this step is not optional.
Step 2: Soak the Seed Overnight
Cover the seed with three times its volume of cool, clean water and let it sit 8 to 12 hours. If your municipal water is questionable during a crisis, treat it first using the methods in our water purification guide. Small seeds need only 4 to 6 hours; large beans need the full 12.
Step 3: Drain and Position the Jar at an Angle
Screw on the mesh sprouting lid, pour off all soak water, and invert the jar at roughly 45 degrees in a bowl or dish rack. Standing water is the number one cause of failed, slimy sprouts. Air must circulate freely through the mesh.
Step 4: Rinse and Drain Twice Daily
Every 12 hours, fill the jar with cool water, swirl, and drain completely. In hot weather or above 80°F, rinse three times daily. Keep the jar at 65–75°F and out of direct sun. You'll see root hairs by day two — these are normal and often mistaken for mold. Mold is gray, fuzzy, and smells sour; root hairs are white, fine, and smell clean.
Step 5: Green the Sprouts Before Harvest
On day 4 or 5, move the jar into indirect light for 12 to 24 hours. Chlorophyll development boosts vitamin A and K content substantially. Then rinse a final time, drain hard for several hours, and refrigerate in a container lined with paper towel. Properly drained sprouts keep 5 to 7 days cold.
Step 6: Plant Microgreen Trays for Higher Yield
Fill a 1020 tray with 1 to 1.5 inches of moist seed-starting mix. Broadcast seed densely — about 1 ounce of sunflower or pea seed per tray, or 1 tablespoon of radish or kale. Cover with a second inverted tray for 3 to 4 days of "blackout" to force strong stem elongation, then uncover and place under an LED strip 6 to 12 inches above the canopy for 12 to 16 hours daily.
Step 7: Bottom-Water and Harvest with Scissors
Once uncovered, water into the solid bottom tray rather than over the leaves — wet foliage invites damping-off fungus. Harvest at 8 to 14 days when the first true leaves appear, cutting stems just above soil level with clean scissors. Expect 8 to 12 ounces per tray from sunflower and pea.
Step 8: Store Backup Seed for the Long Haul
Package reserve sprouting seed in mylar bags with 300cc oxygen absorbers, sealed and stored below 70°F. Under those conditions most sprouting seed maintains 70%+ germination for 4 to 5 years, and alfalfa and clover can push a decade. Test-germinate 20 seeds annually and rotate anything under 70%.
Building a Continuous Rotation
One jar is a novelty. Four jars staggered two days apart is a food supply. Start a new jar every other day and you'll harvest fresh greens continuously and indefinitely. For a family of four, plan on 3 to 4 quart jars in rotation plus two microgreen trays per week. Pair this with fermented vegetables from our lacto-fermentation guide and you've covered the vitamin C gap that sinks most long-term stockpiles. Add a broader survival seed vault for outdoor gardening when the situation stabilizes.
Recommended Gear
Start with a case of wide-mouth quart mason jars and a set of stainless sprouting lids — stainless outlasts plastic mesh and won't warp. A self-draining Easy Sprout unit is worth adding for larger beans that mold easily in jars. For microgreens, heavy-duty 1020 trays survive years of reuse, and low-wattage full-spectrum LED strips draw little enough power to run off a modest battery bank or solar setup. Stock organic seed-starting mix, buy your sprouting seed in bulk, and seal the reserve in mylar bags with oxygen absorbers. More options are listed on our recommended survival gear page.
Frequently Asked Questions
How long do sprouting seeds last in storage?
Sealed in mylar with oxygen absorbers and kept below 70°F, most sprouting seeds hold viable germination rates for 4 to 5 years, with alfalfa, clover, and radish often lasting 8 to 10 years. Heat is the enemy — every 10°F increase roughly halves seed lifespan. Test-germinate a small sample each year.
Can I grow sprouts without electricity or sunlight?
Yes. Jar sprouts need only clean water, a container, and ambient room temperature between 60 and 80°F. They require no light at all until the optional 12-hour greening step, which indirect window light satisfies. This makes sprouting one of the only food production methods that works entirely off grid in a windowless apartment interior.
Are homegrown sprouts safe to eat raw?
They are, provided you sanitize the seed, rinse twice daily, and drain completely. The warm, moist environment that grows sprouts also grows bacteria, so cleanliness is critical. Immunocompromised individuals, young children, and the elderly should lightly steam or stir-fry sprouts, which retains most nutrients while eliminating pathogen risk.
Affiliate Disclosure: SHTFPlan.net participates in the Amazon Services LLC Associates Program. Some links are affiliate links — we may earn a small commission at no extra cost to you.