Tourniquets, Pressure, and Shock: How to Stop Bleeding and Keep Someone Alive Until Help Arrives
When seconds count and EMS is an hour away, knowing how to control severe bleeding could be the difference between life and death.
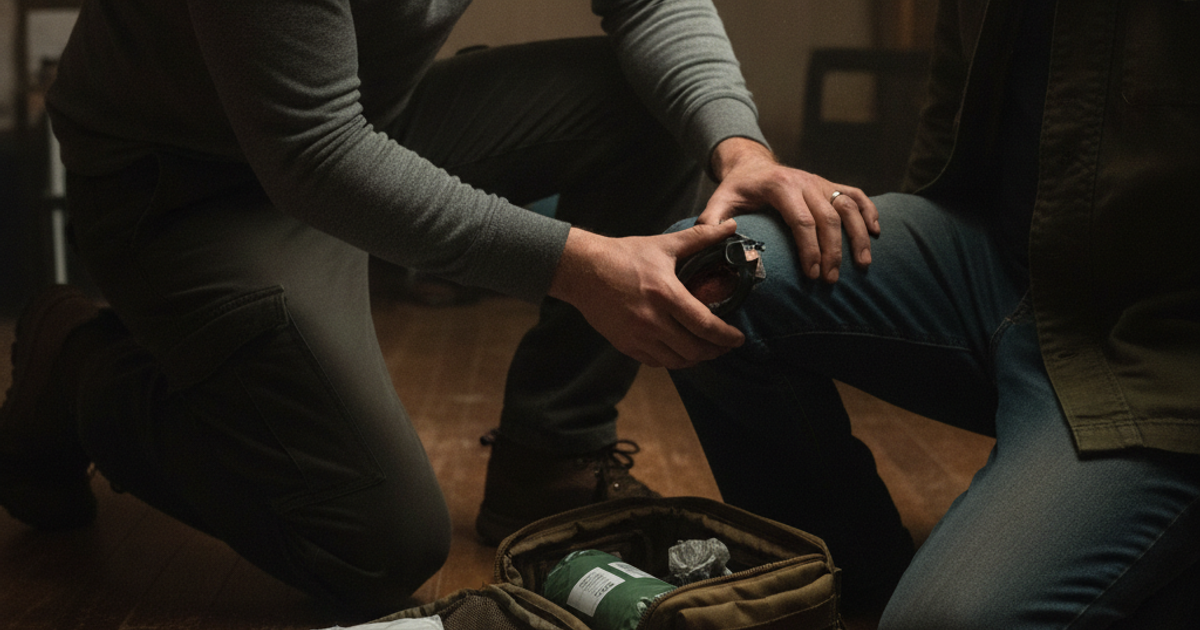
Every minute counts when someone is bleeding severely. According to the Hartford Consensus — a national initiative developed after the Sandy Hook shooting — uncontrolled hemorrhage is the leading cause of preventable death from traumatic injury. Research published by the American College of Surgeons estimates that up to 40% of trauma deaths are attributable to hemorrhage, and many of those deaths occur before emergency services can arrive. In a grid-down scenario, a natural disaster, a mass casualty event, or simply a bad accident on a rural property miles from the nearest hospital, your ability to control bleeding could be the difference between life and death.
This is not a skill set reserved for military medics or paramedics. The Stop the Bleed campaign, launched by the White House in 2015, was built on the premise that bystanders can and should be trained to intervene. Whether you live in a high-rise apartment in Chicago or on a 40-acre homestead in rural Montana, the fundamentals of hemorrhage control apply equally — and they belong in every emergency preparedness plan.
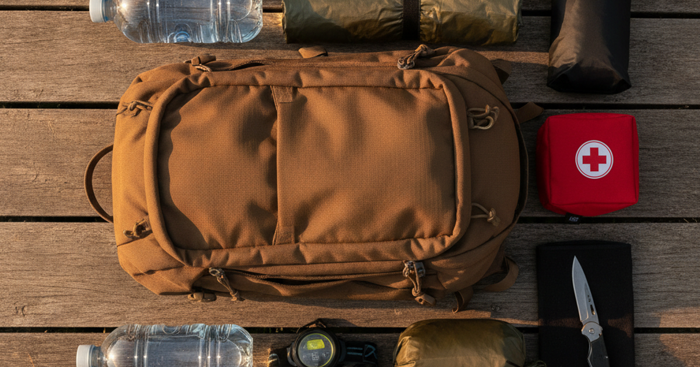
This guide covers the three pillars of pre-hospital bleeding control: direct pressure, wound packing, and tourniquet application. It also explains how to recognize and manage hemorrhagic shock, which can kill even after the bleeding appears controlled. Read it. Practice it. Put the gear in your bug out bag and your home trauma kit.
What You'll Need
Tools
- Nitrile gloves (minimum two pairs per person)
- Trauma shears or heavy scissors
- Permanent marker (for writing tourniquet application time)
Supplies
- CAT Combat Application Tourniquet Gen 7
- QuikClot Advanced Clotting Gauze
- Israeli Emergency Bandage pressure dressing
- North American Rescue Individual First Aid Kit (IFAK)
- Celox hemostatic granules
Understanding Hemorrhagic Shock: The Silent Killer After the Bleeding Slows
Controlling visible bleeding is step one. But here's what most people miss: a person can die from blood loss even after the external wound appears sealed. Hemorrhagic shock is a life-threatening condition that occurs when the body loses so much blood that it can no longer maintain adequate perfusion — meaning the heart, brain, and organs stop receiving enough oxygen-carrying blood to function.
The human body holds roughly 4.7 to 5.5 liters of blood for an average adult. Losing just 750mL — less than a large water bottle — can cause early shock symptoms. At 1.5 liters lost, the patient enters moderate shock. Loss of 2 liters or more is life-threatening without immediate intervention.
Recognize hemorrhagic shock by watching for these signs:
- Pale, cool, clammy skin
- Rapid, weak pulse (above 100 beats per minute)
- Rapid, shallow breathing
- Confusion, anxiety, or sudden calmness (a dangerous sign — it often indicates the brain is being starved of oxygen)
- Thirst and nausea
- Loss of consciousness in severe cases
If EMS is not available, keep the patient warm with a space blanket or dry clothing, lay them flat with legs elevated 8–12 inches (unless there is a suspected spinal injury or chest trauma), and do not give them anything to eat or drink. The goal is to maintain core warmth and prevent the deadly triad of hypothermia, acidosis, and coagulopathy — collectively known in trauma medicine as the "lethal triad" — which dramatically worsens outcomes.
For deeper reading on building complete trauma response capability, see our guide on how to build a trauma kit that keeps your family alive when EMS is gone.
Direct Pressure: The Foundation of Bleeding Control
Before reaching for any specialized gear, apply direct, firm, uninterrupted pressure to the wound. This is the single most universally applicable technique and requires nothing more than your hands and something clean to press against the wound.
Use gloved hands whenever possible to protect yourself from bloodborne pathogens. Place a clean cloth, gauze pad, or any available fabric directly over the wound and press hard — much harder than feels comfortable. Many bystanders apply insufficient pressure because they are afraid of hurting the patient. In severe bleeding, inadequate pressure costs lives.
Do not remove the material once applied. If blood soaks through, add more material on top and press harder. Removing the original dressing disturbs clot formation and resets the clock on hemostasis. Maintain pressure for a minimum of 5–10 minutes continuously — longer for deep wounds.
The Israeli Emergency Bandage — also called the Emergency Pressure Dressing — is a battlefield-proven tool that allows a solo responder to apply and maintain heavy pressure on a wound without tying up both hands. Its built-in pressure bar and wrap design let you secure it tightly over a wound, freeing you to assess the rest of the patient or treat additional injuries.
Wound Packing: How to Stop Deep, Cavity Bleeding Without a Tourniquet
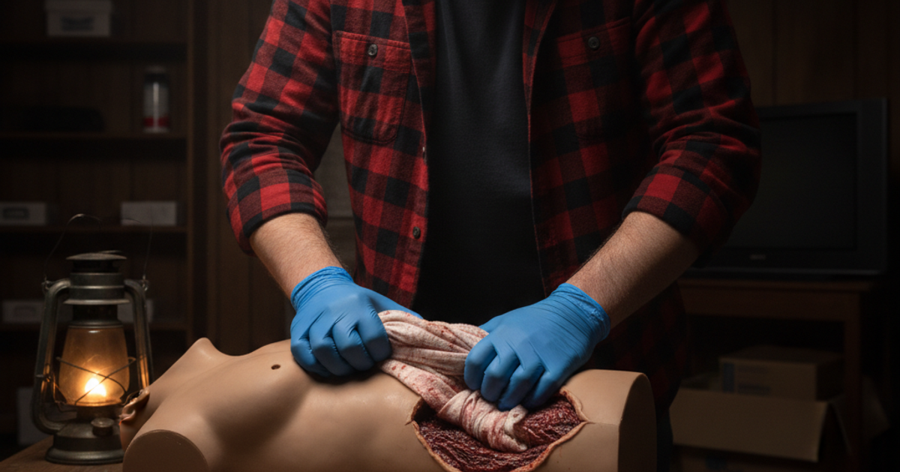
Wounds to the neck, groin, armpit, and torso cannot be controlled with a tourniquet — there is no limb to compress above them. For these "junctional" wounds and any deep cavity bleeding, wound packing is the correct technique.
Wound packing means physically filling the wound cavity with hemostatic gauze and applying internal pressure against the bleeding vessel. It sounds aggressive because it is — and it works.
QuikClot Advanced Clotting Gauze is impregnated with kaolin, a mineral that accelerates the body's natural clotting cascade. Military and civilian trauma studies have consistently shown hemostatic gauze reduces mortality from compressible hemorrhage. Pack it tightly into the wound, maintaining firm pressure for at least 3 minutes. If you do not have hemostatic gauze, plain gauze can be used — it will be less effective, but it is far better than nothing.
For an alternative hemostatic agent, Celox hemostatic granules use chitosan — a natural compound derived from shellfish — to form a gel-like clot that works even in patients taking anticoagulant medications. Celox granules can be poured directly into a wound when gauze packing is not practical, making them a versatile addition to any survival kit or bug out bag.
Tourniquet Application: When and How to Use One Correctly
A tourniquet stops life-threatening limb bleeding by completely occluding arterial blood flow above the wound. This is the correct intervention for severe extremity bleeding that cannot be controlled by direct pressure — amputations, deep lacerations with arterial involvement, or blast injuries.
Despite decades of military concern that tourniquets cause limb damage, the evidence from combat operations in Iraq and Afghanistan is clear: properly applied tourniquets save lives with an acceptable rate of complications. A 2012 study published in the Journal of Trauma found tourniquet use reduced mortality from extremity hemorrhage from 24% to 5%.
The CAT (Combat Application Tourniquet) Gen 7 is the gold standard recommended by the Committee on Tactical Combat Casualty Care (TCCC) and is standard issue for U.S. military personnel. Its self-locking band and windlass rod system allow one-handed self-application, which is critical if you are the one who is injured.
The SOFTT-W Tourniquet from North American Rescue is another military-grade option with a wide band design that distributes pressure more evenly — a feature some medical professionals prefer for patients with larger limbs. Both the CAT and the SOFTT-W have been tested under the strictest military standards and are appropriate for civilian emergency preparedness.
The RATS (Rapid Application Tourniquet System) offers a different form factor — a continuous loop of elastic with a locking cleat — that is useful for smaller limbs, pediatric patients, or as a backup tourniquet carried in a pocket or on a keychain. It is not a replacement for the CAT or SOFTT-W for primary use on adult extremities, but it rounds out a comprehensive bleeding control kit.
Key tourniquet rules every prepper must know:
- Apply 2–3 inches above the wound, never over a joint
- Tighten until bleeding stops completely — discomfort is expected, but the bleeding must stop
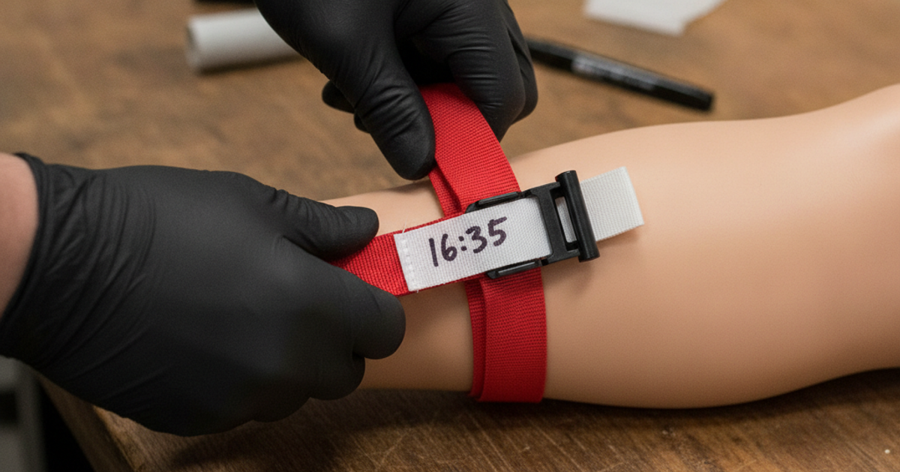
- Write the time of application on the tourniquet or the patient's forehead with a marker
- Do not remove a tourniquet in the field once applied — that decision belongs to medical personnel
- A tourniquet can safely remain in place for up to 2 hours before risk of permanent limb damage increases significantly
Chest Wounds: A Special Category That Requires Specific Treatment
A penetrating chest wound — from a knife, bullet, or impalement — creates a unique and immediately life-threatening problem. Air can enter the chest cavity through the wound with each breath, collapsing the lung in a condition called a tension pneumothorax. This can kill in minutes.
The correct field treatment is a vented chest seal. A vented seal covers the wound but allows air to escape through one-way valves, preventing dangerous pressure buildup inside the chest. The Dynarex vented chest seal is an accessible, cost-effective option that provides the critical one-way valve function required for penetrating chest trauma. Apply it directly over the wound, ensuring the adhesive creates a complete seal around the perimeter. If only a non-vented seal is available, burp it periodically by lifting one edge to allow trapped air to escape.
For a comprehensive breakdown of penetrating trauma gear, see our detailed article on building a gunshot wound kit with chest seals, tourniquets, and hemostatic gauze.
Step-by-Step Instructions
Step 1: Assess Scene Safety and Put On Gloves
Before touching the patient, confirm the scene is safe — you cannot help anyone if you become a casualty yourself. Put on nitrile gloves immediately to protect yourself from bloodborne pathogens. If gloves are unavailable, use plastic bags, extra clothing layers, or any available barrier material.
Step 2: Identify the Source and Severity of Bleeding
Expose the wound by cutting away clothing with trauma shears. Determine whether the bleeding is arterial (bright red, spurting, pulsing with the heartbeat), venous (dark red, steady flow), or capillary (oozing). Arterial bleeding is the most dangerous and demands immediate tourniquet or aggressive direct pressure. Rapidly scan for multiple wounds — in chaotic events, secondary injuries are often overlooked.
Step 3: Apply a Tourniquet for Severe Extremity Bleeding
If the wound is on a limb and bleeding is severe or uncontrollable, apply a tourniquet 2–3 inches above the wound. Thread the band, pull tight, secure the strap, then twist the windlass rod until bleeding stops completely. Lock the windlass into the clip and write the application time on the patient or the device. Do not remove it once applied.
Step 4: Pack the Wound for Junctional or Deep Bleeding
For wounds that cannot be tourniqueted — groin, armpit, neck, or torso — open the hemostatic gauze and pack it firmly and deeply into the wound cavity, pressing tightly against the bleeding point. Use your fingers to push the gauze all the way in; do not simply lay it on top of the skin. Maintain firm direct pressure with your hands for a minimum of 3 minutes after packing.
Step 5: Secure the Wound with a Pressure Dressing
Once the wound is packed, apply an Israeli Emergency Bandage or equivalent pressure dressing over the packed wound to maintain compression and hold the hemostatic gauze in place. Wrap it tightly enough to maintain pressure but verify distal circulation periodically if the limb remains accessible.
Step 6: Treat for Hemorrhagic Shock
Lay the patient flat and elevate the legs 8–12 inches unless spinal or chest injury is suspected. Cover the patient with a mylar space blanket or any available insulation to prevent hypothermia — the cold dramatically worsens clotting ability. Speak calmly and consistently to the patient to monitor their level of consciousness.
Step 7: Monitor the Patient and Reassess Every Two Minutes
Check that bleeding has stopped by looking for blood soaking through the dressing. Assess the patient's breathing, pulse, and mental status repeatedly. Watch for the signs of worsening shock: increasing confusion, loss of consciousness, gasping breathing, or complete absence of radial pulse. If breathing becomes labored after a chest injury, check and adjust any chest seal applied.
Step 8: Get Help or Begin Evacuation to Medical Care
Even after bleeding is controlled, the patient needs definitive medical care as soon as possible. Use every available communication method to summon help. If you must move the patient, stabilize them on an improvised stretcher and minimize jostling. Review our guide on improvised stretchers and casualty carries for techniques to move an injured person safely when no ambulance is coming.
Building Your Bleeding Control Kit: Urban, Suburban, and Rural Considerations
Not everyone has a fully equipped trauma bay at home, and that's fine — the core components of a bleeding control kit are compact and affordable enough for any living situation. Whether you're an apartment dweller in an urban environment or a homesteader miles from the nearest clinic, the same fundamental gear applies.
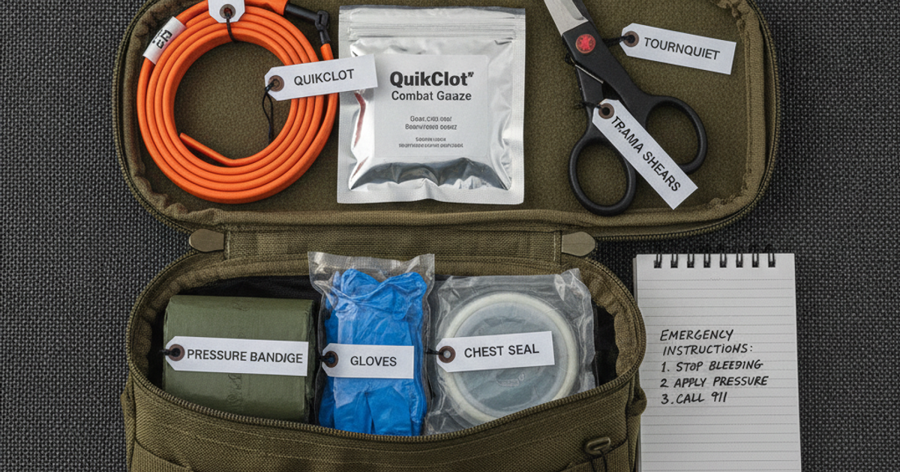
A properly assembled North American Rescue Individual First Aid Kit (IFAK) contains most of what you need in a belt-mountable pouch: tourniquet, hemostatic gauze, pressure dressing, gloves, and a chest seal. NAR is one of the primary suppliers to U.S. military and law enforcement, and their civilian kits are packaged to the same standards. This is the baseline survival gear every prepared person should have staged in their home, vehicle, and bug out bag.
Urban preppers should keep a bleeding control kit in every room most likely to see trauma — the garage, kitchen, and any room where tools or firearms are stored. Suburban families should keep one in each vehicle. Rural preppers and homesteaders — who may be 30+ minutes from the nearest EMS — should carry individual kits on their person during activities like chainsaw work, livestock handling, or hunting.
Also ensure your emergency preparedness plans address who in your household is trained to use this gear. Gear without training is nearly useless under stress. Look for Stop the Bleed courses, wilderness first aid (WFA) certification, or Tactical Combat Casualty Care (TCCC) civilian equivalents in your area. Many fire stations, community centers, and prepper groups offer free or low-cost training. You may also want to review our article on field medicine for treating cuts, burns, and infections without a hospital to build a broader skill base.
For those building out a comprehensive medical preparedness strategy, our guide to building a trauma kit for long-term emergencies without a doctor covers the full scope of supplies and training you'll need.
Frequently Asked Questions
How long can a tourniquet stay on before it causes permanent damage?
The general guideline from military and civilian trauma authorities is that a properly applied tourniquet can remain in place for up to 2 hours with low risk of permanent damage. Beyond 2 hours, the risk of ischemic injury and nerve damage increases, but the threshold is not an immediate cliff — tourniquets have been left on significantly longer in combat settings with limbs ultimately saved. The key point is this: in a survival situation where EMS is delayed, a tourniquet that saves someone's life at the cost of potentially complicating limb recovery is always the right call. Never remove a tourniquet in the field without medical guidance.
What should I do if I don't have a commercial tourniquet?
If you lack a commercial tourniquet, an improvised tourniquet can be constructed using a strip of fabric at least 2 inches wide — a belt, torn shirt, or bandana folded into a thick band — with a rigid rod (pen, stick, tent stake) used as a windlass to tighten it. Wrap the fabric twice around the limb, tie a half-knot, place the rod on top, tie another half-knot over the rod, then twist until bleeding stops and secure the rod so it cannot unwind. Improvised tourniquets are less reliable and harder to apply under stress, which is why carrying a commercial CAT or SOFTT-W in your survival kit is strongly recommended. Narrow materials like rope, wire, or paracord should never be used — they concentrate pressure and cause severe tissue damage without reliably stopping arterial blood flow.
How do I know if wound packing is working?
Effective wound packing stops or dramatically slows visible bleeding within 3–5 minutes of continuous firm pressure. Signs that it is working include blood no longer actively soaking through the dressing after sustained pressure, the patient's color beginning to stabilize, and pulse rate not continuing to climb. Signs that it is failing include blood continuing to pour through despite maximum pressure, the wound cavity feeling as though it is refilling, or the patient's condition deteriorating rapidly. If packing fails, repack the wound aggressively, add more hemostatic gauze, and ensure you are pressing directly against the bleeding point — not just filling the wound opening. In a true SHTF scenario with no medical backup coming, this is the intervention that buys the patient time.
Affiliate Disclosure: SHTFPlan.net participates in the Amazon Services LLC Associates Program. Some links are affiliate links — we may earn a small commission at no extra cost to you.