Safe Room on a Budget: How to Build a Secure Shelter Inside Your Home
A safe room could save your life during a home invasion, tornado, or civil unrest. Here's how to build one without breaking the bank.
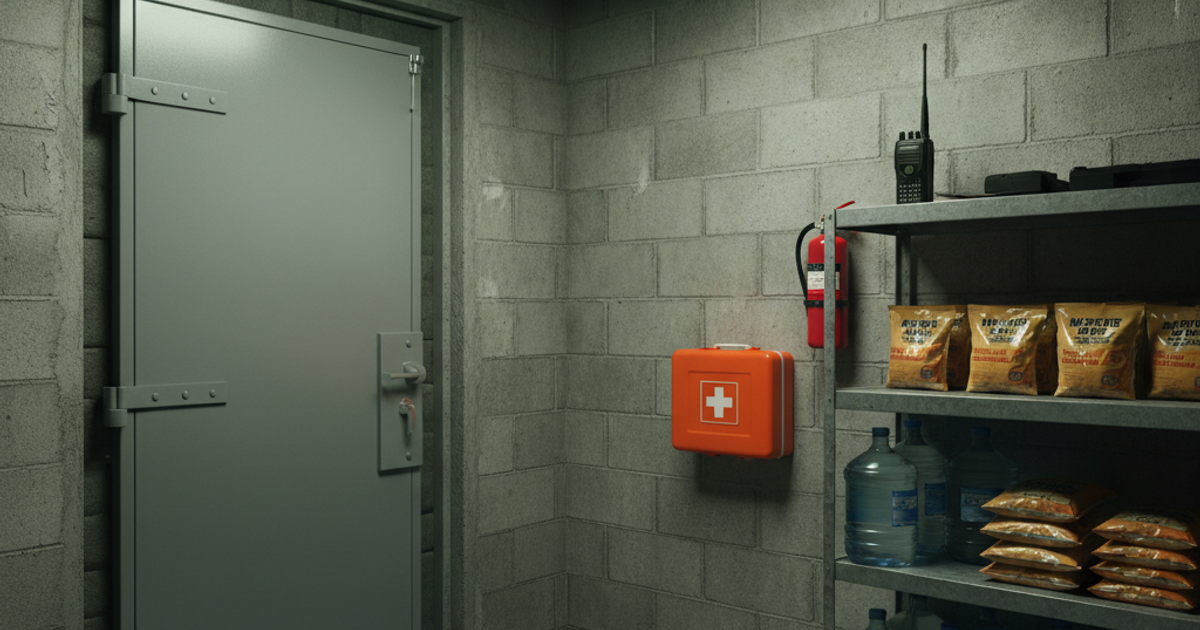
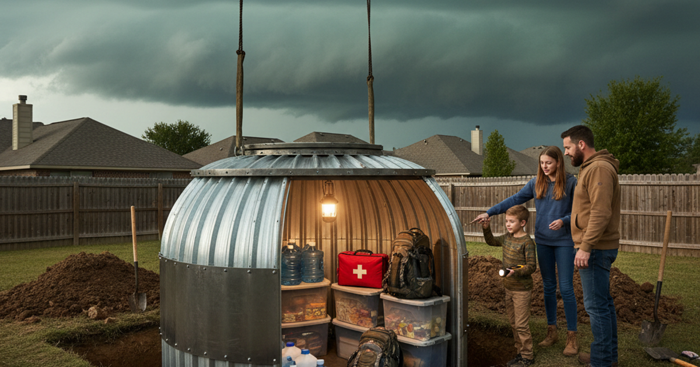
Most people think a safe room requires a contractor, a concrete bunker, and a budget that could fund a small vacation. The truth? A functional, hardened shelter space inside your home — capable of protecting your family during a home invasion, a tornado, a period of civil unrest, or any number of SHTF scenarios — can be built for a few hundred dollars with the right planning and priorities. Whether you're living in a city apartment, a suburban split-level, or a rural farmhouse, the principles are the same: choose the right space, harden it against forced entry and structural threats, stock it with essential supplies, and make sure you can communicate with the outside world from inside it.
According to FBI crime statistics, a burglary occurs in the United States approximately every 25.7 seconds. While most burglars flee at the first sign of resistance or detection, home invasions — where occupants are present — are a different and far more dangerous scenario. Tornadoes kill an average of 70 Americans per year, and the vast majority of those deaths are caused by flying debris and structural collapse that a reinforced interior room can dramatically reduce. When you add the growing reality of civil unrest and social instability, the case for a dedicated safe room becomes undeniable for any serious prepper.
Choosing the Right Location for Your Budget Safe Room
Location selection is the single most important decision you'll make. The right room depends on your primary threat. For home invasion and civil unrest, you want a room that is difficult to approach without warning, has a solid door frame, and ideally has no windows — or windows too small to crawl through. A master bedroom with an en suite bathroom, a walk-in closet, or an interior hallway room all work well. For tornadoes and severe weather, you need the lowest floor possible, ideally below grade, in an interior room with no exterior walls. A basement bathroom or closet is ideal. If you have no basement — a common situation in apartments and many suburban homes in the South and Midwest — an interior first-floor bathroom is your best bet.
For those in apartments, don't assume a safe room is impossible. An interior bathroom with solid walls (concrete block or brick construction is common in older apartment buildings) can be hardened sufficiently. If you're renting, focus on portable reinforcement solutions that don't require permanent modifications. Rural readers have more flexibility — a root cellar, storm shelter, or an interior room in a well-built structure are all viable options depending on the threat scenario.
When evaluating a room, ask these questions:
- Does it have a solid-core door, or a hollow-core door that can be kicked in seconds?
- How many exterior walls does it share? Fewer is better for both ballistic and storm protection.
- Can you reach it quickly from every part of the house, especially bedrooms at night?
- Is there a viable communication path — cell signal, radio, or hardwired phone — from inside the room?
- Can it hold the number of people in your household, plus a 72-hour supply cache?
How to Reinforce Your Safe Room Door Against Forced Entry
The door is the primary vulnerability of any safe room. A standard residential door — hollow core with a basic lockset — can be defeated with two or three kicks in under ten seconds. Reinforcing it is non-negotiable, and you don't need to spend thousands to do it effectively.
Step one is replacing or upgrading the door itself. Solid-core wood doors and steel exterior doors offer dramatically more resistance than hollow-core interior doors. If replacement isn't in the budget, a door barricade is your next priority. The Defenders Security door barricade bar floor brace anchors to the floor and braces against the door, making it nearly impossible to kick in even without upgrading the door itself — and it's fully portable, making it an excellent solution for renters or apartment dwellers.
Step two is addressing the door frame. Here's a fact most people don't realize: when a door is kicked in, it's rarely the lock that fails — it's the door frame that splinters. The strike plate on most residential doors is held in place by 3/4-inch screws going into soft wood. Upgrading to a Door Armor MAX complete door reinforcement kit addresses this systematically — it reinforces the door frame, the hinge side, and the strike plate area with heavy-gauge steel, effectively converting a standard door into a formidable barrier against forced entry.
Step three is upgrading your deadbolt. A quality deadbolt properly installed into a reinforced frame is a significant deterrent. The Schlage B60N deadbolt lock heavy duty is an ANSI Grade 1 rated lock — the highest residential security rating — and it's a straightforward DIY installation. Pair it with 3-inch screws on the strike plate, extending into the wall studs rather than just the door frame, and you've significantly increased your room's resistance to forced entry.
For additional hardening, consider adding a door security bar or a security camera with a small monitor inside the safe room so you can see the hallway approach without opening the door. A wide-angle peephole or a wireless camera are both inexpensive options that enhance your situational awareness from inside the room. Speaking of which, developing strong situational awareness habits well before an emergency is just as important as the physical hardening — read more about that in our guide on Situational Awareness: How to Detect Threats Before They Become Dangerous.
Wall and Structural Reinforcement on a Budget
Full wall reinforcement — filling stud cavities with concrete, adding ballistic panels, or installing safe room pods — can cost $5,000 to $10,000 or more. For most budget-conscious preppers, the better approach is strategic reinforcement of the most likely failure points.
For tornado protection, the walls themselves matter less than avoiding exterior walls and keeping low. Filling wall cavities with insulation or spray foam provides minimal structural benefit against tornado forces — focus instead on anchoring shelving units and heavy furniture that could become projectiles inside the room, and keep the room clear enough to shelter under a sturdy piece of furniture if needed.
For ballistic protection on a budget, bookshelves packed tightly with books, sandbags, or even filled water containers placed against walls can provide meaningful ballistic resistance without significant cost. This is particularly relevant in a civil unrest scenario. A room on an upper floor with no exterior wall exposure to street level has a natural advantage here.
If you're in a position to make permanent improvements, adding a second layer of 5/8-inch drywall to interior walls increases both fire resistance and sound insulation, while providing a marginal increase in structural integrity. It won't stop a rifle round, but it complicates entry and buys time. For homeowners looking at a more comprehensive approach to home hardening, our article on Hardening Your Home: Physical Security on a Budget covers the full-property picture in detail.
Essential Supplies to Store in Your Safe Room
A hardened room you can't survive in for more than an hour defeats the purpose. The goal is to maintain self-sufficiency long enough for a threat to pass or for help to arrive. For most scenarios, that window is 24 to 72 hours. Your safe room cache should be treated as a mini survival kit — distinct from your larger emergency food storage and separate from your bug out bag, which is staged for evacuation rather than sheltering in place.
Stock the following as a minimum baseline:
- Water: One gallon per person per day, minimum 72-hour supply. Sealed water pouches or a small sealed container are space-efficient. Consider a compact water purification filter as a backup in case supply runs low.
- Food: High-calorie, no-cook options — energy bars, dried fruit, nuts, MREs. Rotate every six to twelve months.
- First aid kit: At minimum, a tourniquet, hemostatic gauze, pressure bandages, nitrile gloves, and any prescription medications family members require. See our comprehensive guide on First Aid Without a Doctor: Building a Trauma Kit for Long-Term Emergencies for a full breakdown.
- Light: Battery-powered or hand-crank flashlights, chemical glow sticks, and a headlamp. Never rely solely on your phone flashlight.
- Defense: This is a personal decision based on your legal situation, training, and values. At minimum, a non-lethal deterrent such as pepper spray is appropriate for most situations.
- Sanitation: A portable toilet bucket with waste bags, hand sanitizer, and basic hygiene supplies for extended stays.
- Important documents: Copies of IDs, insurance policies, financial records, and emergency contact information in a sealed waterproof bag.
- Comfort items for children: A stuffed animal, coloring book, or small toy dramatically reduces panic and improves compliance during a stressful shelter-in-place event.
Communication Gear: Staying Informed From Inside Your Safe Room
Isolation is dangerous. Knowing what's happening outside your safe room — whether a tornado warning has been lifted, whether law enforcement has responded, whether civil unrest has spread or subsided — is critical to making good decisions about when to stay and when to move. Your safe room communication setup should have multiple redundant layers.
Your first layer is a dedicated weather alert radio. The Midland WR400 emergency weather alert radio receives NOAA weather broadcasts and issues automated alerts for your specific county — critical during tornadoes and severe storms when cell service may be overloaded or unavailable. It operates on battery backup and should be considered mandatory survival gear for any safe room build. Your second communication layer should be a way to monitor emergency response activity. The Uniden BCD325P2 handheld police scanner allows you to monitor local law enforcement, fire, and EMS frequencies in real time — giving you ground-level intelligence about active threats, response timelines, and developing situations that you simply won't get from mainstream news or social media.
Beyond dedicated radios, ensure you have a fully charged power bank capable of sustaining your cell phone for at least 24 hours. A two-way radio set (GMRS or FRS) enables communication between family members in different parts of the house before they consolidate in the safe room. For those serious about off grid communication redundancy, our guide on HAM Radio for Preppers: How to Build a Reliable Emergency Communication Network covers licensed radio communication options that can reach far beyond your neighborhood.
Safe Room Drills and Family Coordination
A safe room that your family has never practiced using is significantly less effective than one they've drilled on repeatedly. Run a family drill at least twice a year — once during the day and once at night, since most home invasion scenarios happen after dark when response times are slower and orientation is compromised. Assign roles: who grabs the baby, who calls 911, who secures the door. Children as young as four or five can learn a basic safe room drill with practice.
Establish a clear triggering protocol — what specific conditions activate the safe room response? A perceived forced entry, a tornado warning siren, a specific verbal code word? Ambiguity in the moment costs precious seconds. Tie your safe room protocol into your broader family emergency plan, which should address multiple scenario types. For a full framework, see our article on the Family Emergency Plan: How to Prepare Your Household for Any Disaster.
Budget Summary: What a Functional Safe Room Actually Costs
Here's a realistic budget breakdown for a basic but effective safe room setup:
- Door reinforcement kit (Door Armor MAX): $100–$150
- Heavy-duty deadbolt (Schlage B60N): $40–$60
- Door barricade bar: $40–$60
- Weather alert radio (Midland WR400): $60–$80
- Police scanner (Uniden BCD325P2): $150–$200
- 72-hour water supply (pouches or container): $20–$40
- 72-hour food supply (energy bars, MREs): $30–$60
- First aid kit (trauma level): $40–$80
- Flashlights, power bank, misc. supplies: $30–$60
Total estimated range: $510–$790 for a genuinely capable safe room setup. That's not free, but it's a fraction of professionally installed systems that run $3,000 to $10,000 or more — and most of these components serve double duty across your broader emergency preparedness system.
What You'll Need
- Solid core door or door reinforcement kit
- Heavy-duty deadbolt lock
- Door hinge security pins or screws (3+ inches)
- Plywood sheets (3/4 inch thick)
- Battery-powered lights and radio
- First aid kit and emergency supplies
- Cell phone charger and backup power bank
- Basic tools: drill, screwdriver, measuring tape
Step-by-Step Instructions
Step 1: Select the Most Defensible Room
Choose a room on an upper floor if possible, ideally with only one entry point and no ground-level windows. A master bedroom, bathroom, or walk-in closet works well as these rooms typically have fewer access points. Ensure the room has a way to communicate with the outside world, either through a window or by keeping a charged cell phone inside. Avoid rooms with multiple doors or large glass features that could be easily breached.
Step 2: Reinforce the Entry Door
Replace the existing hollow-core door with a solid wood or metal door, or reinforce your current door with a security bar. Install a heavy-duty deadbolt that extends at least one inch into the door frame, using 3-inch screws that anchor into the wall studs. Add a door reinforcement plate around the lock area to prevent kick-ins. This is your primary defense layer and worth investing the majority of your budget.
Step 3: Secure the Door Hinges
Replace standard hinge screws with 3-inch security screws that penetrate deep into the wall studs, making it nearly impossible to remove the door from the hinge side. Install hinge security pins or non-removable hinge bolts for added protection. If hinges are on the outside, consider adding a sliding bolt or barricade bar on the inside as backup. Many home invasions succeed because intruders attack the hinge side rather than the lock side.
Step 4: Cover Windows with Protective Barriers
Cut plywood sheets to fit over interior windows and pre-drill mounting holes so they can be quickly installed during an emergency. Apply security film to window glass as a budget alternative to expensive security glass, which holds shattered glass in place. Keep heavy curtains or blankets in the room to block visibility from outside and provide additional insulation. For permanent solutions, install window security bars with quick-release mechanisms for emergency egress.
Step 5: Stock Emergency Supplies and Communication Tools
Create a dedicated emergency kit containing bottled water, non-perishable food, flashlights, batteries, a first aid kit, and any necessary medications for at least 72 hours. Include a battery-powered or hand-crank radio, a fully charged backup phone with emergency numbers programmed in, and a whistle or air horn to signal for help. Store important documents in a waterproof container, including copies of IDs, insurance papers, and emergency contact information. Regularly check and rotate supplies every six months to ensure everything remains functional.
Step 6: Establish Communication and Alert Systems
Mount a wireless security camera outside the safe room door that connects to your smartphone, allowing you to monitor the situation without opening the door. Install a simple battery-operated motion sensor alarm on the main entry points to your home as an early warning system. Program emergency contacts into speed dial and inform trusted neighbors or family members about your safe room location. Consider a monitored security system if budget allows, or use a smart home hub with mobile alerts as an affordable alternative.
Step 7: Practice and Maintain Your Safe Room Plan
Conduct regular drills with all household members, ensuring everyone knows the quickest route to the safe room and how to operate all locks and security features. Time your response to identify any obstacles or improvements needed, aiming to reach the safe room within 30 seconds of an alert. Create a simple code word or signal that immediately alerts family members to move to the safe room without causing panic. Inspect all hardware, locks, and supplies quarterly, replacing worn components and updating emergency contact information as needed.
Frequently Asked Questions
Can I build a safe room in an apartment or rental property?
Yes, absolutely. Renters and apartment dwellers have more options than most people realize. Focus on non-permanent solutions: a door barricade bar (no installation required), a portable deadbolt security device, and a reinforced door chain. Choose an interior bathroom or closet as your shelter space — ideally one with concrete block walls, which are common in older apartment construction. Communicate your plans with your household members and run drills so everyone knows the protocol. Your safe room in an apartment may not stop a determined long-term threat, but it can absolutely provide meaningful protection during a home invasion, a tornado, or a period of civil unrest while you wait for help to arrive.
What is the most important thing to put in a safe room for a home invasion?
A charged cell phone (or dedicated landline if available) is your single most important asset during a home invasion — calling 911 quickly and staying on the line dramatically improves outcomes. After that, a means of barricading or reinforcing the door against forced entry is your next priority. A door barricade bar can be deployed in seconds and doesn't require any prior installation. Beyond that, a defensive tool appropriate to your training and legal situation, a flashlight, and basic first aid supplies round out the critical list. The ability to see without being seen — whether through a peephole, a security camera, or a door monitor — is also highly valuable for making decisions about when and whether to open the door.
How do I make my safe room work for both tornadoes and home invasions?
The good news is that the requirements overlap significantly. Both scenarios benefit from an interior room with no exterior windows, a solid reinforced door, and a reliable communication device. The primary difference is location: tornado protection requires the lowest floor possible (basement is best), while home invasion protection benefits from a room that's hard to approach silently and has a single entry point. In a single-story home with no basement, an interior bathroom on the ground floor serves both purposes reasonably well. In a two-story home, consider a first-floor interior closet or bathroom for storm protection and a master bedroom with a reinforced door for invasion protection — and make sure your family knows which room to use for which threat type. Your tornado preparedness plan and your home defense plan should be documented separately and drilled independently.
Affiliate Disclosure: SHTF Plan participates in the Amazon Services LLC Associates Program. Some links are affiliate links — we may earn a small commission at no extra cost to you.