Forge and Anvil: How to Master Basic Blacksmithing and Make Your Own Tools When Manufacturing Stops
When hardware stores are empty and replacement parts don't exist, the person who can heat and shape steel becomes indispensable. Here's how to build a forge and learn survival blacksmithing.
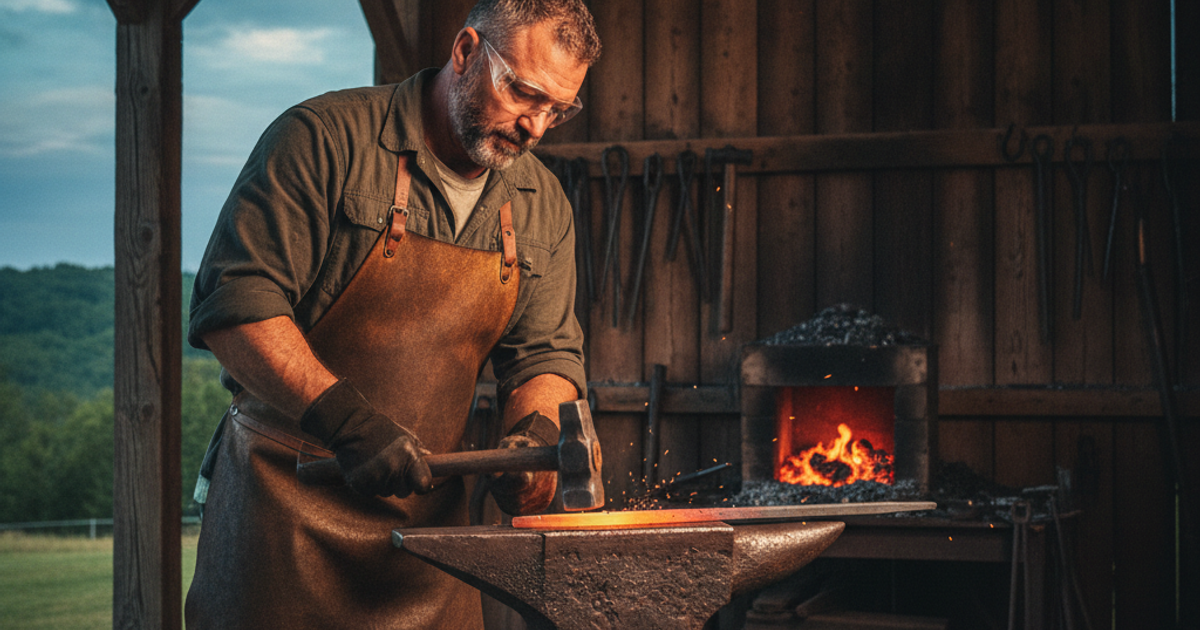
Every tool in your garage was made by someone, somewhere, on a machine fed by a supply chain that stretches across oceans. When that chain breaks — and the 2020–2022 disruptions showed how fast it can, with the New York Fed's Global Supply Chain Pressure Index hitting its highest reading in the index's recorded history — the replacement axe head, the hinge, the chisel, and the knife simply stop arriving. At that point, the person who can heat steel and move it becomes the most valuable member of any community.
Blacksmithing is the original force multiplier. It is the skill that produced every other skill's tools. For a serious prepper, it sits in the same tier as water purification and emergency food storage — not because you'll forge your way to dinner, but because the hoe, the knife, the nail, and the repaired wagon bolt are what keep the rest of the system running. The good news: a working forge costs less than a decent rifle optic, and you can learn the fundamentals in a weekend.
What You'll Need
Tools
- Propane gas forge (double burner)
- Cast steel blacksmith anvil
- Cross peen blacksmith hammer
- 3 lb drilling/sledge hammer
- Locking welding clamp pliers (improvised tongs)
- Heavy bench vise, angle grinder, and mill files
Supplies
- Leather welding gloves
- Propane cylinders or bituminous smithing coal / lump charcoal
- Scrap high-carbon steel (leaf springs, coil springs, files, rebar)
- Quench medium: canola oil, used motor oil, or a 5-gallon bucket of brine
- Safety glasses, cotton or wool clothing, leather apron, hearing protection
How to Build a DIY Forge in a Backyard, Garage, or Apartment Setting
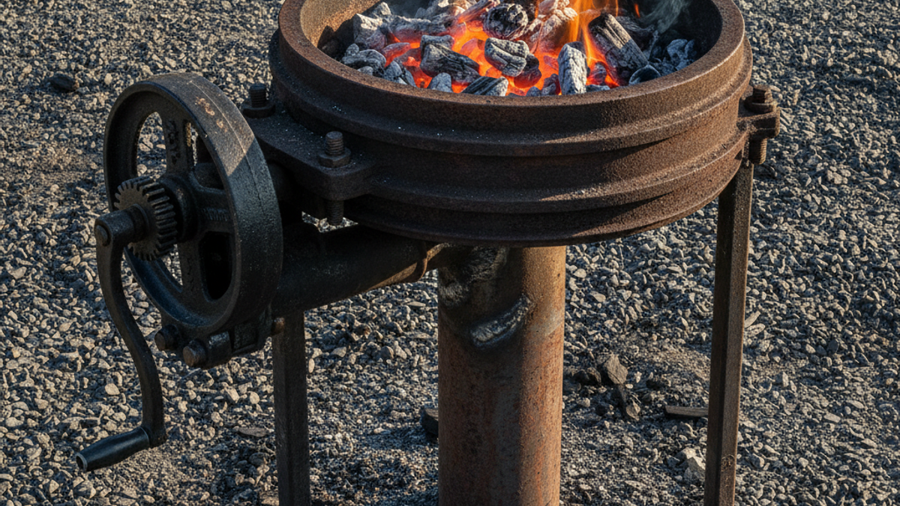
A forge is nothing more than an insulated box that holds fire against steel. You have three realistic paths.
The brake drum coal forge (rural and suburban)
The classic DIY build uses a scrapyard brake drum as the firepot, a length of black pipe as the tuyere (air pipe), and a hair dryer or bathroom fan as the blower. Total cost: often under $60. Bituminous smithing coal burns at roughly 2,500°F with forced air — well above the 2,200°F upper forging range of plain carbon steel. Hardwood lump charcoal works nearly as well and can be made on-site, which matters in a long-term off grid scenario where propane deliveries have stopped.
The propane forge (fast, clean, suburban-friendly)
Propane forges light in thirty seconds, produce no smoke plume that broadcasts your activity to the neighborhood, and hold consistent heat — a real advantage for heat treatment. The NC Tool Company Whisper Momma propane forge is a workhorse used by working farriers and will take blade stock and small tool steel all day. A Hell's Forge double burner gives you a longer chamber for axe and hawk work at a lower price point. Budget roughly one pound of propane per burner per hour; a 20 lb cylinder gives a single-burner smith about ten working hours.
If you live in an apartment
Do not run a forge on a balcony. Carbon monoxide kills roughly 400 Americans a year according to CDC data, and a coal fire in an enclosed space is a reliable way to join that statistic. Instead, urban preppers should build skill by other routes: stock-removal knifemaking with files and an angle grinder, a heavy bench vise bolted to a workbench, and membership at a local makerspace or ABANA-affiliated blacksmith guild — there are over 50 affiliate chapters nationwide, many of which rent forge time for the price of a tank of gas. Keep the grey man principle in mind: hammering steel is loud, bright, and smells like a foundry. In an urban survival situation, that's an advertisement.
How to Choose an Anvil and Hammers Without Overspending
The anvil is a mass of steel that refuses to move when you hit it. The traditional guideline is a 50:1 anvil-to-hammer weight ratio — a 2 lb hammer wants roughly 100 lb of anvil — but real smiths produce excellent work on 55 to 75 lb anvils. A Simond Store cast steel anvil offers a hardened face with good rebound at a reasonable price. If budget is tight, a Happybuy 55 lb cast iron anvil will get you started, though cast iron absorbs more energy than steel. The best free option remains a 12-inch drop of railroad rail or a 4-inch square of forklift tine stood on end and set in a stump — endgrain wood damps ring and vibration better than any commercial stand.
For hammers, start with one: a 2 to 2.5 lb cross peen. The Estwing cross peen blacksmith hammer is nearly indestructible and sized for all-day work. Add a Vaughan 3 lb drilling hammer for heavy drawing and striking work with a partner. For holding hot stock before you forge proper tongs, Irwin locking welding clamp pliers are the standard beginner workaround. Protect your hands with Lincoln Electric leather welding gloves — scale comes off at 1,500°F and does not care about your pain tolerance.
Where to Source Scrap Steel for Forging Tools
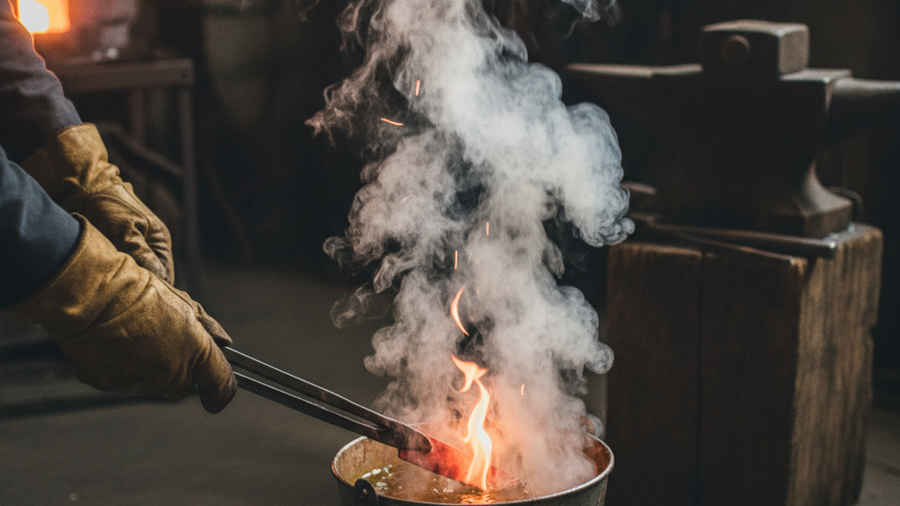
You do not need to buy steel. You need to learn to read it.
- Leaf and coil springs — typically 5160 or 9260 alloy, roughly 0.60% carbon. Ideal for knives, machetes, froes, and hawks.
- Old files and rasps — usually W1/1095 at 0.95–1.2% carbon. Superb edge-holding but brittle; anneal before forging.
- Ball bearings and bearing races — 52100, the premium carbon steel of the knife world.
- Jackhammer bits, axles, and torsion bars — medium carbon, excellent for hammers, punches, and chisels.
- Rebar and structural angle — low carbon; fine for hooks, hinges, nails, and tripods, but it will not hold an edge.
Test unknown stock with the spark test on a grinding wheel: low-carbon steel throws long straight yellow-white streaks, while high-carbon steel throws dense bursting starbursts. Follow up with a quench-and-file test — if a file skates off the hardened steel, you have something worth forging into a blade. Salvage discipline here overlaps directly with urban scavenging and salvage skills, and situational awareness applies: scrapyards and abandoned industrial sites attract other people with the same idea.
Step-by-Step Instructions
Step 1: Set Up a Safe, Ventilated Forging Area
Work outdoors or in a shop with open doors and cross-ventilation. Clear a 10-foot radius of anything flammable, keep a charged fire extinguisher and a bucket of water within arm's reach, and wear cotton, wool, or leather — synthetics melt into skin. Set the anvil face at knuckle height when you stand with your arm hanging naturally.
Step 2: Light the Forge and Bring Steel to Heat
Fire the forge and let it come up to temperature for five to ten minutes. Insert your stock and watch the color: dull red is about 1,200°F (too cold to move efficiently), bright cherry-orange is roughly 1,700–1,900°F, and that's your working range. Yellow-white near 2,300°F risks burning the steel and ruining the piece.
Step 3: Draw Out and Shape the Stock
Working on the far edge of the anvil face, strike with the cross peen to lengthen and thin the metal, then flatten with the hammer face. Keep blows square and rhythmic — a dozen controlled hits beat fifty wild ones. Return the piece to the fire the moment the color drops below dull red; hammering cold steel cracks it and destroys hammers.
Step 4: Normalize the Piece Before Hardening
Heat the finished shape to non-magnetic (around 1,414°F — a magnet stops sticking) and let it air cool to black. Repeat this cycle three times. Normalizing relieves forging stress and refines grain structure, which is the difference between a knife that flexes and one that snaps in your hand six months into a crisis.
Step 5: Harden the Edge in Oil or Brine
Reheat to just past non-magnetic, hold for a slow count of ten, then plunge the piece edge-first and straight down into warmed canola oil (120–130°F) for spring steels, or brine for simple high-carbon water-hardening steels. Move it in an up-and-down motion, never side to side. Test with a file — it should skate off the hardened surface.
Step 6: Temper to Remove Brittleness
A freshly hardened blade is glass. Clean the surface with sandpaper and temper in a kitchen oven at 400–425°F for two hours, repeating the cycle twice with a cooldown between. That yields roughly 58–60 HRC for most spring steels — hard enough to hold an edge, tough enough to chop. Chisels and punches temper hotter, around 475–550°F.
Step 7: Grind, Sharpen, and Fit a Handle
Finish the bevels with files or a belt sander, working slowly and dipping in water so you never let the steel discolor — overheating undoes your temper. Fit a handle of hardwood, antler, or micarta, pin or peen it, and finish with oil. Document the steel type and heat-treat recipe in a notebook for repeatability.
Step 8: Stockpile Consumables and Practice Quarterly
Store coal or propane, files, abrasives, and a supply of known-alloy stock. Blacksmithing is a perishable motor skill; a single session every three months keeps hammer control alive far better than reading about it.
Why Metalworking Belongs in Your Emergency Preparedness Plan
Forged goods are among the highest-value barter items in any collapse scenario — knives, axe wedges, hinges, nails, fire tools, and repairs to broken implements. Tradeable skill beats tradeable goods every time, a principle covered in depth in our guide to bartering skills and goods when SHTF. Pair blacksmithing with a solid gear repair kit and you become the person the neighborhood needs rather than the person it resents.
Recommended Gear: Start with a propane setup — either the NC Tool Whisper Momma or the budget-friendlier Hell's Forge double burner — paired with a Simond Store cast steel anvil or a 55 lb Happybuy anvil if funds are tight. Browse more vetted equipment on our recommended survival gear page, and see our breakdown of survival knife selection to understand what makes a blade worth forging.
Frequently Asked Questions
Can I learn blacksmithing if I live in an apartment with no yard?
Yes, but not with an open fire. Focus on stock-removal knifemaking using files, a vise, and an angle grinder in a ventilated space, and join a local blacksmith guild or makerspace for forge time. Many chapters charge $50–$150 a year and provide forges, anvils, and instruction — the cheapest possible entry into the craft for the urban prepper.
What is the best scrap steel for making a survival knife?
Automotive leaf springs (5160) are the forgiving favorite — tough, widely available, and nearly impossible to ruin with a reasonable heat treat. Old files (1095) hold a finer edge but are brittle and demand precise tempering. Avoid rebar, mystery mild steel, and anything galvanized; zinc coatings release fumes that cause metal fume fever when heated.
How much does it cost to set up a basic survival blacksmithing shop?
A scrapyard-sourced coal forge, a rail anvil, one hammer, and locking pliers can be assembled for under $150. A clean propane setup with a commercial anvil, proper tongs, and safety gear typically lands between $700 and $1,200 — comparable to a mid-range generator and arguably more useful over a multi-year grid-down timeline.
Affiliate Disclosure: SHTFPlan.net participates in the Amazon Services LLC Associates Program. Some links are affiliate links — we may earn a small commission at no extra cost to you.